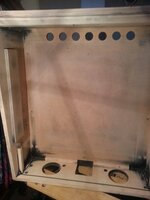
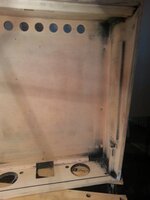
So last night I revisited the areas that i'd filled with wood filler a few nights back. I didn't fill all the dings and scrapes because i'd never used a two-part filler before and I wanted a chance to get familiar with how to work it. I also didn't want to waste loads of the darned stuff so I only mixed up a small batch to fill a couple of the larger holes which were in one side of the back box.
I have to say i'm really impressed with the filler. I was half expecting it to come away from the cavity once I started sanding but it stuck in place and sanded down really well. In fact the only problem is one of my own making - I was a little miserly with the filler and didn't leave it proud enough in a couple of places. Lesson learnt; make sure to fill it proud so that it sands down properly.
I only used 120 and then 240 grit but even with that the surface feels incredibly smooth when you run your hand over it. I quickly learnt not to rely on sight alone as some of the areas where it's been filled don't look smooth thanks to the appearance of the filler; but if you run your hand down the side it's easy to feel any minor imperfections. The section shown in the middle below is a prime example - it looks a bit of a state but when you run your fingers over it the whole thing feels perfectly smooth.
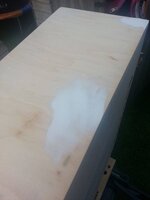
Ooops, I think I need to fill this so it's a little more proud and then sand it back again. A side effect of me people a bit tight with the filler whilst also not wanting to waste heaps of the stuff.
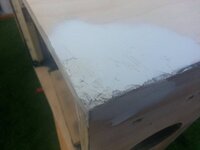
This side filled a bit better but it's got a slight 'chamfer' on the corner so needs building up a little more too so that it sands perfectly flat.
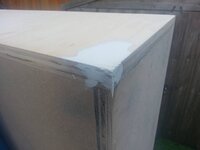
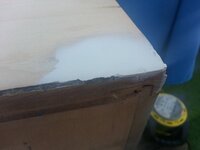
So yeah, i'm relatively happy with that for a first attempt. I'll mix up another batch tonight and concentrate on getting the last of the damage.
Does anyone have any tips on filling when it's on an edge or at the corners? Is it really a case of just building it up before sanding along both sides of the corner to make it perfectly smooth? Or is there anything that can be done during the application to assist (I did contemplate clamping a baton on the edge to give me a straight edge to fill against).
Also, one final question. In the last picture above you can see a chamfer to the left of the filled area. This appears to run the entire length of that side and it's matched on the other side. I therefore presume that this side shouldn't be filled to a square edge but the chamfer should be left in place. Is that correct? I guess I can just run a detail sander down that side at an angle?
More news soon - i'll hopefully get the filling finished Wednesday night and then I can get the 120 and 240 grit sanding finished off before the weekend. The it should be time to get the paint out.


