What's new
Pinball info

Register a free account today to become a member! Once signed in, you'll be able to participate on this site by adding your own topics and posts, as well as connect with other members through your own private inbox!

In Progress Baywatch refurb

@PeteB I’m just getting aquatinted with my airbrush and starting to mix some colours for the cabinet. Your name got dropped regarding decals and I wondered if you knew a good way to match the colours to ‘original’ I mean if you’re printing decals then they must have hex code values etc? Appreciate this is probably your IP and you’ve done the hard yards that I need to do myself but I wondered if you had a technique you used?

I was gonna scour the web, find some decent pictures, grab the hex codes for the closest matches and then try to pick a ‘middle’ value from all the closest images, then match my paint to that - do you think this would work?

Any advice greatly appreciated! [emoji4]

Sent from my iPhone using Tapatalk
 
@PeteB I’m just getting aquatinted with my airbrush and starting to mix some colours for the cabinet. Your name got dropped regarding decals and I wondered if you knew a good way to match the colours to ‘original’ I mean if you’re printing decals then they must have hex code values etc? Appreciate this is probably your IP and you’ve done the hard yards that I need to do myself but I wondered if you had a technique you used?

I was gonna scour the web, find some decent pictures, grab the hex codes for the closest matches and then try to pick a ‘middle’ value from all the closest images, then match my paint to that - do you think this would work?

Any advice greatly appreciated! [emoji4]
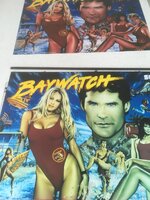

Sent from my iPhone using Tapatalk

Paint codes will be kinda irrelevant because your machine is old and would of faded so the colour code will no longer match. You would be better off doing it by eye that's what I do
 
Paint codes will be kinda irrelevant because your machine is old and would of faded so the colour code will no longer match. You would be better off doing it by eye that's what I do

Thanks Rude, yeah I know I’m gonna have to feel that pain when it comes to the blues (currently no idea how I’m going to get it close; method statements much appreciated!) but the reds have gone completely on the swim suits so I’m flying blind and need a reference point.

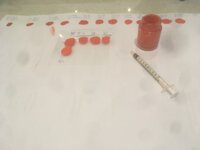
At the moment I’m just mixing known quantities of red and yellow and writing the mixes next to blobs on some paper.


Sent from my iPhone using Tapatalk
 
Is there any of the original red left? U could mix you colour put a blob on so acetate or some clear plastic. Let it dry incase it changes colour when dry and hold it against the original
 
@PeteB I’m just getting aquatinted with my airbrush and starting to mix some colours for the cabinet. Your name got dropped regarding decals and I wondered if you knew a good way to match the colours to ‘original’ I mean if you’re printing decals then they must have hex code values etc? Appreciate this is probably your IP and you’ve done the hard yards that I need to do myself but I wondered if you had a technique you used?

I was gonna scour the web, find some decent pictures, grab the hex codes for the closest matches and then try to pick a ‘middle’ value from all the closest images, then match my paint to that - do you think this would work?

Any advice greatly appreciated! [emoji4]
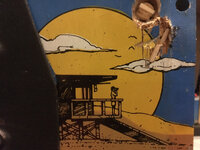
Wish I could give you the magic recipe but unfortunately there isn’t one.

Matching colours on decals is a lot different because we’re dealing with computer screens and ink pigment. It’s very hard, blue is the hardest to match, and the same blue printed on 2 different printers will look different.

With paint you can only mix by eye.

All colours fade or change with age too. I’m working on a Turtles right now and its taken me months to get a match on the green. Removed the side rails only to find a different colour. So had to match it again. Its a massive pain.

The only good advice I can offer is choice of paint for the cabinet. Go with One Shot Sign Writers Enamel. The finish is glossy and when you get the colour right it will blend seemlessley with the original cabinet paint (provided the original paint is buffed clean).
 
Thanks Pete,

My side rails are loose fitted currently as I’ve not refitted the new double sided foam tape because I’d been waiting to do this (and get the new plastic glass inserts from Marcos) but there’s no red underneath. I guess I’m gonna have to eye it up using photos from the web.

I have just got very close to the orange I need, after a LOT of mixing.

uploads.tapatalk_cdn.com_20180210_b834db871c77ef34805c5c990a249821.jpg

I started with 20ml of red and added yellow in 5ml increments. I’m now at 65 ml yellow and reckon ill have cracked it at 70ml yellow.

I’m now hoping I can use one of the reds I’ve already got for the swimsuits.

Next up, blue. Should be fun!


Sent from my iPhone using Tapatalk
 
Been a while but have the colours mixed now.

Also got chads code ready to fit :)

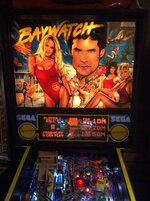
New original translite arrived from the states this week so fitted that and looks so much better. The original (bottom) was faded.

uploads.tapatalk_cdn.com_20180421_32bf03de541a70a991f3eb1068311a8e.jpg

Next up will be airbrushing in the garden. Got myself some trestles to sit it on while I’m spraying it so I can take all the metal off first.


Sent from my iPhone using Tapatalk
 
It’s been what seems like an eternity getting round to, and getting ready to tackle the cabinet but I’ve made some major progress over the last few weeks.

I cut all the frisket for the Blue base coat a few weeks ago but as I wanted to use createx 4030 to toughen the paint and give it a satin quality, I realised I’d not bought the right reducer so that set me back by a couple of weeks waiting for it to arrive and then waiting for another free weekend.

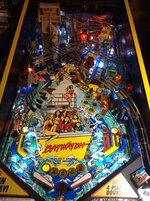
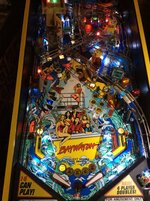
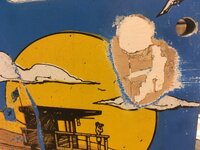
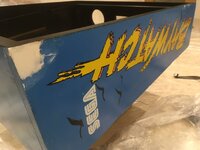
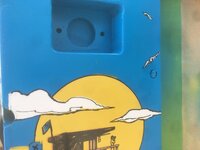
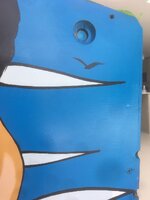
A couple of old ‘before’ shots, dowelling the old lock bar holes with PVA and filling with epoxy...
fca729ee5171e5d74e415a239a57740f.jpg
70c489c25ae617828557b0ea8e824e63.jpg
d5edcad66156ecae6ed823e7d1382e96.jpg
6370c6be7c66f659259efc4959f43421.jpg

After this a yellow high build primer was used and the whole thing taken back again with fine sandpaper and the 00 wire wool to get everything flat.

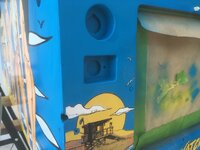
I did quite a bit around the button recesses to get these looking tidy again.

I’ve now completed all the work on the cabinet, bar reinstatement of the red tones that had bleached out. Will update on this hopefully next weekend.

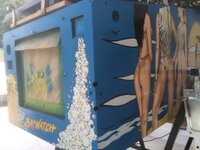
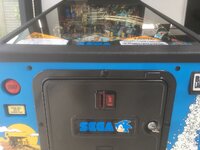
Also fitted new glass guides and then properly fitted the side rails back on with the double sided foam automotive tape by loose fitting them and peeling the tape back while tightening the fixings. All went off without a hitch. The front of the machine now looks really solid and I’m pretty pleased, with the colour matches, masking, and freehand work I’ve done.

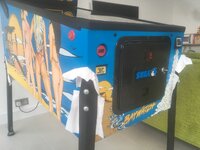
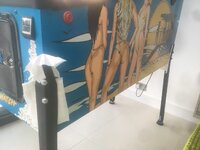
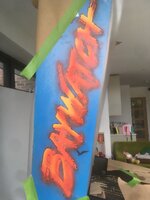
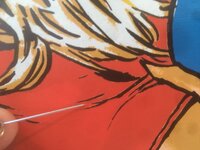
Some pics... (excuse the blotches; I’ve got dust inside my phone camera)

ab83c48c8d674da3494f784d74923363.jpg
aa20a8a4cc8ca1e6a87f40b50a3e72b7.jpg
926c879da87eb0f91202355ef434653d.jpg
d79cb66ee34e3e907ca17d2bbf199d78.jpg
73d17313bfe2c9a7eae1c2c6698a0ee8.jpg
3a0154726a6481071cced0ae1612f210.jpg
95949f331e401460bbd74b94beea353b.jpg
c71730d4c4f2edfeadedcd8148e89a65.jpg
(Sorry about the temporary leg guards, about to order some proper ones!)

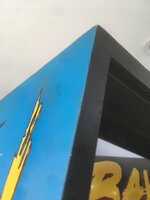
I then used two coats of satin clear and a final gloss coat to get the sheen to blend with the original as createx have a naturally Matt finish. The airbrush enabled me to mask detail areas and blend the new paint into the old so that only small areas were touched up rather than re-doing the whole cabinet. I have tried to retain as much of the original finish as possible.
 
Last edited:
Thanks Chaps,

To do the ends and behind the legs I got a pair of trestles and put lengths of timber between them to support the machine so I could take the legs off.

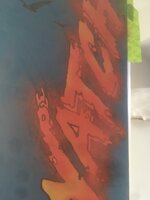
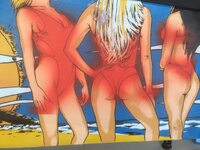
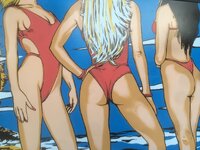
Now the legs are back on and the trestles are out of the way, I need to put the reds back on. I’ve matched the red to an unbleached area behind a coach bolt head so next up will be masking the swimsuits and the red bits on the lettering...


Sent from my iPhone using Tapatalk
 
Got some leg protectors from Pinball Mania which I fitted and then spent the weekend cutting frisket, around female genitalia.

Fitted the larger nozzle to my airbrush and it sprayed a lot better. The smaller one was getting clagged-up after long stints using the 4030 additive.

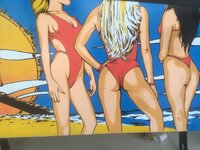
I needed the colour really thin as the original pictures I found had detail showing through the red swimsuits so I needed the red to be semi-opaque.

After doing this and seeing how it came out I’m going to have a go at reinstating the orange gradient on the sunset, and then that’ll be everything done, bar a final clear coat.

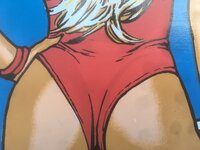
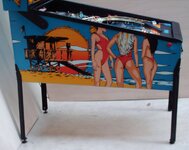
I was in a quandary as to whether to match the shoddy original screen print or whether to make it how it was intended to have looked. Having stared far too closely at the cabinet artwork for far too long, I’m now able to spot a number or errors with the original artwork, both in terms of design, and the implementation. Yes, I could bore even the most staunch Baywatch Pinball enthusiast to tears right now... (see how the red bathing suit bleeds out to the right side of the picture)? That’s intentional, to match what was there before.

cac572d73c868bfefbf42765eb577ee4.png.jpg

Anyway I decided to match like-for-like, across everything - felt like the most authentic approach, even if it’s wrong!

Some pictures...


1eeaf6563ae22fcdf3297cd17b90b84a.jpg
fc2af2794c669a0399b2e902798584c5.jpg
550fbd102c59adb4f9830482340ef090.jpg
0ddcf0a270ee973797ecb7f552cf5435.jpg
9204ddac1ac4c5094a1d16f7eb98c1e5.jpg
6deae494187161e64cf191915eede91b.jpg
ade7e76dd6da8364978e1e953beff4a3.jpg
4f353bc8c75188f54bd8d5468254e253.jpg
d1bcdcca36a86b175666d2f3bcc5b337.jpg
fe20df343d9098b8cc6370e3748de47b.jpg
086f337389e50fa78811d94d628c45e2.jpg
 
Last edited:
Fitted chads new code tonight. Wow what a difference. The whole personality of the game has changed.

New graphics.
New sounds.
All those standard runs of hear x, then see y and then do z - now very different.

Even feels like the flow of the game has changed.

Although the multi ball is now much harder to get and doesn’t happen by chance/fluke any more, it’s not really affected the scoring.

In fact I’d go so far as to say the game is now easier.

This is because the rest of the features and modes are more evenly distributed and their difficulty more equally weighted - so you get them in more equal quantities

Overall I really like it.

Bonus: when you’re playing a video mode on the screen, the GI goes out so you can actually see the screen rather than the GI reflecting in it (worse with LED) so that’s a massive bonus.

This was as good as I managed over a few games, which is only c.300m less than my old high score.

9a5d0daba31243790517f1b59f3e4301.jpg
 
After a straight day of cutting frisket to get the ‘fire’ around the edges of the sunset (massive PITA), and then the rest of the tower, putting the red gradient back on, it’s finally finished.

This is what I was aiming for:

9702039c275fddbbb196a29d401fd03b.jpg
This looked like the least faded example on IPDB.

This is the result

390d60c56f7bc756765f4ae7c21f98b0.jpg

You might notice some errors in the original screen print design where the gradient hasn’t been applied where it should have and other masks have the wrong colour. Having researched this, they are all the same, so I’ve resisted the temptation to ‘improve’ the design and have instead tried to recreate its original, flawed, glory as best I can!

For anyone attempting this, don’t try and mix an orange for the sunset.

Although there has been minor fade to all the colours, having had the side rails off, this has been barely noticeable.

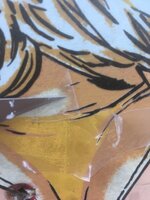
But having removed the coach bolts from the side, I was able to match the paint to the remnants of a red pigment that had been protected by the bolt heads. The red had almost completely disappeared by comparison.

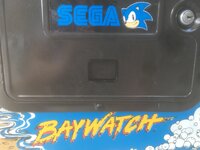
This is actually the same red as the swim suits, and the accent around the Baywatch logo by the coin door and the sides of the back box. The reason it looks orange is because a halftone gradient was used, over the top of the yellow, in the original printing process, a bit like this:

a34178fdf2ebe51aec8964f96a79758a.jpg (but much larger, finer, and a more gentle version of this sort of gradient)

So by holding the airbrush away from the cabinet and thinning the red paint right down to 50/15/25 using createx 4030 / createx 4012 / and the createx paint I’d matched, I was able to gently build up the gradient, from the bottom up.

I could still see the original halftone pattern but the reason it looked yellow is because the red dots had faded to a very pale colour. I did look into whether a halftone would be possible to reproduce but could not see a way to do it. Unless you’re standing 2” from the side of the cabinet (as I’ve been recently!) and have seen a flawless original, you won’t notice this anyway.

So that’s me done on this project.

Unfortunately I now have to sell it after all this hard work, but I’ve thoroughly enjoyed doing it, am proud of what I’ve achieved and am immensely grateful to everyone on this forum for their support, encouragement and expert advice.

I’m definitely going to get another pin at some point in the next year or so, but we are considering moving at the moment, it’s taking up space, and we need the money for a holiday so it’s farewell to Dave and the girls. I think my next machine will have a theme more suited to having two young daughters and a mum who is easily offended!!

It’s going to be listed on eBay with a fixed BIN to get some interest but would rather sell to a forum member. Please PM to view and play, and make an offer. Will of course donate if sold to anyone here.
 
Last edited:
Inspirational job. Well done. If you have to sell it so be it, the game may go but the skills you picked up along the journey will stay with you for ever.
I bet you will never pay so much attention to a bikini line ever again.
 
Inspirational job. Well done. If you have to sell it so be it, the game may go but the skills you picked up along the journey will stay with you for ever.
I bet you will never pay so much attention to a bikini line ever again.

Haha those damn camel toes, I’m not sure the original artist had a sister.

Yeah definitely wanna do another one soon :)


Sent from my iPhone using Tapatalk
 
Back
Top Bottom