Pinball info
You are using an out of date browser. It may not display this or other websites correctly.
You should upgrade or use an alternative browser.
You should upgrade or use an alternative browser.
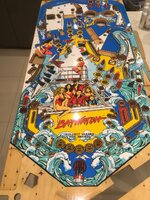
In Progress Baywatch refurb
- Thread starter edsr
- Start date
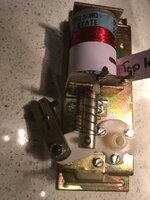
Been mostly reuniting clean switches with their freshly polished metal bits.
Removed the legs, play field sides, side rails, coin door, etc. I’ve hammered the dents out of the coin door and sent the whole lot to the coaters.
The legs, side rails, and lock bar will be the original crackle back (crinkle finish) and the playfield sides etc will be original black satin. The coin door is gonna be sand blasted and I’m going to reinstate the hammered finish on it.
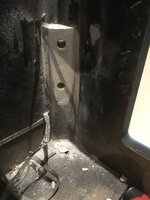
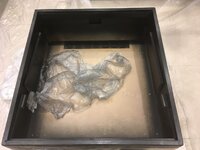
Also about to fill behind the bolt brackets inside the cabinet which have been way over-tightened and pulled right back into the wood. This will then be sanded back and ready for the new satin black interior paint.

Sent from my iPhone using Tapatalk
Removed the legs, play field sides, side rails, coin door, etc. I’ve hammered the dents out of the coin door and sent the whole lot to the coaters.
The legs, side rails, and lock bar will be the original crackle back (crinkle finish) and the playfield sides etc will be original black satin. The coin door is gonna be sand blasted and I’m going to reinstate the hammered finish on it.
Also about to fill behind the bolt brackets inside the cabinet which have been way over-tightened and pulled right back into the wood. This will then be sanded back and ready for the new satin black interior paint.

Sent from my iPhone using Tapatalk
Looking great and amazing dedication.
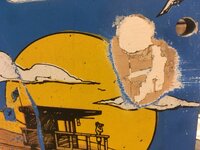
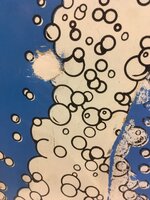
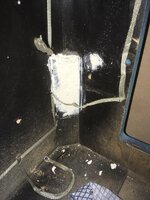
More filler around the security bar holes which had been crow barred at some point. Dowelled with PVA and some dowel I had lying around from a diy job. Then filled as neatly as I could. I’m gonna sand as small an area as possible and then touch up with an air brush in the new year when it’s all back together.
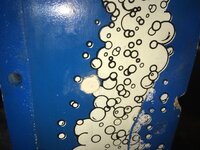
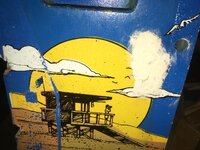
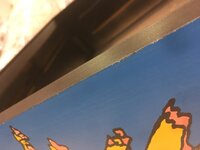
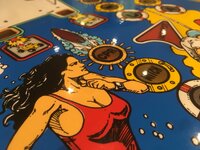
I’ve taken close ups before hand so I can touch the original design back in as neatly as possible.
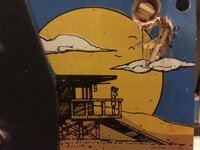
Sent from my iPhone using Tapatalk


I’ve taken close ups before hand so I can touch the original design back in as neatly as possible.

Sent from my iPhone using Tapatalk
Have to agree also here ,you are doing a really good job so far but I think it's going to let you down by not taking off the old decals and fitting new ones 
Looking forward to see it all finished
Looking forward to see it all finished

Cheers for the encouragement guys. I’m right in the pits of it at the moment.
I’m getting an airbrush for Xmas and the plan is to mask and touch in the cabinet, but only where it needs it. It’s really good on one side but the other is faded. Only the reds and oranges fade though so you can spray those back on and keep it as original as possible.
I did think about going for new decals and I think if mine were really bad and faded on both sides there would be nothing left to work with, but others said the cab looked pretty good so I’m currently going down that route.
Interested in your views if you disagree though. I read on flippers.be there are two approaches:
1. Make it like new
2. Only fix what is broken
I guess filling holes is verging into middle ground but i am going to lengths to source 100% original parts wherever possible to maintain the authenticity, so I think decals is a step too far, but always interested in people’s views.
Sent from my iPhone using Tapatalk
Your machine, your choice. Don't forget it.
I doubt very much that whatever you do in the long run will look crap so have fun along the way, experiment and learn.
Give the airbrush a go, if in a few months if you have the time and inclination do decals.
You are doing a great job, go do what you feel is best.
I doubt very much that whatever you do in the long run will look crap so have fun along the way, experiment and learn.
Give the airbrush a go, if in a few months if you have the time and inclination do decals.
You are doing a great job, go do what you feel is best.
Additionally,
In our hearts I know we all want to be able to do this...
https://pinside.com/pinball/forum/topic/another-ebd-screaming-for-attention-g94
...but on a first machine, it is not worth the pain or effort, unless it is going 6' under with you.
In our hearts I know we all want to be able to do this...
https://pinside.com/pinball/forum/topic/another-ebd-screaming-for-attention-g94
...but on a first machine, it is not worth the pain or effort, unless it is going 6' under with you.
Additionally,
In our hearts I know we all want to be able to do this...
https://pinside.com/pinball/forum/topic/another-ebd-screaming-for-attention-g94
...but on a first machine, it is not worth the pain or effort, unless it is going 6' under with you.
“Cut the ropes by hand with frisket and xaxto” wow! [emoji851][emoji851][emoji851]
Sent from my iPhone using Tapatalk
Only the reds and oranges fade though so you can spray those back on and keep it as original as possible.
Although I'm shooting myself in the foot by not pushing for the sale of decals lol, I would always advocate repairing an original cabinet and keeping it original. It's definitely the best way, although typically involves more fiddly work.
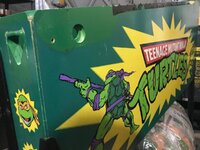
That being said though, it's a myth that only red's and oranges fade. Actually all colours fade, or change in some way due to age. Here's a TMNT I'm working on - red's look fine and it has no obvious fade, but it's the main green colour which is the problem. Didn't even realise this until I started removing cabinet parts:
It amuses me that we invest so much in restoring cabinets and then cram the things a couple of inches apart once we're finished.
Keep up the good work edsr, when's the DMD coming back so you can get playing? Be fun to play it a bit on the original code so you can better appreciate Chads update.
ps I'm an airbrush, still in the box newbie too, so share your experience
Keep up the good work edsr, when's the DMD coming back so you can get playing? Be fun to play it a bit on the original code so you can better appreciate Chads update.
ps I'm an airbrush, still in the box newbie too, so share your experience

Snap my airbrush is still in its box too !
After doing Fish Tales I had said to myself never again but now have Dr Who and Space invaders waiting in the wings to be done
After doing Fish Tales I had said to myself never again but now have Dr Who and Space invaders waiting in the wings to be done
It amuses me that we invest so much in restoring cabinets and then cram the things a couple of inches apart once we're finished.
Keep up the good work edsr, when's the DMD coming back so you can get playing? Be fun to play it a bit on the original code so you can better appreciate Chads update.
ps I'm an airbrush, still in the box newbie too, so share your experience
I’ve only enough room for one and Sod’s law the faded bits face into the room so that’s the incentive. Chasing the dmd and you’re right, I need to get to know the original code (on a properly waxed playfield with everything working) first!
Sent from my iPhone using Tapatalk
That's come out really nice
Great to see someone spending time on a title that doesn't usually get the love that others do.
Well done that man, and great work so far.
Well done that man, and great work so far.
Great to see someone spending time on a title that doesn't usually get the love that others do.
Well done that man, and great work so far.
Agreed !
Now an honorary member of the Baywatch Appreciation and Preservation Society ....BAPS

[emoji23]
Sent from my iPhone using Tapatalk
Sent from my iPhone using Tapatalk
Used a smaller version of this kit to re-black all the bolts while the metal parts are at the coaters.
http://www.gaterosplating.co.uk/gp-cool-black-blacking-kit?search=Black
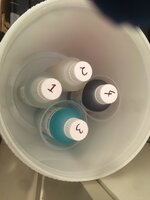
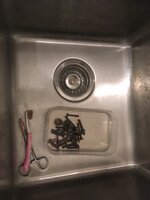
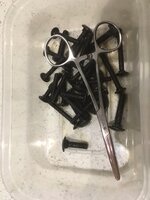
Sent from my iPhone using Tapatalk
http://www.gaterosplating.co.uk/gp-cool-black-blacking-kit?search=Black


Sent from my iPhone using Tapatalk
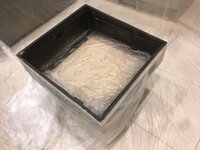
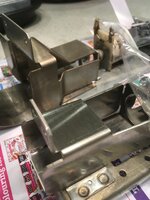
Repairing the usual cracks in the ball return trough.
Used Model X acrylic water-like glue and some business card laminate backers cut using an x-Acto knife and bent using boiling water on the centre piece of the two-bowl kitchen sink.
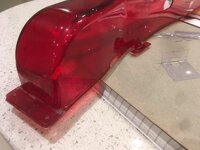
For this piece on the end the whole lip had snapped off the end so I glued the bits back on and then sandwiched both sides to form a laminate.
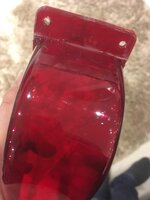
Apart from this end piece it was pretty good but any hairlines, I beefed up on the inside, so should not be visible when back in place.
Sent from my iPhone using Tapatalk
Used Model X acrylic water-like glue and some business card laminate backers cut using an x-Acto knife and bent using boiling water on the centre piece of the two-bowl kitchen sink.

For this piece on the end the whole lip had snapped off the end so I glued the bits back on and then sandwiched both sides to form a laminate.

Apart from this end piece it was pretty good but any hairlines, I beefed up on the inside, so should not be visible when back in place.
Sent from my iPhone using Tapatalk
Last edited:
Spraying the cabinet having sanded and used a yellow high-build primer to get the scratches out. Also used a self-laminating business card to make a protector for the screw heads that had scuffed the sides previously on the back of the shark scoop up kicker.
Had the coin door sand blasted by the powder coaters so sprayed these up using hammerite having put toothpicks in all the screw holes.
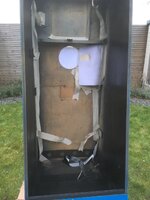
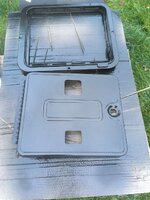
I had previously beaten it straight again and used the flat round back of a spare rivet punch to get the edge detail back to the original shape. Very pleased with how that came out - didn’t think it’d ever look that good.
Had the coin door sand blasted by the powder coaters so sprayed these up using hammerite having put toothpicks in all the screw holes.


I had previously beaten it straight again and used the flat round back of a spare rivet punch to get the edge detail back to the original shape. Very pleased with how that came out - didn’t think it’d ever look that good.
Really enjoying this thread. Great effort man

