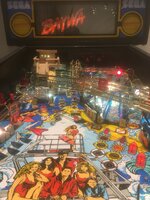
Pinball info
You are using an out of date browser. It may not display this or other websites correctly.
You should upgrade or use an alternative browser.
You should upgrade or use an alternative browser.
In Progress Baywatch refurb
- Thread starter edsr
- Start date
R
RobZombie
Wow! Awesome work.
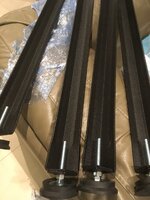
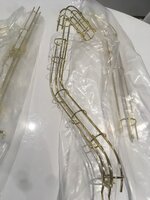
Can’t take credit for the powder coating - MB Finishings in Toddington did the legs, lock bar, side rails and hinges in crackle back, and the rest in satin. Broadway Brass in Birmingham did the re plating on the wire forms.
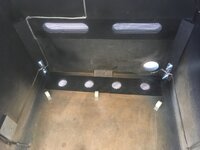
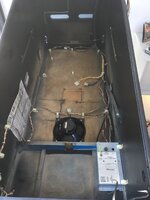
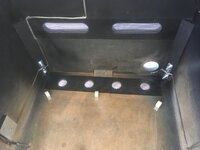
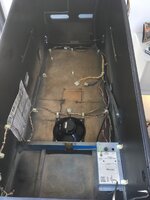
The cab is now finished inside and filled and primed externally ready to airbrush.
Ended up doing bbq paint on the bolts too as when I really rubbed, most of the black oxide came back off, so they are looking 100%

The cab is now finished inside and filled and primed externally ready to airbrush.
Ended up doing bbq paint on the bolts too as when I really rubbed, most of the black oxide came back off, so they are looking 100%
Last edited:
Coming back together now...
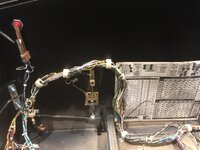
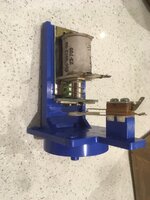
The tilt sensor polished up beautifully and I’ve fitted the missing knocker with a replacement sourced from the US.
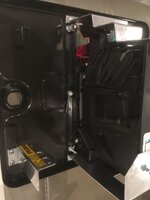
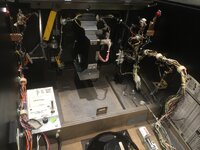
Pleased with the reassembled coin door - pretty much the first thing I took apart so great to see one piece of the machine fully restored. Also re-mounted the original SEGA sticker to the front using a spray adhesive.
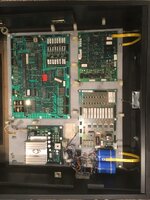
The lock bar was corroded on the top and back face so I polished this up to a shine, cleaned and then clear coated it. The other faces still have the yellow cadmium finish, just a lot cleaner and shinier, having been re-dipped.
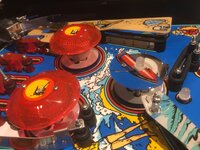
Rebuilt the bumpers completely, with new sleeves, replacement blue brackets sourced from Europe, new fibre yokes, new metal rings, plastics, etc, and cleaned everything else. Then put small pilot holes in the holes I had previously dowelled, and mounted them back on the playfield. Having pulled the cables back thru to the underside, I put warm white LEDs in these as they will be a PITA to replace if a bulb goes and it’ll help reduce load on the GI circuit, so should make everything more reliable without loosing authenticity.
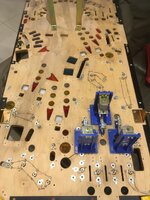
Put warm white LEDs anywhere the bulbs aren’t accessible without stripping the play field.
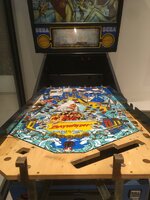
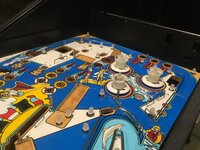
...and then it was xmas eve. No pinball for a few days. Merry Xmas y’all [emoji4]


The tilt sensor polished up beautifully and I’ve fitted the missing knocker with a replacement sourced from the US.


Pleased with the reassembled coin door - pretty much the first thing I took apart so great to see one piece of the machine fully restored. Also re-mounted the original SEGA sticker to the front using a spray adhesive.


The lock bar was corroded on the top and back face so I polished this up to a shine, cleaned and then clear coated it. The other faces still have the yellow cadmium finish, just a lot cleaner and shinier, having been re-dipped.

Rebuilt the bumpers completely, with new sleeves, replacement blue brackets sourced from Europe, new fibre yokes, new metal rings, plastics, etc, and cleaned everything else. Then put small pilot holes in the holes I had previously dowelled, and mounted them back on the playfield. Having pulled the cables back thru to the underside, I put warm white LEDs in these as they will be a PITA to replace if a bulb goes and it’ll help reduce load on the GI circuit, so should make everything more reliable without loosing authenticity.


Put warm white LEDs anywhere the bulbs aren’t accessible without stripping the play field.


...and then it was xmas eve. No pinball for a few days. Merry Xmas y’all [emoji4]
Last edited:
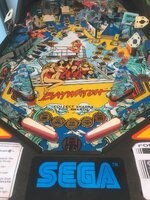
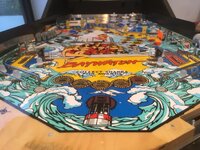
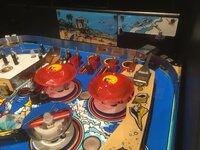
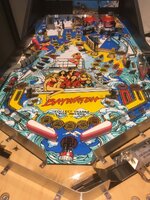
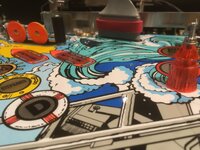
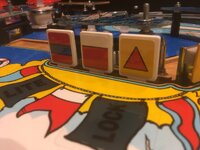
Looking like a playfield again!
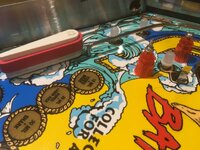
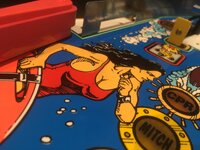
Installed a new set of rubbers as well as all the post rubbers with original colour parts, including new lower flippers (with original sonic logo), new fluorescent orange star posts, two clear jewel posts, which were sourced from U.K., Europe and US, and polished all the plastics.
The one above the drop targets was damaged so I’ve found an original replacement that’s on its way from Australia.
Cleaned and applied new decals to the fixed targets and added new foam pads.
Added new slingshot plastics and put Lexan washers on these as well as a few other places to prevent future damage.


Last edited:
Baywatch is well worth the time and effort that you are clearly spending. That playfield weighs a ton due to all the stuff on it. Cracking Pin!
Yeah I was amazed at how comparatively light it is when the loom, ball trough, 3xVUKs, 4xflippers, 3xshooters, etc, are removed. Weighs an absolute tonne now, and that’s before putting the lock tower and wire forms back on.
I’d hazard a guess that the cabinet, back box and play field combined, weigh less than the rest of the machine.
Sent from my iPhone using Tapatalk
I’d hazard a guess that the cabinet, back box and play field combined, weigh less than the rest of the machine.
Sent from my iPhone using Tapatalk
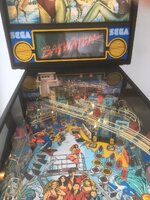
Finally back together!
Re-blued the ramps, polished with a dremel and then waxed.
Rebuilt the lock tower and fitted the new and refurbished parts to the play field.
Then re-tied the loom where any connectors were fed through from the play field.
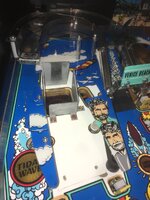
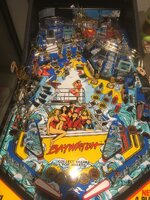
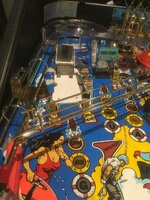
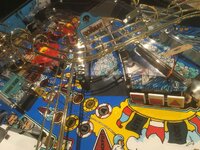
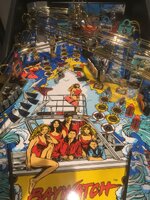
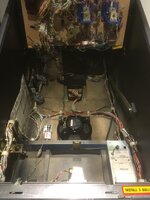
It’s funny how the loom told me how it wanted to be reassembled - the wires have a memory so they want to go back into their original position.
In many places I was just able to slip the connectors out of their ties and then slide them back in afterwards, so to all intents and purposes it should look just like it did when it was first made.
And the best bit - it doesn’t smell anymore.
I ran the vacuum around the inside of the cabinet one last time just to catch any dust from the screws re-tapping their new holes that were dowelled earlier.
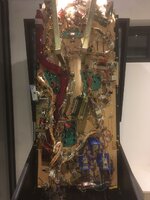
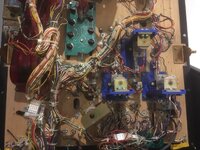
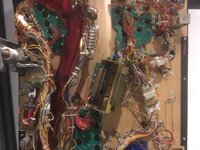
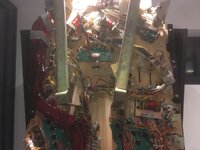
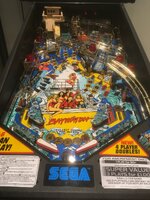
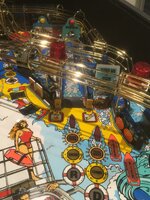
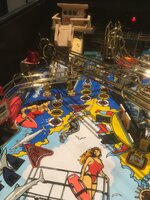
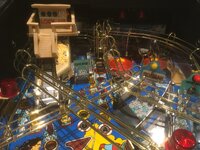
Now just need to get the DMD working and will be ready to do some tests.
Re-blued the ramps, polished with a dremel and then waxed.
Rebuilt the lock tower and fitted the new and refurbished parts to the play field.
Then re-tied the loom where any connectors were fed through from the play field.


It’s funny how the loom told me how it wanted to be reassembled - the wires have a memory so they want to go back into their original position.
In many places I was just able to slip the connectors out of their ties and then slide them back in afterwards, so to all intents and purposes it should look just like it did when it was first made.
And the best bit - it doesn’t smell anymore.
I ran the vacuum around the inside of the cabinet one last time just to catch any dust from the screws re-tapping their new holes that were dowelled earlier.


Now just need to get the DMD working and will be ready to do some tests.
Last edited:
great work, thats awesome
Now just need to get the DMD working and will be ready to do some tests.
Your DMD is bust, pinballsp has just reduced pricing on his Colour DMD to Eur295, surely the planets are aligning here

http://www.pinballinfo.com/communit...ctured-by-pinballsp.33923/page-15#post-237496
I would go for the Dr Pinball DMD extender if you don't mind the non oem look: http://www.drpinball.co.uk/index.htm
Thanks fellas,
I’m holding out for a stock replacement dmd or the closest I can get to it - the price on dr pinball is good but don’t fancy modding the door and having the screen poking up and then hacking the speaker panel around - rather stick OEM where possible just coz I’ve gone to such lengths to keep everything 100% stock. If I was starting over then I’d probably have used red star posts, used ‘blank’ flippers, black pop bumper brackets, gold power coated wireforms, etc etc etc but this one definitely has the ‘stock’ theme.
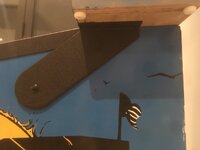
A couple more pics now the coaters dropped the missing part (backbox lock plate) off today:
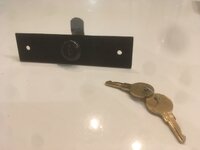
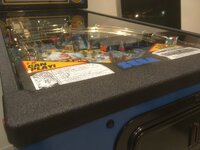
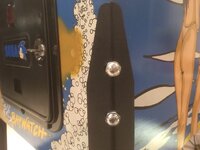
(Obviously the cab hasn’t been airbrushed yet but it’s filled and primed ready to cover over those crow bar marks).
Sent from my iPhone using Tapatalk
I’m holding out for a stock replacement dmd or the closest I can get to it - the price on dr pinball is good but don’t fancy modding the door and having the screen poking up and then hacking the speaker panel around - rather stick OEM where possible just coz I’ve gone to such lengths to keep everything 100% stock. If I was starting over then I’d probably have used red star posts, used ‘blank’ flippers, black pop bumper brackets, gold power coated wireforms, etc etc etc but this one definitely has the ‘stock’ theme.
A couple more pics now the coaters dropped the missing part (backbox lock plate) off today:


(Obviously the cab hasn’t been airbrushed yet but it’s filled and primed ready to cover over those crow bar marks).

Sent from my iPhone using Tapatalk
It's looking stunning  The effort has paid off
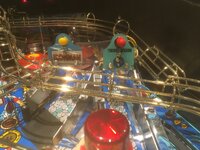
BTW - I notice the Ironman and Tourist Season plastic signs are showing wear , as most do, Bay Area Amusiemts in the US do new ones if you want to throw more money at it
 The effort has paid off
BTW - I notice the Ironman and Tourist Season plastic signs are showing wear , as most do, Bay Area Amusiemts in the US do new ones if you want to throw more money at it
Armour and metal work looks fantastic. Is it the same wrinkle finish as original?
Thanks Pete, I’d say so. Most of the parts didn’t look any different when they came back, it was like the scuffs and rust just disappeared.
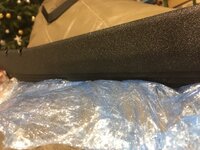
Weird seeing the lock bar re coated as I’d only ever seen it polished almost smooth from sweaty hands. The only way I realised it was supposed to be crinkle finish was looking underneath it at the bits that weren’t rusty.
If you chat to your friendly local coaters (or MB coatings in Toddington) they often have the crinkle finish (AKA Crackleback) on the shelf. It’s commonly used on engine casings for classic cars so it’s not unique to pinball.
Last edited:
It's looking stunningThe effort has paid off
BTW - I notice the Ironman and Tourist Season plastic signs are showing wear , as most do, Bay Area Amusiemts in the US do new ones if you want to throw more money at it
Thanks Sarge!
Yeah I was gonna try touching them up with nail polish from behind. Nail polish would cost about £25 for the colours I’d need. May not match perfectly though, but it is designed to stick to fake nails, which are acrylic! (Yes,
Snigger, I’ve become quite the expert on all things nail varnish!!).
The plastics at BAA are cheap but the postage is soooo expensive and they don’t have all the ones I want (Ironman etc). I can get a replacement plastic set from Europe but they are replicas and having inadvertently bought a replica, they aren’t a patch on the originals - id rather have a go at the ones I’ve got.
Definitely let me know if you see any genuine ones floating around. I’ve also asked Andy at Pinball Mania to let me know when he’s ordering from them.
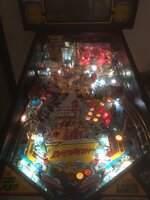
I’ve now got everything working and played a few test games (albeit without a working screen).
It’s like a new machine. Shots that were easy before are much harder, and the ball no longer gets stuck anywhere.
Everything is so much faster. Now I need to learn how to play properly.
I’ve noticed a lot more spin on the ball, probably due to wax on the playfield.
I need to dial some of the settings down as the shooter is so powerful that the ball sometimes bounces off the upper control gate and comes out of the left lane under the tower. And the VUK wireform flexes a lot when it fires. So I need to get a screen sorted ASAP.
The jet bumpers sound wonderfully solid and make a really nice thump when they fire.
And the flippers are noticeably more powerful, especially the left ones.
Not completely sold on the look of the LEDs on the playfield GI, but should hopefully be a lot more reliable long term and it’s not a huge job to swap them back out for bulbs if I’m swapping plastics out later on.
Likewise with the screen I’m tempted to go LED. I’m not really into the whole colour thing, so I’d probably just have it in retro orange mode - more reliable than putting a used OEM ‘time bomb’ in there (for the same money), and should look very close to original. Loving the new DrPinball project but not sure I can wait that long so PinballSP’s product is still in the lead at the moment. Thanks @astyy for the heads up.

Last edited:
R
RobZombie
Looks amazing! Baywatch is not a game that has ever been on my radar but after seeing the effort you've put into this I'd certainly like to own it. Great job, you should be rightfully proud. Giving some pro restorers a run for their money.
Thanks Pete, I’d say so. Most of the parts didn’t look any different when they came back, it was like the scuffs and rust just disappeared.
Weird seeing the lock bar re coated as I’d only ever seen it polished almost smooth from sweaty hands. The only way I realised it was supposed to be crinkle finish was looking underneath it at the bits that weren’t rusty.
If you chat to your friendly local coaters (or MB coatings in Toddington) they often have the crinkle finish (AKA Crackleback) on the shelf. It’s commonly used on engine casings for classic cars so it’s not unique to pinball.
Yeah I’ve had a few DE and Sega pieces powder coated over the years and asked for the wrinkle finish but they never came back looking like the original ones. Tried a few different companies.
Eventually I settled on a spray painting process which uses a combination of a few different paints to get a close match. It’s ok but not as durable.
Yours look perfect. Might have to send some parts down to those guys next time.
Yeah I rang around a few places and Mike’s name kept popping up as a bit of an expert. Just be warned. The postcode on his website is wrong (massive wild goose chase on my lunch break trying to find him) - the one on the yell.com listing is correct. He was also very good value.
So after @Sgt GrizZ bashing my Ironman sign [emoji6] I was in boots today with the family and drew a few glances from other shoppers as I perused the nail varnish aisle comparing colours to my phone.
Nail varnish is designed to stick to acrylic/lexan - what fake nails are made of, so I am told [emoji54]
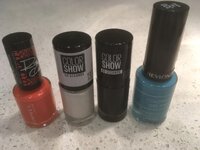 mmmmm. Sexy.
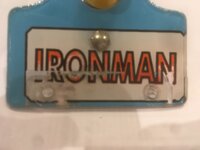
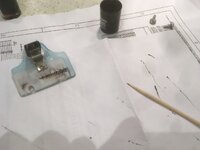
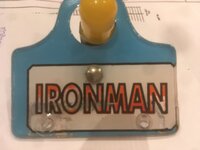
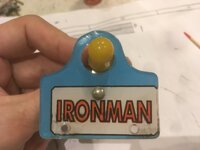
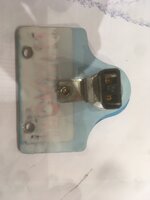
Here’s the original sign, with a lot of missing paint.
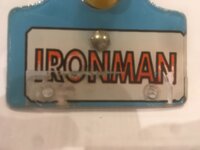
I got the nail varnish and started with the black outlines first, using a bamboo bbq skewer to apply it.
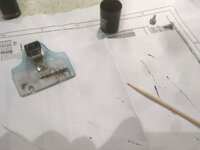
It’s hard to be neat here but after a minute or so you can go round and scratch it off again to tidy up your lines. If you scrape off too much, you can re apply. After about ten minutes it looked like this.
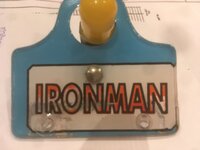
Then it’s almost too easy to fill the colours in... orange took about a minute, as you’ve done the ground work, you don’t need to be so neat with the next layers.
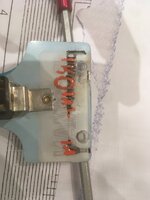
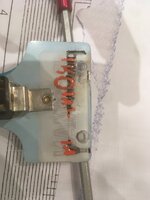
Then, and I should have waited longer, I layered some white all over the back of it. Unfortunately the solvent in the white smudged the black slightly so I lost some of those clean lines. And finally touched in the missing blue at the bottom.
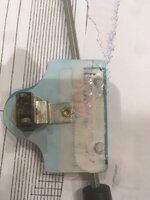
The end result. Pretty pleased with that. Annoyed it smudged, but close up it looks loads better and once on the playfield I don’t think you will ever notice it, especially once two screws are back over it, the lights are in your face, and given the fairly shonky quality of the original graphics!
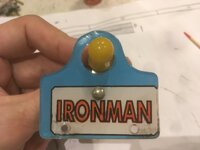
But I couldn’t help myself so went back and fiddled with it as much as I dare,
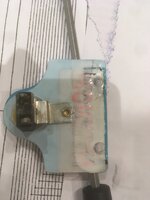
Scraping back the runs and back filling with white:
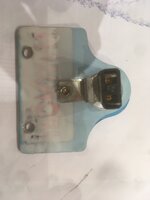
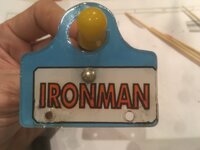
Nail varnish is designed to stick to acrylic/lexan - what fake nails are made of, so I am told [emoji54]
 mmmmm. Sexy.
 Here’s the original sign, with a lot of missing paint.

I got the nail varnish and started with the black outlines first, using a bamboo bbq skewer to apply it.

It’s hard to be neat here but after a minute or so you can go round and scratch it off again to tidy up your lines. If you scrape off too much, you can re apply. After about ten minutes it looked like this.

Then it’s almost too easy to fill the colours in... orange took about a minute, as you’ve done the ground work, you don’t need to be so neat with the next layers.

Then, and I should have waited longer, I layered some white all over the back of it. Unfortunately the solvent in the white smudged the black slightly so I lost some of those clean lines. And finally touched in the missing blue at the bottom.

The end result. Pretty pleased with that. Annoyed it smudged, but close up it looks loads better and once on the playfield I don’t think you will ever notice it, especially once two screws are back over it, the lights are in your face, and given the fairly shonky quality of the original graphics!

But I couldn’t help myself so went back and fiddled with it as much as I dare,
Scraping back the runs and back filling with white:


Last edited:
Dude. You are in waaaaay too deep already!So after @Sgt GrizZ bashing my Ironman sign [emoji6] I was in boots today with the family and drew a few glances from other shoppers as I perused the nail varnish aisle comparing colours to my phone.
Nail varnish is designed to stick to acrylic/lexan - what fake nails are made of, so I am told [emoji54]
mmmmm. Sexy.
Here’s the original sign, with a lot of missing paint.
I got the nail varnish and started with the black outlines first, using a bamboo bbq skewer to apply it.
It’s hard to be neat here but after a minute or so you can go round and scratch it off again to tidy up your lines. If you scrape off too much, you can re apply. After about ten minutes it looked like this.
Then it’s almost too easy to fill the colours in... orange took about a minute, as you’ve done the ground work, you don’t need to be so neat with the next layers.
Then, and I should have waited longer, I layered some white all over the back of it. Unfortunately the solvent in the white smudged the black slightly so I lost some of those clean lines. And finally touched in the missing blue at the bottom.
The end result. Pretty pleased with that. Annoyed it smudged, but close up it looks loads better and once on the playfield I don’t think you will ever notice it, especially once two screws are back over it, the lights are in your face, and given the fairly shonky quality of the original graphics!
But I couldn’t help myself so went back and fiddled with it as much as I dare,
Scraping back the runs and back filling with white:
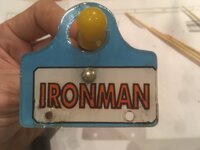
:-D
Sent from my D5833 using Tapatalk
Man overboard! Shoot the tower...
Sent from my iPhone using Tapatalk
Sent from my iPhone using Tapatalk
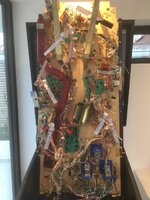
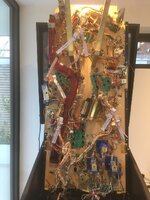
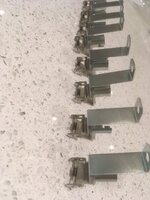
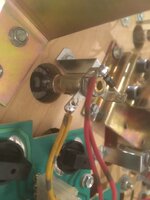
Despite my best efforts cleaning the rusty bulb holders, a few of them just weren’t working and the bulbs weren’t lasting on quite a few others, so I bit the bullet and fitted a full set purchased from @pinballmania using the parts list in the manual.
I fluxed and tinned them all first and fitted diodes, so the process of soldering them onto the loom was dead easy.
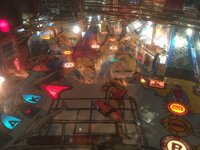
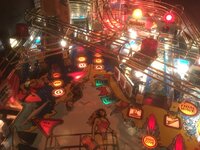
What a difference; it’s like I’ve fitted LEDs in all the inserts (which I haven’t). I’m guessing somehow the old holders were sucking power and now they are all new everything seems so much brighter and you can see what ramps you’re supposed to be hitting. I’d highly recommend doing this.
Slight issue that in the fortnight I’ve been playing it, one of the brand new bumper rings purchased from a European retailer (who will remain nameless) has self destructed. I think it’s just a defective part rather than low quality as they felt really sturdy, just one was a bit loose, and in hindsight I shouldn’t have fitted it, but no damage done.
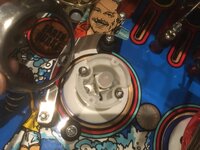
I have a spare which is a bit corroded I can use until a new one arrives. I’ve also had a delivery from Bay Area amusements of some new plastics for a couple that were cracked so once they are in, my work on the interior will be finished, including a touch up of the black outline around the shark hole.
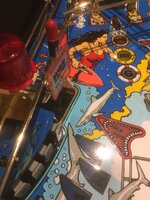
But... big news... the dude with my DMD reckons he’s fixed it! It’s coming back tomorrow so fingers crossed I’ll have a fully working pin by the end of the week having waited two months!
I fluxed and tinned them all first and fitted diodes, so the process of soldering them onto the loom was dead easy.


What a difference; it’s like I’ve fitted LEDs in all the inserts (which I haven’t). I’m guessing somehow the old holders were sucking power and now they are all new everything seems so much brighter and you can see what ramps you’re supposed to be hitting. I’d highly recommend doing this.


Slight issue that in the fortnight I’ve been playing it, one of the brand new bumper rings purchased from a European retailer (who will remain nameless) has self destructed. I think it’s just a defective part rather than low quality as they felt really sturdy, just one was a bit loose, and in hindsight I shouldn’t have fitted it, but no damage done.

I have a spare which is a bit corroded I can use until a new one arrives. I’ve also had a delivery from Bay Area amusements of some new plastics for a couple that were cracked so once they are in, my work on the interior will be finished, including a touch up of the black outline around the shark hole.

But... big news... the dude with my DMD reckons he’s fixed it! It’s coming back tomorrow so fingers crossed I’ll have a fully working pin by the end of the week having waited two months!
Last edited:

