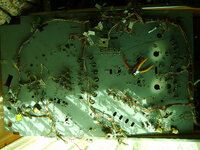
Jesus, that looks like it was thrown in a swamp!
Pinball info
You are using an out of date browser. It may not display this or other websites correctly.
You should upgrade or use an alternative browser.
You should upgrade or use an alternative browser.
In Progress Adventures in Budget Restoration: 1978 Bally PARAGON
- Thread starter Nedreud
- Start date
S
socalshutterbug
Just wanted to tell you that I REALLY enjoyed this whole thread, so much so that I joined to leave the comment here. 
As an owner of (count 'em) two Paragons and a (third) playfield, you have really captured my attention! Love the pictures and your dialog. Keep it up!
Regards from the USA
Jim W.
As an owner of (count 'em) two Paragons and a (third) playfield, you have really captured my attention! Love the pictures and your dialog. Keep it up!
Regards from the USA
Jim W.
Hi Jim! Welcome to PinballInfo! We're mostly UK-based here but all are welcome if you want to chat about pinball. Actually we chat about a load of other rubbish tooJust wanted to tell you that I REALLY enjoyed this whole thread, so much so that I joined to leave the comment here.
As an owner of (count 'em) two Paragons and a (third) playfield, you have really captured my attention! Love the pictures and your dialog. Keep it up!
Regards from the USA
Jim W.
Thanks for your positive comments and glad you're enjoying my humble little shop log. I also started the "Bally Paragon Fan Club" thread on here so feel free to post up a few pics of your Paragons. I just read your bio, what a great tale about your Paragons! Why not introduce yourself on the New Members thread?
Today I stripped down the bank of three drop targets right down to each last E-clip, washer and screw then started to buff everything on the polishing wheel.
Last edited:
I take it you've seen the plastics on ebay?
I've seen them. They're from the guy I bought my paragon off. Glad to see he threw them in with the sale 
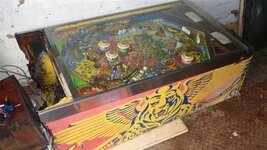
They're probably from the rotten machine I posted a picture of:I've seen them. They're from the guy I bought my paragon off. Glad to see he threw them in with the sale
Condition not too bad I guess, shame about the upper-left apron being broken. But the set isn't complete as the small piece that sits in front of the central pop bumper is missing (bottom left, CPR gives you two as they're often broken and or missing):
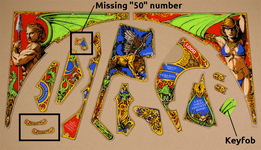
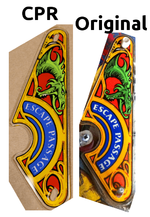
That's CPRs set of reproduction Paragon plastics - $139 + $59 shipping to Europe = £116! The colour looks great, as does the quality, but I don't think they made a good choice with the font. It's too light and not the best match shape-wise. Here's their left slingshot plastic compared with my original:
There's also an error (at least in the store photos) in that one of the small pieces is missing the number "50". This plastic sits at the top of the waterfall:
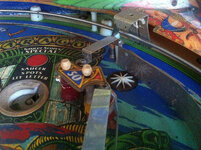 Paragon: star rollover by staticboy, on Flickr
For the price CPR are charging (and the all the hot air they spout about how long it takes to recreate vector drawings of each colour layer) I'd expect much better attention to detail for £116 worth of plastic
The thing is not all production machines ended up with matching plastics and CPR only use what resources are available at the time of the reproduction. So what looks like a lack of attention to detail may actually be what was on someone elses machine and drawn to accuracy of their plastics. Or the person doing the drawings did indeed miss out details, but as far as I'm aware most of the reproduction artists do this voluntary...
Good point, @Moonraker. So I checked at least 3 dozen images on a Google Image search where you could clearly see this piece and all of them "50" on. Maybe they realised their error and it's fixed in the production run.
And I think you're right about the folks at CPR doing it voluntarily, which is part of the reason for the very long time scales. I think the folks doing it just enjoy it and end up with a playfield/backglass/plastics as "payment" because usually the machine in question is in their collection
But from a buyers perspective I would personally expect better attention to detail at that price. After all, they're not in the business of knocking-off a million copies of rock-bottom junk. Their stuff is supposed to be mint/better-than-new for collectors who want to restore their machines to a concours standard.
You are after some plastics then? Have you scanned yours?
No, I'm not after plastics. Mine are in great condition, I was very lucky with that. No cracks and only a few very minor scratches that have buffed out with Novus. The large upper-apron plastics are a bit warped but I'm going to try heating them up in the oven then squishing them between a pair of playfield glasses!You are after some plastics then? Have you scanned yours?
June 2014
PLAYFIELD STRIPDOWN: THE UNDERSIDE
I've flipped the playfield over now so I can start clearing the underside. As you can see I'm getting pretty crazy with the tag labels but with my memory there'd be bugger all chance of it being put back together otherwise:
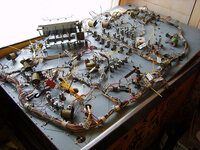
Paragon: Playfield Underside Stripdown by staticboy, on Flickr
Thought I'd start by getting the drop-target banks out of the way. So, here is the triple bank AS-2795-121 DROP TARGET ASSEMBLY:
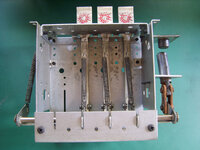
Paragon: Drop-Target Stripdown by staticboy, on Flickr
Very dirty inside and also slightly sticky along the shaft (phnah, phnar) so I suspect it was oiled at some point. I'm pretty sure Bally didn't recommend any kind of lubrication in pins of this era, so everything should run "dry". The shaft sits in split nylon bearings so any lubrication is pretty pointless.
The targets are a bit battered, and I have some new reproduction ones from Classic Arcades Inc, but I might see how they scrub up:
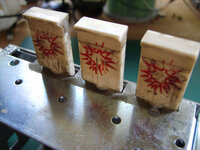
Paragon: Drop-Target Stripdown by staticboy, on Flickr
Plunger and coil stop are in great condition; I guess they don't take too much hammering:
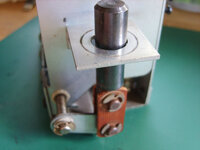
Paragon: Drop-Target Stripdown by staticboy, on Flickr
All stripped down to the very last e-clip and washer, here's the chassis laid out in order. LATCH PLATE (top), END PLATE, SIDE PLATE, END PLATE (middle left to right) and BOTTOM PLATE FRAME (bottom):
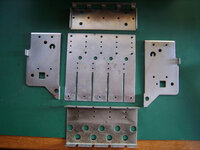
Paragon: Drop-Target Stripdown by staticboy, on Flickr
I've started attacking all the parts with the buffing wheel and they look fantastic when polished! Will post more pics when it's finished but in the meantime there are dozens of reference photos on flickr.
PLAYFIELD STRIPDOWN: THE UNDERSIDE
I've flipped the playfield over now so I can start clearing the underside. As you can see I'm getting pretty crazy with the tag labels but with my memory there'd be bugger all chance of it being put back together otherwise:

Paragon: Playfield Underside Stripdown by staticboy, on Flickr
Thought I'd start by getting the drop-target banks out of the way. So, here is the triple bank AS-2795-121 DROP TARGET ASSEMBLY:

Paragon: Drop-Target Stripdown by staticboy, on Flickr
Very dirty inside and also slightly sticky along the shaft (phnah, phnar) so I suspect it was oiled at some point. I'm pretty sure Bally didn't recommend any kind of lubrication in pins of this era, so everything should run "dry". The shaft sits in split nylon bearings so any lubrication is pretty pointless.
The targets are a bit battered, and I have some new reproduction ones from Classic Arcades Inc, but I might see how they scrub up:

Paragon: Drop-Target Stripdown by staticboy, on Flickr
Plunger and coil stop are in great condition; I guess they don't take too much hammering:

Paragon: Drop-Target Stripdown by staticboy, on Flickr
All stripped down to the very last e-clip and washer, here's the chassis laid out in order. LATCH PLATE (top), END PLATE, SIDE PLATE, END PLATE (middle left to right) and BOTTOM PLATE FRAME (bottom):

Paragon: Drop-Target Stripdown by staticboy, on Flickr
I've started attacking all the parts with the buffing wheel and they look fantastic when polished! Will post more pics when it's finished but in the meantime there are dozens of reference photos on flickr.
I never realised that Paragon's 3-bank used the metalwork for a 4-target unit, but with only three targets fitted. It's not a case of it being changed by an op either, since the screw holes on the playfield are original.
No, I'm not after plastics. Mine are in great condition, I was very lucky with that. No cracks and only a few very minor scratches that have buffed out with Novus. The large upper-apron plastics are a bit warped but I'm going to try heating them up in the oven then squishing them between a pair of playfield glasses!
Ok cool. I had a sudden urge to make virtual pin of Paragon and thought had no decent set, but found what I had already is pretty good. If you needed a couple of pieces I would've had a shot a redrawing a couple.
I hadn't given it any thought until you said because the only other pin I've got is Vector, which I haven't studied closely yet, so I've no points of reference for comparison. I just assumed the chassis was a standard part but I decided to look again at the parts manual. The image in the 1979 manual doesn't look quite right for Paragon (too many fiddly bits on the reset bar) so I had a look in the 1980 issue (Paragon was June 1979 so only just made it in to the end of '79 issue). This looks exactly right, no more spacer blocks between the RESET BAR and plunger LINK:I never realised that Paragon's 3-bank used the metalwork for a 4-target unit, but with only three targets fitted. It's not a case of it being changed by an op either, since the screw holes on the playfield are original.
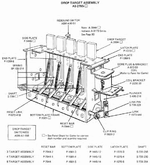
From this I realised I've got the part number wrong in my previous post. Unfortunately the "Panel Chart" mentioned in the above diagram is on the back cover of the manual which I can't find a copy of, but with a bit of Google-based search and deduce I came to the following conclusions:
- AS-2795-3: 3-target assembly
- AS-2795-4: 4-target assembly
- AS-2795-5: 5-target assembly
Amazing work so far. 
I've already stripped my R&B once and done a fair bit of work on it. But it's already filthy again so I really want to do it again but this time go for a full strip down so I can also touch in the small areas of damage on the playfield. Your posting here is really helping to inspire me to do it; just as soon as i've got all the spare parts I need then i'll be on it.
Please keep the updates coming; it's looking stunning already.
HOW TO POLISH PINBALL PARTS
Several people have asked how I get my parts nice and shiny. I'm no pro at this and I'm not saying this is the best or only method, it's just what works for me with the minimum amount of effort, fuss and cost vs. the results.
!!! SAFETY !!!
If you try this at home please make sure you're wearing some heavy duty gloves and decent eye protection. Also, make sure the side of the buffing wheel that you use is rotating AWAY from you so that if the part gets whipped out of your hands (and small parts do easily) it flies away from you across the other side of the room and not towards your goolies.
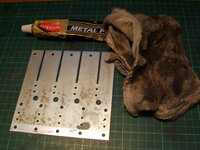
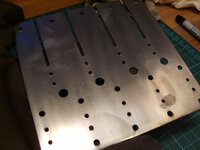
Here I'm going to work on the SIDE PLATE from the AS-2795-4 DROP TARGET ASSEMBLY starting with Autosol and cotton rag:
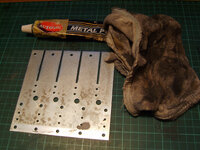
Start with a quick clean up using Autosol:
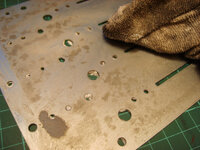
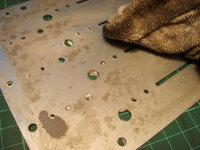
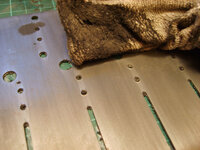
Then start to work a little harder with the Autosol. It's great for breaking down stubborn oxidation. Look at the black **** on that rag:
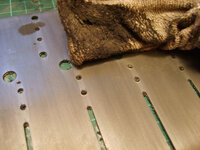
Looking shinier already - right side has had more work than the left half:
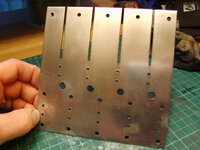
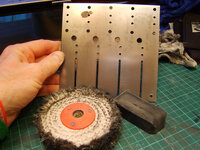
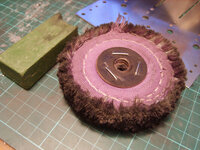
That's enough Autosol for now. Next up is the initial "cut" using the rough sisal wheel and black compound:
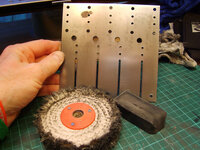
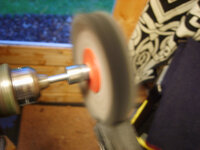
I use a 4-inch Steel Polishing Kit from http://metalpolishingsupplies.co.uk which is running in a standard home DIY hammer drill (Black & Decker twin speed at 2,800rpm) mounted in a bench vice. Lightly hold the compound on the buffing wheel for a few seconds. The heat generated will melt the compound onto the wheel:
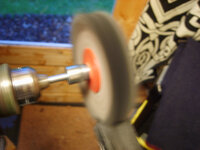
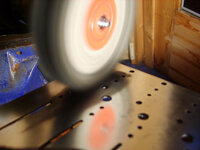
Gently work the wheel back and forth over the work with a firm pressure. Too hard and it'll get too hot and the compound will start to burn; too light and you'll just be there all day! Every so often put a little more compound on the wheel. You'll get to know when. When the compound is freshly applied the wheel goes dark black. As you polish it gets lighter turning back to the colour of light brown rope:
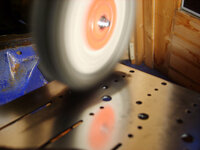
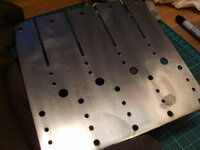
Initial heavy cut done. Getting shinier:
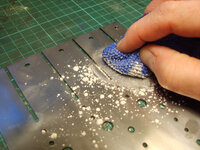
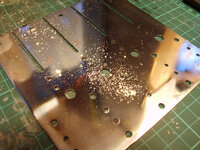
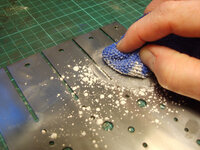
Before moving on to the next stage of buffing use Vienna lime to clean off any residue from the black compound. It even comes in a little baggy so totally looks like you spilt cocaine everywhere!
That's not too bad:
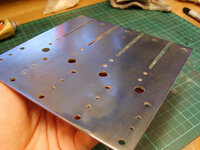
Next up is the "Colour-Stitch" cotton mop and green compound for final polishing of steel:
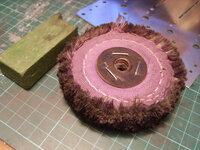
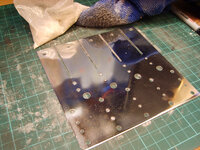
After working in a similar fashion as the sisal wheel but for longer and with a little less pressure you should be able to achieve something approaching a mirror finish. Exactly how smooth depends on what you want to achieve against how long it takes. Longer spent doing the initial cut will give better results; it just takes longer. He's the result (sprinkled with a little Vienna lime):
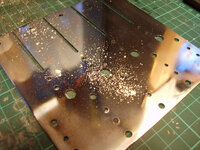
Again, clean off any green compound residue with Vienna lime:
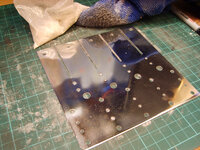
Finally, give it another thorough going over with Autosol and clean soft cloth to really get the shine up. Autosol also leaves a protective coating that inhibits oxidation to keep it shiny for longer.
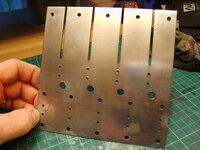
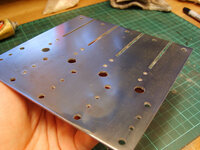
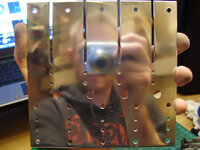
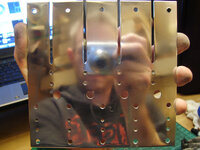
And there we go! Good enough that I can see myself in the reflection. Not bad for a part that probably won't be seen again for another 35 years...!
I also took a little film. Sorry, it's an odd colour due to using a 500W floodlight at night, but you can see me putting some green compound on the mop and gently working over the piece:
Several people have asked how I get my parts nice and shiny. I'm no pro at this and I'm not saying this is the best or only method, it's just what works for me with the minimum amount of effort, fuss and cost vs. the results.
!!! SAFETY !!!
If you try this at home please make sure you're wearing some heavy duty gloves and decent eye protection. Also, make sure the side of the buffing wheel that you use is rotating AWAY from you so that if the part gets whipped out of your hands (and small parts do easily) it flies away from you across the other side of the room and not towards your goolies.
Here I'm going to work on the SIDE PLATE from the AS-2795-4 DROP TARGET ASSEMBLY starting with Autosol and cotton rag:

Start with a quick clean up using Autosol:

Then start to work a little harder with the Autosol. It's great for breaking down stubborn oxidation. Look at the black **** on that rag:

Looking shinier already - right side has had more work than the left half:

That's enough Autosol for now. Next up is the initial "cut" using the rough sisal wheel and black compound:

I use a 4-inch Steel Polishing Kit from http://metalpolishingsupplies.co.uk which is running in a standard home DIY hammer drill (Black & Decker twin speed at 2,800rpm) mounted in a bench vice. Lightly hold the compound on the buffing wheel for a few seconds. The heat generated will melt the compound onto the wheel:

Gently work the wheel back and forth over the work with a firm pressure. Too hard and it'll get too hot and the compound will start to burn; too light and you'll just be there all day! Every so often put a little more compound on the wheel. You'll get to know when. When the compound is freshly applied the wheel goes dark black. As you polish it gets lighter turning back to the colour of light brown rope:

Initial heavy cut done. Getting shinier:

Before moving on to the next stage of buffing use Vienna lime to clean off any residue from the black compound. It even comes in a little baggy so totally looks like you spilt cocaine everywhere!

That's not too bad:

Next up is the "Colour-Stitch" cotton mop and green compound for final polishing of steel:

After working in a similar fashion as the sisal wheel but for longer and with a little less pressure you should be able to achieve something approaching a mirror finish. Exactly how smooth depends on what you want to achieve against how long it takes. Longer spent doing the initial cut will give better results; it just takes longer. He's the result (sprinkled with a little Vienna lime):

Again, clean off any green compound residue with Vienna lime:

Finally, give it another thorough going over with Autosol and clean soft cloth to really get the shine up. Autosol also leaves a protective coating that inhibits oxidation to keep it shiny for longer.
And there we go! Good enough that I can see myself in the reflection. Not bad for a part that probably won't be seen again for another 35 years...!

I also took a little film. Sorry, it's an odd colour due to using a 500W floodlight at night, but you can see me putting some green compound on the mop and gently working over the piece:
C
Cheers kev
Class work man must get some of that auto sol as my wh20 is gonna need it compared to the ft restore!!!!HOW TO POLISH PINBALL PARTS
Several people have asked how I get my parts nice and shiny. I'm no pro at this and I'm not saying this is the best or only method, it's just what works for me with the minimum amount of effort, fuss and cost vs. the results.
!!! SAFETY !!!
If you try this at home please make sure you're wearing some heavy duty gloves and decent eye protection. Also, make sure the side of the buffing wheel that you use is rotating AWAY from you so that if the part gets whipped out of your hands (and small parts do easily) it flies away from you across the other side of the room and not towards your goolies.
Here I'm going to work on the SIDE PLATE from the AS-2795-4 DROP TARGET ASSEMBLY starting with Autosol and cotton rag:
Start with a quick clean up using Autosol:
Then start to work a little harder with the Autosol. It's great for breaking down stubborn oxidation. Look at the black **** on that rag:
Looking shinier already - right side has had more work than the left half:
That's enough Autosol for now. Next up is the initial "cut" using the rough sisal wheel and black compound:
I use a 4-inch Steel Polishing Kit from http://metalpolishingsupplies.co.uk which is running in a standard home DIY hammer drill (Black & Decker twin speed at 2,800rpm) mounted in a bench vice. Lightly hold the compound on the buffing wheel for a few seconds. The heat generated will melt the compound onto the wheel:
Gently work the wheel back and forth over the work with a firm pressure. Too hard and it'll get too hot and the compound will start to burn; too light and you'll just be there all day! Every so often put a little more compound on the wheel. You'll get to know when. When the compound is freshly applied the wheel goes dark black. As you polish it gets lighter turning back to the colour of light brown rope:
Initial heavy cut done. Getting shinier:
Before moving on to the next stage of buffing use Vienna lime to clean off any residue from the black compound. It even comes in a little baggy so totally looks like you spilt cocaine everywhere!
That's not too bad:
Next up is the "Colour-Stitch" cotton mop and green compound for final polishing of steel:
After working in a similar fashion as the sisal wheel but for longer and with a little less pressure you should be able to achieve something approaching a mirror finish. Exactly how smooth depends on what you want to achieve against how long it takes. Longer spent doing the initial cut will give better results; it just takes longer. He's the result (sprinkled with a little Vienna lime):
Again, clean off any green compound residue with Vienna lime:
Finally, give it another thorough going over with Autosol and clean soft cloth to really get the shine up. Autosol also leaves a protective coating that inhibits oxidation to keep it shiny for longer.
And there we go! Good enough that I can see myself in the reflection. Not bad for a part that probably won't be seen again for another 35 years...!
I also took a little film. Sorry, it's an odd colour due to using a 500W floodlight at night, but you can see me putting some green compound on the mop and gently working over the piece:
Cheers kev
Reasonable price for anyone in the market for AutoSol: http://www.ebay.co.uk/itm/Autosol-S...ssories_Car_Care_Cleaning&hash=item3a902eeee7
Or buy in a larger container. Even with the postage charge it works out pretty reasonable:
http://www.ebay.co.uk/itm/Autosol-7...ssories_Car_Care_Cleaning&hash=item233ba0e88c
I need to grab some more. It's fantastic stuff and i've been eyeing up a polishing wheel myself so I can make my Pin shine like Nedreuds.
Thanks for the links @Wiredworm! 6 tubes for £22 works out at £3.67 each whereas they're £5.99 in Halfords! The tin works out considerably cheaper: about £33 vs. £48 per litre. A little goes a long way though - a tube does seem to last a long time!
It sure does. I think I only just about managed to finish off a tube when doing a full strip down on my R&B and that included polishing up all the guides too. I was pretty sure Halfords prices were over what they should be but then I suppose you pay for the convenience of just being able to drop in and grab it when needed. 
Autosol ordered!!!!
This still doesn't explain why Paragon uses an AS-2795-4 assembly with only 3 targets fitted when it could have saved a bit of space and metal by using an AS-2795-3. Maybe the original design was for 4 targets but in reality that didn't work out but somehow the part number carried over on the final parts list? Maybe they were out of stock of the 3-target parts? I looked at as many images as I could find on Google Images and where I could clearly discern this assembly they were all 4-target.
A point about drop target banks that baffled me was why Stern's 'Nugent' (1979) had five seperate switches on one of its two 3-target banks - there was even a service bulletin showing the wiring arrangement on that bank. I finally realised that it was because Nugent used the same software as an earlier game, 'Lectronamo', by the same designer. That game had a 5-target bank, so on Nugent the switches had to be doubled up on the top and bottom targets of a 3-bank. It must've been tricky to check for switch operation in the self-test.
A point about drop target banks that baffled me was why Stern's 'Nugent' (1979) had five seperate switches on one of its two 3-target banks - there was even a service bulletin showing the wiring arrangement on that bank. I finally realised that it was because Nugent used the same software as an earlier game, 'Lectronamo', by the same designer. That game had a 5-target bank, so on Nugent the switches had to be doubled up on the top and bottom targets of a 3-bank. It must've been tricky to check for switch operation in the self-test.
Why does pinball bring about so many fantastic solutions to quite simple problems?
Oh, and I also stripped down the famous in-line drop-targets. This was a brand new feature seen for the first time on Paragon. There was even a PATENT PENDING sticker on side. Interesting to see the minor modifications they made to the standard side-by-side drop-target components. It still uses the same end plates, coil mech, etc., even the same reset levers. They just added a small bracket for the tensioning spring and a right-angled pin arrangement on the bottom of each drop-target.
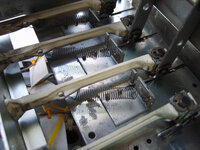 Paragon: Inline Drop-Target Stripdown by staticboy, on Flickr
 Paragon: Inline Drop-Target Stripdown by staticboy, on Flickr
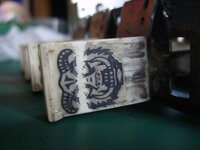 Paragon: Inline Drop-Target Stripdown by staticboy, on Flickr
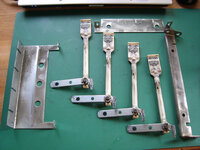 Paragon: Inline Drop-Target Stripdown by staticboy, on Flickr
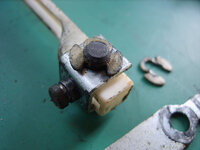 Paragon: Inline Drop-Target Stripdown by staticboy, on Flickr
 Paragon: Inline Drop-Target Stripdown by staticboy, on Flickr
 Paragon: Inline Drop-Target Stripdown by staticboy, on Flickr
 Paragon: Inline Drop-Target Stripdown by staticboy, on Flickr
 Paragon: Inline Drop-Target Stripdown by staticboy, on Flickr
 Paragon: Inline Drop-Target Stripdown by staticboy, on Flickr
Great stuff! Keep the pics coming 
JULY 2014
PLAYFIELD STRIPDOWN
Really shifted up a gear with this now! The playfield stripdown is complete!
After removing all the staples from the GI I used my lovely new Wera Screwdrivers to unscrew all the lamp holders thus releasing the wiring loom from the clutches of the playfield. I had an offcut of 1-inch Celotex kicking around so I've attached the loom to it using a few cable ties to keep it in the same layout. Just the process of sliding it onto the Celotex got it pretty tangled so it'll stay on the board as I work on it till it's refitted.
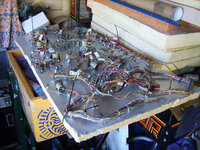
Paragon: Wiring Loom Removed by staticboy, on Flickr
And there it is. An empty playfield:
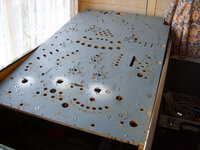
Paragon: Playfield Fixings Reference by staticboy, on Flickr
Next job was to remove the remaining fixings. After bagging up the hex screws that hold on most of the hardware I moved onto the small T-Nuts by screwing in an old fixing post; give it a wiggle and a pull and out they come:
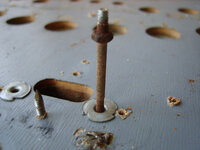
Paragon: Removing T-Nuts by staticboy, on Flickr
The large T-Nuts required a little more persuasion. I put an old screw back in and used a jemmy and wooden block to prise them out, making sure to lift vertically:
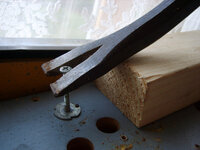
Paragon: Removing T-Nuts by staticboy, on Flickr
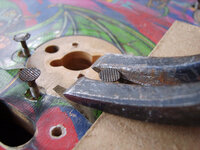
For the fin-shank screw-nails that are used to hold on the pop bumpers I hammered them through halfway from the underside then used a claw hammer and wooden block to pull them out really slowly:
Paragon: Removing Pop Bumper Nails by staticboy, on Flickr
And that was it! Job done! Bare as a baby's bottom:
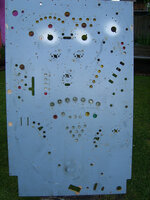
Paragon: Completely Stripped Playfield by staticboy, on Flickr
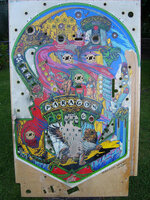
Paragon: Completely Stripped Playfield by staticboy, on Flickr
I also took this shot with the bright sky behind to show all the holes. Looks like Swiss cheese!
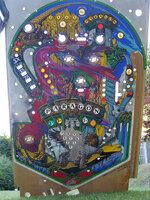
Paragon: Completely Stripped Playfield by staticboy, on Flickr
Next job... removing the inserts.
PLAYFIELD STRIPDOWN
Really shifted up a gear with this now! The playfield stripdown is complete!
After removing all the staples from the GI I used my lovely new Wera Screwdrivers to unscrew all the lamp holders thus releasing the wiring loom from the clutches of the playfield. I had an offcut of 1-inch Celotex kicking around so I've attached the loom to it using a few cable ties to keep it in the same layout. Just the process of sliding it onto the Celotex got it pretty tangled so it'll stay on the board as I work on it till it's refitted.

Paragon: Wiring Loom Removed by staticboy, on Flickr
And there it is. An empty playfield:

Paragon: Playfield Fixings Reference by staticboy, on Flickr
Next job was to remove the remaining fixings. After bagging up the hex screws that hold on most of the hardware I moved onto the small T-Nuts by screwing in an old fixing post; give it a wiggle and a pull and out they come:

Paragon: Removing T-Nuts by staticboy, on Flickr
The large T-Nuts required a little more persuasion. I put an old screw back in and used a jemmy and wooden block to prise them out, making sure to lift vertically:

Paragon: Removing T-Nuts by staticboy, on Flickr
For the fin-shank screw-nails that are used to hold on the pop bumpers I hammered them through halfway from the underside then used a claw hammer and wooden block to pull them out really slowly:

Paragon: Removing Pop Bumper Nails by staticboy, on Flickr
And that was it! Job done! Bare as a baby's bottom:

Paragon: Completely Stripped Playfield by staticboy, on Flickr

Paragon: Completely Stripped Playfield by staticboy, on Flickr
I also took this shot with the bright sky behind to show all the holes. Looks like Swiss cheese!

Paragon: Completely Stripped Playfield by staticboy, on Flickr
Next job... removing the inserts.
I bet taking the pictures takes as long as fixing up the stuff? Great work BTW.
It always great to see people get stuck in as it mostly feeds my own desires to get off my as* and fix something....
Great stuff! Keep the pics coming
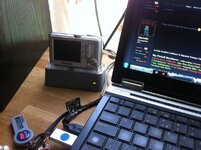
No problem taking photos. I need them to remember how it all goes back together! Today I uploaded my 1,000th picture to my Paragon album on Flickr! I have a "spare" Samsung Digimax S800 8 mega pixel camera that sits on a neat little charging dock that I keep in the pin shack. It's kinda standard but it does take great close-up macro shots. It takes an SD card and my laptop has a card reader built in so it's quick and easy to import and upload.
