What's new
Pinball info

Register a free account today to become a member! Once signed in, you'll be able to participate on this site by adding your own topics and posts, as well as connect with other members through your own private inbox!

In Progress Adventures in Budget Restoration: 1978 Bally PARAGON

May 2014
PF STRIPDOWN
Removed the other 3 flippers today. It's when you start poking around that the little problems start to crawl out of the woodwork: sheared screw on one coil stop bracket and another held on by just a single over-sized self-tapping machine screw!

farm4.staticflickr.com_3786_14317513833_c3837ec884_b.jpg
Paragon: Playfield Stripdown by staticboy, on Flickr

farm6.staticflickr.com_5586_14297346355_69dd43da1e_b.jpg
Paragon: Playfield Stripdown by staticboy, on Flickr

Next I'll tackle the pop bumpers...
 
Ouch! I didn't realise how worn the PF was until you posted the above pic. I would not feel guilty sticking an overlay on that PF ;)
 
Yup, it really is totally and utterly shagged. I think even following Vid's Guide to Ultimate Playfield Restoration I'd be hard pushed to do much with it! It wouldn't just be a case of repairing the bare patches as even where there is paint it's in such bad flaky condition you can't work on it without it just falling off. You can see the paint is flaking off in line with the planking. F***ered basically.
 
May 2014
PF STRIPDOWN

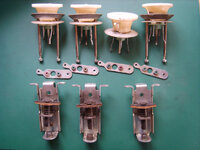
Getting right into this now! Attacked the pop bumpers last night. Another pile of bits bagged and tagged:

farm4.staticflickr.com_3810_14303861654_930b5c8545_b.jpg
Paragon: Pop Bumper Parts by staticboy, on Flickr

This was the dirtiest mechanism. All looks quite serviceable and will all clean and polish nicely:

farm6.staticflickr.com_5315_14117901127_dca2a53673_b.jpg
Paragon: Pop Bumper Parts by staticboy, on Flickr

The coil stops are even in good nick!

farm4.staticflickr.com_3723_14303860564_b39266499b_b.jpg
Paragon: Pop Bumper Parts by staticboy, on Flickr

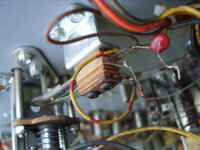
Something else broken. Noticed one of the capacitors across the spoon switch for BEAST'S LAIR pop bumper had become disconnected:

farm4.staticflickr.com_3677_14324623163_a2a5f02168_b.jpg
Paragon: Pop Bumper Removal by staticboy, on Flickr

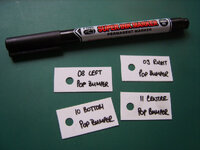
I decided that I'd better start labelling everything on the playfield wiring loom or even with reference photos it's going to be a headache to remember where everything goes! I'm a keen railway modeller so have plenty of white plasticard to hand. Chopped up some thin stuff and made holes using standard paper hole punch. Wrote labels with permanent CD marker pen:

farm6.staticflickr.com_5576_14117752129_fb3962d63d_b.jpg
Paragon: Playfield Labels by staticboy, on Flickr

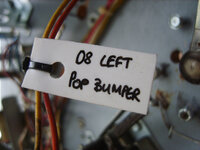
Fixed in place with little zip ties:

farm4.staticflickr.com_3704_14281298386_1426b7471e_b.jpg
Paragon: Playfield Labels by staticboy, on Flickr

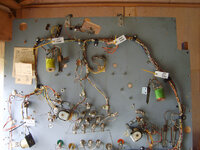
Progress so far:

farm3.staticflickr.com_2937_14302519692_e2c4a21e36_b.jpg
farm3.staticflickr.com_2916_14117901697_14284e0dd4_b.jpg
Paragon: Playfield Labels by staticboy, on Flickr

Slingshots and saucer kickers next... :) Loads more photos on my flickr PARAGON set
 
Last edited:
May 2014
PF STRIPDOWN

Quickly whipped off the slingshots and saucer kickers this afternoon:

farm3.staticflickr.com_2914_14326957613_ba1b02e5da_b.jpg
Paragon: Slingshots by staticboy, on Flickr

farm4.staticflickr.com_3713_14304864332_0738c4f66c_b.jpg
Paragon: Saucer Kickers by staticboy, on Flickr

Kickers are cool!

farm3.staticflickr.com_2896_14304862922_fb4a9478f0_b.jpg
Paragon: Saucer Kickers by staticboy, on Flickr

Nice old label. Haven't found any others like it:

farm4.staticflickr.com_3816_14120237167_ba6785387b_b.jpg
Paragon: Slingshots by staticboy, on Flickr

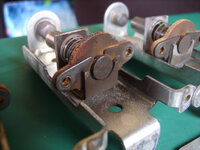
Tiny amount of surface rust but should polish off just fine:

farm4.staticflickr.com_3734_14120115608_d6d4d2e195_b.jpg
Paragon: Slingshots by staticboy, on Flickr

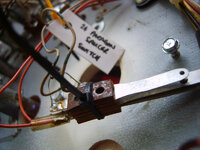
Had to remove the switches to be able to remove the saucer kickers, but in doing so there's nothing to hold them together! Cable zip ties to the rescue:

farm4.staticflickr.com_3734_14303408031_b7cdc5861a_b.jpg
Paragon: Cable Ties Switches by staticboy, on Flickr

farm4.staticflickr.com_3800_14326939783_cdeaf0242e_b.jpg
Paragon: Cable Ties Switches by staticboy, on Flickr

Looks as though it's the spot targets next following by drop targets...
 
May 2014
PF STRIPDOWN COMPLETED!

Managed to get the kids in bed reasonably early last night (it's half term week) so I popped out to the summer house around 10.30pm and finished stripping the top-side of the playfield. WOOHOO!

Off came the rebound switches, spot targets, slingshot switches and outhole kicker. Here she is in all her bare-naked glory:
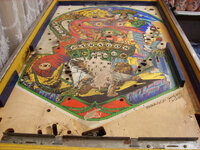
farm4.staticflickr.com_3746_14125903100_7777fa4071_b.jpg
Paragon: Stripped Playfield by staticboy, on Flickr

Centre spot target removed. This is the target that sits in front of the centre bumper and taunts you with ADVANCE BONUS but it's a fool's game as almost every hit sends it straight down the middle of the flippers to drain:
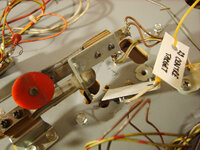
farm4.staticflickr.com_3674_14310674722_c42216415b_b.jpg
Paragon: Centre Target by staticboy, on Flickr

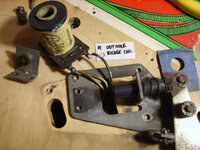
Outhole kicker. Probably the rustiest mechanism in the game, I suspect because any liquid spilt on the glass ends up pooling in the vicinity and there are quite a few liquid stains in the cabinet:
farm3.staticflickr.com_2933_14125904260_77c465a26a_b.jpg
Paragon: Outhole Kicker by staticboy, on Flickr

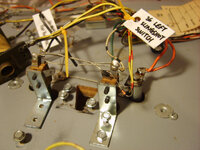
Left slingshot switches wired as a common parallel pair:
farm6.staticflickr.com_5589_14312521895_df66725825_b.jpg
Paragon: Slingshot Switches by staticboy, on Flickr

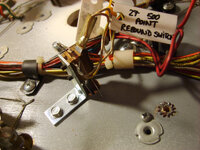
500 POINT REBOUND switch. There are 2 of them both #27 in the manual, which made me realise they're common on the switch matrix (and similarly there are three #34 switches for Top Right Rollover, Golden Cliffs Rollover and Drop Target Rebound, again all common on the switch matrix):
farm4.staticflickr.com_3810_14125906960_532b1d335e_b.jpg
Paragon: 500 Point Rebound Switch by staticboy, on Flickr

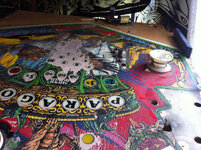
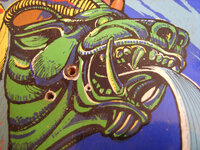
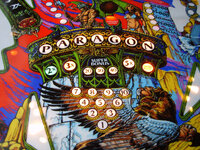
And here's a couple of macro shots of some of the beautiful artwork on this playfield. Loads more on my flickr.

farm4.staticflickr.com_3823_14310668362_93ae4cf15a_b.jpg
Paragon: Stripped Playfield by staticboy, on Flickr

farm4.staticflickr.com_3753_14289367136_36d1d1ec1a_b.jpg
Paragon: Stripped Playfield by staticboy, on Flickr
farm3.staticflickr.com_2902_14125859308_3f1f8dfba5_b.jpg
Paragon: Stripped Playfield by staticboy, on Flickr

So, here's the current overall state of play. Next job is to strip everything from the underside (the loom, GI, drop targets, rollover switches, etc.)
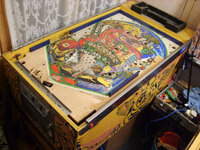
farm4.staticflickr.com_3793_14125896360_b93463083f_b.jpg
Paragon: Stripped Playfield by staticboy, on Flickr
 
June 2014
TEST FITTING OF PLAYFIELD OVERLAY DECAL

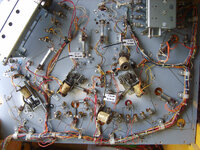
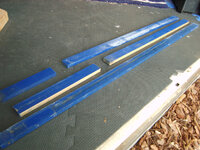
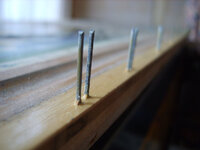
Just a little more work on the playfield stripdown to remove the wooden side rails. Although the underside of the playfield had been pre-drilled for screws only 3 had been fitted and the rails were actually held in place with dozens of big staples. I guess they realised staples were cheaper and quicker in the production line but they're a bugger to remove!

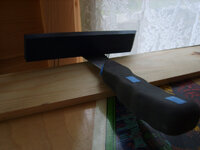
After a little wiggling side to side to create a small gap I used a heavy-duty stripping knife to gently lever off the side-rails using a thin strip of wood to protect the playfield (Err... why?):

farm3.staticflickr.com_2913_14138040667_303b76a4a3_b.jpg
Paragon: Removing Wooden Playfield Rails by staticboy, on Flickr
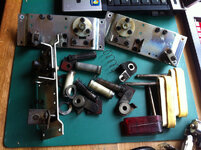
This is what came off:

farm6.staticflickr.com_5538_14323891314_5b0856fdb2_b.jpg
Paragon: Removing Wooden Playfield Rails by staticboy, on Flickr
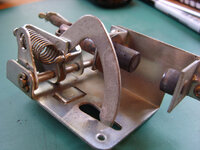
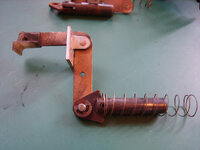
And these are what I had to fettle out with hammer and pliers:

farm6.staticflickr.com_5557_14137917299_54876454e3_b.jpg
Paragon: Removing Wooden Playfield Rails by staticboy, on Flickr
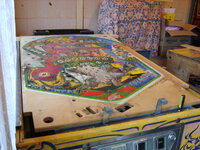
But at last the playfield is truly completely 100% stripped:

farm3.staticflickr.com_2921_14322787232_a1665feddb_b.jpg
Paragon: Test Fitting Overlay Decal by staticboy, on Flickr
After trimming the decal down to size I stuffed a 500W floodlight in the cabinet:

farm6.staticflickr.com_5528_14324564805_3cce9b0022_b.jpg
Paragon: Test Fitting Overlay Decal by staticboy, on Flickr
farm6.staticflickr.com_5278_14301423006_112b5ed26d_b.jpg
Paragon: Test Fitting Overlay Decal by staticboy, on Flickr

farm3.staticflickr.com_2938_14138035397_1d5779352a_b.jpg
Paragon: Test Fitting Overlay Decal by staticboy, on Flickr

The inserts lined up remarkably well! I doff my hat to @ABSOLUTE CONTROL!

She's really beginning to take shape and come to life :D Beginning to get very, very excited about this now!

farm6.staticflickr.com_5579_14301420846_62059d3830_b.jpg
Paragon: Test Fitting Overlay Decal by staticboy, on Flickr

farm6.staticflickr.com_5574_14344752713_611260a3c6_b.jpg
Paragon: Test Fitting Overlay Decal by staticboy, on Flickr

More photos as always on my signature flickr link.
 
You seem to be quite lucky that Bally decided to stick all the inserts in the right place, the week they made your playfield ;)

I look forward to seeing that fitted :)
 
Oh, this is definitely budget! NOS or mint Paragon playfields are like hen's teeth. I've seen NOS go for $1,400, about £1,000! When CPR eventually create a reproduction Paragon it'll be well in excess of anything before it due to the extra size. I estimate a minimum of $800 (they need to invest in new equipment as neither their drum sander or silk-screening is wide enough!) plus shipping $169 plus 20% import duty and charges (say another $200) and you've tipped £700.

Admittedly the ultimate in "budget" would be to not replace the playfield at all, and that is a viable option. I would simply make a polycarbonate playfield protector to preserve what is already there (I don't think one has been done for Paragon yet and I wouldn't pay €130 (£105) plus shipping for a bit of Lexan I could buy for about £10-15). I commented before that mine is too worn and Paragon is too complex (at least for my skills) to contemplate a paint restoration, so for me a vinyl decal is the only option. So, a nice bit of maple ply is about £60 cut to size and delivered, the decal around the same, and £20 for the Lexan. Altogether around £140 for brand spanking new repro playfield.

Of course, it could be a total disaster and look like utter ****e, in which case I fall back to preserving the original playfield under Lexan ;)
I might be missing something here ! But could you not fit the decal and then clearcoat it , then it should play like a normal playfield. . .?
 
I might be missing something here ! But could you not fit the decal and then clearcoat it , then it should play like a normal playfield. . .?
+1 on clearcoating one fitted.

Hi @Lee ellison and @replicas. Yep, I could fit the decal to the playfield and clearcoat, but a few reasons why I'm not keen:
  1. Even though it's totally knackered I'm keen to keep the original playfield. I'd hate to sand it bare and mess up doing the decal, so I'm going to cut a new playfield blank and hang the original on the wall.
  2. The inserts are cupped so badly I'd need to redo them all anyway. Might as well **** up a blank sheet of wood learning how!
  3. I've never sprayed a large area of clearcoat and I don't really have the ideal facilities, like a garage. The best I could do would be with rattle cans but I think Makrolon/Lexan polycarbonte will look better. I could pay to have it done but this is supposed to be a "budget" restoration. My wife was not terribly impressed when I spent £350 on Vector so I can imagine the reaction to spending £150 on professional automotive clearcoat!
  4. I'm not 100% sure how clearcoat will play with the vinyl decal? If it expands/contracts differently it could look bad or maybe even some kind of chemical reaction (although I suspect it'd be fine - could test the sample print).
  5. I like the look of Makrolon/Lexan polycarbonate playfield protectors. The difference is I would fit it as a complete sheet before rebuilding the playfield, so all the components are mounted on it instead of being shaped with holes for the major items. And it's a doddle to keep shiny with Novus.
  6. If the polycarbonate doesn't work out I can still have it clearcoated at a later date.
 
I've been looking at these overlays & don't seem that bad to me. The redraw on the space shuttle one I've seen isn't the best but does look alright.

Did you buy the overlay or scan? Was just wondering what size dpi/ppi was ok to be used for the print?
 
I've been looking at these overlays & don't seem that bad to me. The redraw on the space shuttle one I've seen isn't the best but does look alright.

Did you buy the overlay or scan? Was just wondering what size dpi/ppi was ok to be used for the print?

The overlay was made from a hi-res scan of a NOS playfield - so it's not a redraw. The image is at 150dpi. Ideally it should be 300dpi for printing but I printed a tester out on a sheet of high quality glossy photo paper on a top-notch photo printer and you couldn't see any blockiness at all. Have a look back through my PARAGON Flickr set for some close-ups (link below in my signature).

@ABSOLUTE CONTROL, aka Jim as http://www.absolutecontrol.co.uk, made the overlay decal. He did some touch ups, e.g., re-doing the text on the inserts, cleaning up the white areas, etc. He must have some serious kit for the stuff his company does and the quality on the tester he sent me is amazing. I'll post some close-up macro shots soon.
 
Hey, thanks . 600 would easily be ok yes, but I was thinking 300 could do it too.

I printed a tester out on a sheet of high quality glossy photo paper on a top-notch photo printer and you couldn't see any blockiness at all.

So even @ 150 it's ok. Going to have a proper look flickr through now.
 
June 2014
OUTHOLE KICKER

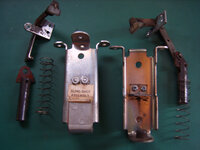
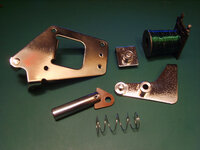
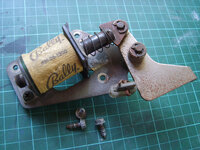
Weekend mini project. Had a busy and strange weekend ferrying kids back and forth to parties, staying away with friends and distant family members passing away but managed to squeeze in an hour or two of restoration. So this is what I started with, an outhole kicker assembly:

farm6.staticflickr.com_5590_14374277651_80e4e45bdc_c.jpg
Paragon: Outhole Kicker by staticboy, on Flickr

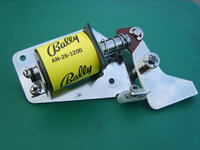
And this is the end result. Even that little bit of white plastic cleaned up nicely:

farm6.staticflickr.com_5475_14191039780_ce7b8440d2_c.jpg
Paragon: Outhole Kicker by staticboy, on Flickr

farm4.staticflickr.com_3923_14191166527_4136b3bb0c_c.jpg
Paragon: Outhole Kicker by staticboy, on Flickr

I revamped the fishpaper insulation by colouring it in with one of my daughter's blue felt tip pens!

farm6.staticflickr.com_5506_14190980368_2df0f4e807_c.jpg
Paragon: Outhole Kicker by staticboy, on Flickr

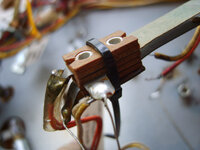
I remembered to test the coil resistance before going to the effort of cleaning it up. I was surprised it was as high as 11.8 Ohms but this MASTER CROSS REFERENCE CHART OF COILS FOR COIN OPERATED GAMES has it listed as 12R5 (12.5 Ohms) so it's within tolerance. In between the before and after it looked like this:

farm6.staticflickr.com_5485_14376663024_13d3d05218_c.jpg
Paragon: Outhole Kicker by staticboy, on Flickr

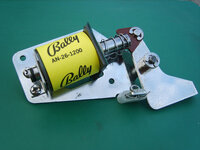
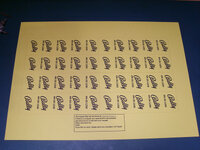
I made a new AN-26-1200 coil wrapper by printing out the PDF from Inkochnito's Pinball Score and Instruction Reproduction Cards onto light yellow card using an inkjet:

farm4.staticflickr.com_3861_14191178667_9913d69693_c.jpg
Paragon: Outhole Kicker by staticboy, on Flickr
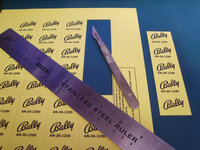
Cut one out with a scalpel:

farm3.staticflickr.com_2927_14191048130_c96404a2b9_c.jpg
Paragon: Outhole Kicker by staticboy, on Flickr
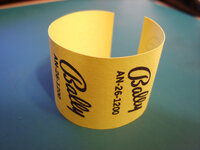
And pre-curled by pulling it over the edge of the cutting mat:

farm6.staticflickr.com_5194_14354515926_6d729c549d_c.jpg
Paragon: Outhole Kicker by staticboy, on Flickr
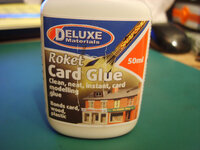
And stuck it on with some of this stuff, Deluxe Materials Roket Card Glue (I'm into model railways and you soon learn that this is only glue to use for card modelling - their other adhesives are awesome too):

farm6.staticflickr.com_5554_14190989298_2eb1020f47_c.jpg
Paragon: Outhole Kicker by staticboy, on Flickr
 
June 2014
So this is what I started with, an outhole kicker assembly:

farm6.staticflickr.com_5590_14374277651_80e4e45bdc_c.jpg
Paragon: Outhole Kicker by staticboy, on Flickr
And this is the end result. Even that little bit of white plastic cleaned up nicely:

farm6.staticflickr.com_5475_14191039780_ce7b8440d2_c.jpg
Paragon: Outhole Kicker by staticboy, on Flickr
Ok... if you're going to show something *THAT* shiny, you're going to have to tell us more about how you got from the "start" to the "finish". That's just unreal... :o
 
Ok... if you're going to show something *THAT* shiny, you're going to have to tell us more about how you got from the "start" to the "finish". That's just unreal... :eek:
But if I told you, I'd have to kill you ;)

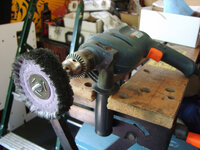
Seriously, though, there's no voodoo magic, just some Autosol, a £10 steel polishing kit from Metal Polishing Supplies UK Ltd. and then it's just time and patience. For smaller pieces like those from the outhole kicker I clamp my Black & Decker twin-speed hammer drill in a Workmate by its handle and set it to run at the faster 2,500rpm speed.

!!! WARNING: ALWAYS WEAR HEAVY DUTY GLOVES AND EYE PROTECTION !!!

Sorry about that but I don't want any of the very nice folks on here losing a finger or an eye just to make bit of an old pinball machine shiny. It ain't worth it. If you haven't got gloves or glasses don't do it (dust mask is a good idea too - the process makes lots of cotton dust). You will accidentally rub your hand against the mop and parts will get whipped out of you fingers and embed themselves in the opposite wall! Always work on the part of the wheel that is moving away from you. In my case this is the underside, which is good for two reasons: if it gets caught it'll fly away from you; and you can look down onto the work to see how the polishing is going.

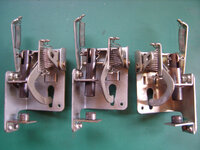
I'm working on three saucer kickers at the moment so I'll do a little "How To" with photos. In the meantime the basic process I use is as follows:
  • Completely strip the mechanism down into its component parts.
  • A quick clean with a little Autosol to remove the heavy gunk (the black "soot" common in pinball machines).
  • If the piece is really dirty/oxidised or lightly rusted clean up with a ScotchBrite satin web wheel.
  • Use the rough sisal wheel with black compound to do the initial "cut". This gets rid of light scratches and smooths the surface.
  • Use the colour stitch wheel and green compound for the final mirror shine.
  • Polish again with Autosol for that showroom finish ;) and to leave a protective coating that inhibits re-oxidation.
The only things I don't polish on the wheel are tiny parts like washers, e-clips, split pins, etc., and bolt and screw heads. I find it much easier to lay a tough cloth on the workbench, squeeze out a thin line of Autosol about 4" long and holding the screw/bolt head down rub it back and forth vigorously for 20-30 seconds. For the washers/e-clips/pins I use a little 1" buffing wheel on a Dremel-like multi-tool.

My "secret" weapon:

farm4.staticflickr.com_3852_14210944657_b34de3c4e6_c.jpg
My "Bench Grinder" Polisher by staticboy, on Flickr
 
Looks like you have done a fine job there. I use the tumbler to do the majority of the work and then hand finish if necessary with the dremel and polishing attachments (well I did until my dremel melted the other day :mad:)
 
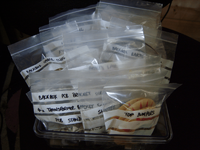
I've borrowed a tumbler (twice now) but never got around to using it properly. I didn't want to waste the grit only doing a few parts at a time but hadn't got around to stripping the PF to make up a big batch. Now I've got a pile of parts stripped I'm hesitant about chucking them all in together because I took the time to bag them all up and label them as I went!

Is that a bit retentive? ;)

Bags Of Bits.png
 
I'm just trying to be the first person to ever complete a rebuild and not have one part left over with no idea where it belongs! ;)
 
In fairness, it still annoys me to this day, that when I did my RAB full strip down, I ended up with a spare post that I can't find where it came from and never did years later (even after checking pics several times) :rofl:

I'm starting to think my Mrs chucked some random post she found on the floor in the parts tin when I was working on it as punishment for not paying her enough attention or something :rofl:
 
Wow. At least your misses has a sense of humour when playing pinball jokes. When my wife gets the hump I start thinking it'd probably be a good idea to put a lock on the shed where I keep the petrol in case she torches my favourite toys.
 
The longer those bits stay in those bags , the harder it will be to get the thing back together without anything left over.

When is the rebuild starting ?
 
Well... I've got my eye on that knackered Paragon playfield that's on eBay at the moment. If I win it it could make things a lot easier as well as giving me a lifetime bunch of spares and game-specific parts. I could completely strip it to bare wood to use for my playfield overlay which would save me the hoo-hah of making my own. That would really speed things up. But it depends on the price. Otherwise it's new piece of plywood and time to fire up Mr Router :)
 
Well... I've got my eye on that knackered Paragon playfield that's on eBay at the moment. If I win it it could make things a lot easier as well as giving me a lifetime bunch of spares and game-specific parts. I could completely strip it to bare wood to use for my playfield overlay which would save me the hoo-hah of making my own. That would really speed things up. But it depends on the price. Otherwise it's new piece of plywood and time to fire up Mr Router :)

I was going to point that one out to you, but not surprising you have found it already :)

Honestly though, I don't think you need to make a new playfield. I admire your desire to not trash a genuine playfield, but in fairness the wear on your existing playfield is beyond reasonable restoration. I think most people on here would agree that putting the overlay on is a sensible thing to do based on it's condition
 
I was going to point that one out to you, but not surprising you have found it already :)
My eBay saved search alerts were set up long ago to inform me of anything vaguely pinball and Paragon related!

Honestly though, I don't think you need to make a new playfield. I admire your desire to not trash a genuine playfield, but in fairness the wear on your existing playfield is beyond reasonable restoration. I think most people on here would agree that putting the overlay on is a sensible thing to do based on it's condition
Yeah, I know. I'm just a bit of a sentimental fool, hence all the cleaning and polishing of old parts, even tiny washers, clips and screws, rather than replacing. I get it from my Grandad - he rarely threw anything away; there was always some new life to squeezed out of things. I guess the deciding factor will be if I bag the playfield on eBay. Would be good to have an almost complete set of spare parts - the bonus would be I'd happily sand down that playfield to keep my own as wall art.

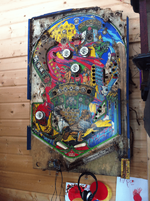
I need it to replace this piece of sh*te anyway:

WallArt.png
 
Back
Top Bottom