Still waiting for the brown paper hopefully that will arrive today. My shop is at standstill at the mo due to waiting for stuff to arrive grr
Pinball info
You are using an out of date browser. It may not display this or other websites correctly.
You should upgrade or use an alternative browser.
You should upgrade or use an alternative browser.
Complete Theatre of magic shop log
- Thread starter elrikos
- Start date
Got a few hours in today which was nice!
First up, replacing a couple of coil wrappers. Just the white ones (printed those out myself). Here's a before and after. Made a nice difference I think!
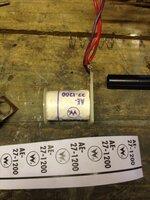
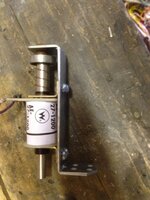
Managed to fit the whole solenoid loom in place. Most of the mechanisms aren't on yet, just a few to route the wiring properly.
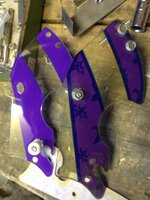
Next up. Changing the ramp flaps on the new ramps. Had a nightmare in that I cracked the right ramp getting the flap off. Only a small one and its mostly hidden by the new flap but I was fuming at myself!!!
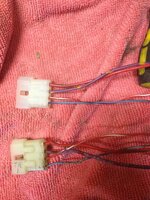
Part of the swap is changing across the wiring loom. This loom was the one pictured right at the start of the shop log. Ithad been damaged by the playfields movement. I found some similar wire in the loom I was kindly given and got to work! New and old side by side.
And then I got the call from bill. The parts are in!! Lots more shiny bits to put back on the game!!
First up, replacing a couple of coil wrappers. Just the white ones (printed those out myself). Here's a before and after. Made a nice difference I think!


Managed to fit the whole solenoid loom in place. Most of the mechanisms aren't on yet, just a few to route the wiring properly.
Next up. Changing the ramp flaps on the new ramps. Had a nightmare in that I cracked the right ramp getting the flap off. Only a small one and its mostly hidden by the new flap but I was fuming at myself!!!
Part of the swap is changing across the wiring loom. This loom was the one pictured right at the start of the shop log. Ithad been damaged by the playfields movement. I found some similar wire in the loom I was kindly given and got to work! New and old side by side.

And then I got the call from bill. The parts are in!! Lots more shiny bits to put back on the game!!

Looking good hopefully sending my habitrails for rechrombing once I get paid
Coil wrappers arrived today. Courtesy of rudi. I've attached a couple with copydex. Looks very smart and well worth the cash.
Also got my colordmd for the afm. Really impressed. I have to say I wasn't expecting a laptop LCD. Very clever. As an aside the display panels only cost £50. Decent profit on the board and software!!
Also got my colordmd for the afm. Really impressed. I have to say I wasn't expecting a laptop LCD. Very clever. As an aside the display panels only cost £50. Decent profit on the board and software!!
Bows gracefully
A little more progress over the past few days. Managed to get the trunk mechinism rebuilt and fitted. Had a minor panic when I couldn't find one of the metal collars from the trunk shaft. Then remembered I'd given if to bill to replate. Phew! So with the gearbox shaft, trunk metal box and other bits freshly plated it went back together. 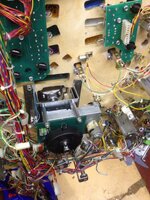
New opto interrupter and new trunk wiring loom, just to finish the effect. New stainless nyloc nuts also. Looks good!
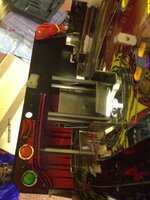
Next on to the trapdoor. Finally got that all done. Had to scrounge a rare coil sleeve from Dave the taxman. Thanks Dave!! Then put it all back together. Again all the mild steel parts have been replated. New trapdoor flap and decal. Coil wrappers and sleeves replaced. The trapdoor coil plunger is also new. The old one was in a terrible state!!
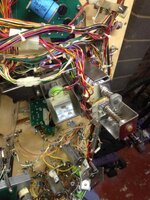
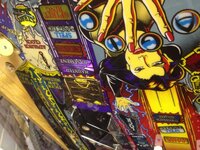
And that's it for the day. Next jobs are building the flipper mechs, trough and pop bumpers.

New opto interrupter and new trunk wiring loom, just to finish the effect. New stainless nyloc nuts also. Looks good!

Next on to the trapdoor. Finally got that all done. Had to scrounge a rare coil sleeve from Dave the taxman. Thanks Dave!! Then put it all back together. Again all the mild steel parts have been replated. New trapdoor flap and decal. Coil wrappers and sleeves replaced. The trapdoor coil plunger is also new. The old one was in a terrible state!!


And that's it for the day. Next jobs are building the flipper mechs, trough and pop bumpers.
Lovely, pinball porno that.
got loads done over the last day or 2. First up i started to work my way around the PF populating all the star posts and rubbers. I'm about half way round in this shot.
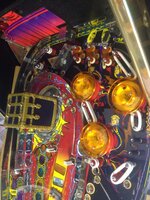
i've got a feeling that white rubber wasn't the best choice but we'll see.
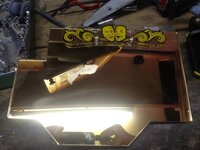
I've also got round to fitting the gold mirror i ordered a while ago. £15 delivered from a plastics company called crestar. I really like it!! The mount (which you cant see) has been replated, the screws have been plated with 24k gold and the plastic is new.
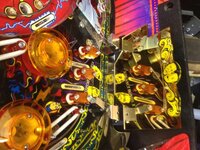
Next up, i replaced the wiring loom on the other ramp. The original loom had got chewed up due to the broken playfield slide. I used the old loom kindly provided by a member here and replaced like for like. You'd never know it wasnt original! The flap has also been replaced with a stainless one. I think it looks nicer. Nerve racking, especially after the catastrophe on the last one! All went without a hitch though.
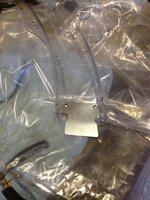
I've hit a problem though. I've started to replace the plastics with a new set, but theres an issue with them. Have a look!
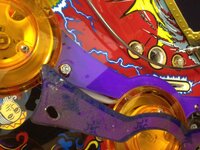
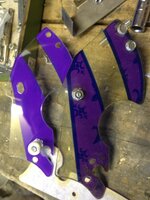
the blue's so faint its almost missing. I'm on to the seller so fingers crossed its a one off and not the way that the repro plastic sets are!
Few other bits got done but i didnt take photos (sorry!)
all solenoids are now mounted. I had a (self made) problem with the pop bumpers. I mounted the skirts the wrong way round. Only noticed when i came to find the rod and ring assembly and there was no hole for the rods to go through! I was kicking myself. I removed all the carefully mounted staples that held the lamp leads to the PF and changed it round. I then stole an idea from Ed Cheung. Instead of trying to staple the leads back down through the looms (doomed to failure!), i soldered a ring lug to the end of the wire and screwed the wire to the PF with a small screw. I could then slide the lamp lead under the screw lug before i fully tightened it down. Its securely held and removeable in case i need to remove the pops again! Pics of that part are to follow i'm afraid!!
Another tip i picked up relates to the trunk. I'm told that the repros are a bit brittle and will crack early. The accepted wisdom is to use some dynamat (or similar) to absorb the vibrations and stop cracking. I ordered a piece from ebay (about £4.50 delivered) and hacked it to the right size when it arrived. Firmly stuck it to the inside of the trunk and mounted the trunk. You cant tell its there from the outside but the whole assembly feels more sturdy now.
Anyway i'm all out of pictures so time to sign off for the evening. More updates over the coming days.

i've got a feeling that white rubber wasn't the best choice but we'll see.
I've also got round to fitting the gold mirror i ordered a while ago. £15 delivered from a plastics company called crestar. I really like it!! The mount (which you cant see) has been replated, the screws have been plated with 24k gold and the plastic is new.


Next up, i replaced the wiring loom on the other ramp. The original loom had got chewed up due to the broken playfield slide. I used the old loom kindly provided by a member here and replaced like for like. You'd never know it wasnt original! The flap has also been replaced with a stainless one. I think it looks nicer. Nerve racking, especially after the catastrophe on the last one! All went without a hitch though.

I've hit a problem though. I've started to replace the plastics with a new set, but theres an issue with them. Have a look!


the blue's so faint its almost missing. I'm on to the seller so fingers crossed its a one off and not the way that the repro plastic sets are!
Few other bits got done but i didnt take photos (sorry!)
all solenoids are now mounted. I had a (self made) problem with the pop bumpers. I mounted the skirts the wrong way round. Only noticed when i came to find the rod and ring assembly and there was no hole for the rods to go through! I was kicking myself. I removed all the carefully mounted staples that held the lamp leads to the PF and changed it round. I then stole an idea from Ed Cheung. Instead of trying to staple the leads back down through the looms (doomed to failure!), i soldered a ring lug to the end of the wire and screwed the wire to the PF with a small screw. I could then slide the lamp lead under the screw lug before i fully tightened it down. Its securely held and removeable in case i need to remove the pops again! Pics of that part are to follow i'm afraid!!
Another tip i picked up relates to the trunk. I'm told that the repros are a bit brittle and will crack early. The accepted wisdom is to use some dynamat (or similar) to absorb the vibrations and stop cracking. I ordered a piece from ebay (about £4.50 delivered) and hacked it to the right size when it arrived. Firmly stuck it to the inside of the trunk and mounted the trunk. You cant tell its there from the outside but the whole assembly feels more sturdy now.
Anyway i'm all out of pictures so time to sign off for the evening. More updates over the coming days.
Another update. Had an exchange of emails with the plastics manufacturer, planetary pinball. They tell me that they're using the original Williams masks and processes to make the plastics and that they are correct And my originals are wrong. The purple is printed over the blue so it appears when backlit. Seems strange but not much I can do! No one else makes plastics for the game!
I had the first plug in last night. Full of excitement. Plugged in. Flicked switch. All went dark. Damn!! Blew the fuse on the plug and tripped the electrics. All switched back on and fuse replace. Unplug the outlet from the switch box and try again. Bang! Dark again. After taking the switch box to bits I found the problem! I'd reattached the wires to the switch wrongly. Flicking the switch shorted live and neutral together. Whoops!! Swapped them over and she switched on!
Bookkeeping totals cleared, factory settings restored, bookkeeping totals cleared, factory settings restored, bookkeeping totals, factory settings, bookkeeping, factory, bookkeeping, blank, blank blank. Damn!!
After some component swappery I've worked out there's a problem with the dmd board. Now waiting for a hv rebuild kit from Andy at pinballmania.
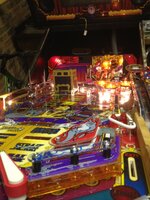
So, you're all up to date!! Here's a picture of where I'm up to!

Loving the new coil wraps. I may do this on mine.
The whole build is simply stunning!
The whole build is simply stunning!
Loving the new coil wraps. I may do this on mine.
The whole build is simply stunning!
still got plenty of paper left ;0)
Fixed the display problem (with a bit of help from Andy the legend). I fitted all the parts and still no joy. Checked voltages. All fine apart from pin 1 and 2 on the connector. Both were showing -120v rather than -120v and -108v. Quick check with Andy and he diagnosed (by email!) a problem with my solder work near d6. I checked and sure enough, a tiny solder flake bridged 2 points. Quick dab with the iron and it worked perfectly!
Next problem. Switch matrix showing all sorts of crazy errors. Heres the switch edge report.
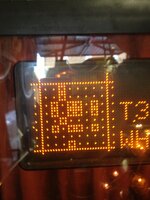
Optos registering wrongly, some switch closures registering multiple closures of other switches.
After much head scratching I started to isolate each column in turn to try to identify the problem. Then I saw it. I'd plugged a switch connector into a lamp connector for the backboard. Swapped it over and all sorted! Serves me right. Check the simple stuff first!!
Next problem. Switch matrix showing all sorts of crazy errors. Heres the switch edge report.

Optos registering wrongly, some switch closures registering multiple closures of other switches.
After much head scratching I started to isolate each column in turn to try to identify the problem. Then I saw it. I'd plugged a switch connector into a lamp connector for the backboard. Swapped it over and all sorted! Serves me right. Check the simple stuff first!!
I'd have gone with orange starburst bumper caps with orange skirts and matching posts under the lane guides, hey but that's just me. also WH20 stand ups
http://www.flickr.com/photos/59755014@N00/sets/72157617392214932/
stan, great job though
http://www.flickr.com/photos/59755014@N00/sets/72157617392214932/
stan, great job though
make sure you pack under the ramp flaps as they will dent, build them up with insulating tape all the way to the edge it will save the playfield.
stan
stan
Well work has moved on! I've had a total nightmare few days on this game!! Totally blame my lack of time to concentrate!
The ramps and metal ball guides are on. They look top! Still waiting for the flipper EOS bracket to arrive from Phil. My base plate didnt come with one so he kindly offered to supply one!
Next up, switched the game on and opened the coin door to check the flashers. Into test mode and i selected flasher test. 1st flasher, flash (thought it was quite bright!). No repeat flash. Strange thought i. Next flasher. Bright blue flash, no repeat. hmmmmm this may be a problem! third flasher. Definite blue flash. no repeat. Somethings wrong!!
At this point there was an almighty bang and the garage filled with smoke. Capacitor C11 had decided to blow in a spectacular fashion!
Having composed myself and resisted the urge to kick the game out into the rain, i spent a bit of time researching and looking. Guess who got the flipper diodes the wrong way round! As said above, i blame my haste in putting the thing together.
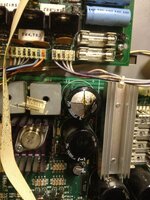
I've ordered a replacement C11 and am going to change the flipper diodes. Hopefully that will fix the problem. I've checked the other common cause of this capacitor going pop (ribbon cable poorly connected or J124 plugged into J128. All is well there.
So close to finishing, just a few more things to do and then all is finished. Im telling myself it will be worth it in the end!!
Updates soon on my tiger saw! Its nearly time.
The ramps and metal ball guides are on. They look top! Still waiting for the flipper EOS bracket to arrive from Phil. My base plate didnt come with one so he kindly offered to supply one!
Next up, switched the game on and opened the coin door to check the flashers. Into test mode and i selected flasher test. 1st flasher, flash (thought it was quite bright!). No repeat flash. Strange thought i. Next flasher. Bright blue flash, no repeat. hmmmmm this may be a problem! third flasher. Definite blue flash. no repeat. Somethings wrong!!
At this point there was an almighty bang and the garage filled with smoke. Capacitor C11 had decided to blow in a spectacular fashion!
Having composed myself and resisted the urge to kick the game out into the rain, i spent a bit of time researching and looking. Guess who got the flipper diodes the wrong way round! As said above, i blame my haste in putting the thing together.

I've ordered a replacement C11 and am going to change the flipper diodes. Hopefully that will fix the problem. I've checked the other common cause of this capacitor going pop (ribbon cable poorly connected or J124 plugged into J128. All is well there.
So close to finishing, just a few more things to do and then all is finished. Im telling myself it will be worth it in the end!!
Updates soon on my tiger saw! Its nearly time.
p.s. bartron,
do you mean stick insulation tape on the underside of the steel of the flap? is that just a thin layer to stop the metal edge digging into the playfield? I assume that its cut along the metal edge so its not seen topside?
Also, you may be right on the starburst caps. I like those! not so sure on the targets to be honest. I'm also kicking myself i didnt know about the up post mod! would have been great to incorporate. Too late now though. Maybe next time.
Surely it should pop a fuse before popping a cap?
RudeDogg, it wouldn't because its the other side of the fuse, the diode being the wrong way allows a backrush of current from the coil when its de-energised.
Oh I c
I didn't! A bit green on that kind of thing! Still, eBay to the rescue. £3 each for the correct caps. I've had a look at the fliptronics board (scare stories on pin side of burnt traces after similar stupidity to mine). All looks fine visually. Ill get to component testing over the coming days.
So frustrating but I'm so close. 1 more set of parts to bill the plater and about 5 hours work and its finished. Expect many pictures!! It'll feel a bit sad not posting on the shop log. I'm thinking of doing soother table, or possibly point my skills out doing restorations for others. Who knows!
So frustrating but I'm so close. 1 more set of parts to bill the plater and about 5 hours work and its finished. Expect many pictures!! It'll feel a bit sad not posting on the shop log. I'm thinking of doing soother table, or possibly point my skills out doing restorations for others. Who knows!
yep under the flap.
stan.
stan.
thanks Stan. I'll get that done.
I managed to get a little more done last night. Another problem of my own making with the capacitor. I can now say from bitter personal experience that mixing the wires on the coin door interlock switch will make capacitor C11 explode. Watch out for it! Essentially i was connecting the 50v winding and the 25v winding from the transformer together. Luckily before it goes bang it makes a slight hissing noise. I caught the replacement quick enough to save it! I had disconnected the flashers and fliptronics connectors from the loom to isolate the problem as i'd convinced myself i had a dud coil diode.
Anyway its all fixed now!
In other news i was planning to wire myself up a tiger saw mod using a tap into the switch matrix from the captive ball. However i've now changed my mind a little!
I had read up about software version 1.4h but was put off by the multiball crash bug. I've looked into it a bit more and it seems that its a very rare problem and i feel that the software will give more than it takes. The big plus point is that it reintegrates the proper tiger saw behaviour.
I've managed to source a motor EMI board from replicas (thanks for that!) and i'm now in the process of wiring the motor to the power driver board.
In terms of the game rom itself. For some reason the powers that be at williams specified a different U22 security chip for the 1.4h software from the 1.3x. THat specific U22 chip is pretty rare. Another option would be a ewe22 chip from shiftedbits. Not a cheap solution.
I then read from Ed Cheungs website that there is a software patch for game roms which removes the need for a specific U22 (you do still need a U22 chip, but it doesnt matter what game its for). I've patched the 1.4h software and Paul has burnt it onto a chip for me. Its on its way as we speak. Once its arrived i can see whether the patch has worked and hopefully have a properly working tiger saw!
Still waiting for one part from Phil. An EOS switch bracket from a flipper base. Then it needs to be plated by Bill. Hopefully it'll arrive on Monday.
I'm tantalisingly close to finishing this now. Another week and i should be all finished.
Hi Elrickos,
A very interesting read. I'm currently looking at upgrading the speakers on a couple of my machines - could you tell me what speakers you have gone for and if under recommedation or otherwise ?
thanks
Geoff
A very interesting read. I'm currently looking at upgrading the speakers on a couple of my machines - could you tell me what speakers you have gone for and if under recommedation or otherwise ?
thanks
Geoff
Hi Geoff
I've gone for alpine 1625s's. they were available online for around £25 for the pair. Coaxial but the tweeter isn't so prominent it fouled the grille.
As for subs I've previously gone for the stock 6 1/2" size. They tend to be more expensive and poorer quality than 8" subs (pretty much the car audio standard). I got a pyramid 8" sub from eBay for around £20 delivered.
I've not spent much time listening to them yet but initial results are promising! I'd buy the same again. Back on page 4 I link to a page giving chapter and verse on speakers for pinball. I'd suggest a read as its very informative.
Bit more progress today.
I've been looking at the tiger saw modification again. I chose a 120rpm geared 12v motor so that the saw blade wouldn't spin stupidly quick. Hopefully it will work out!
I've run the wire from the power driver board, hiding it in the loom on the way. I found 12v at a connector just by the backboard so I've tapped into that. All is ready for the 1.4 rom which should be here tomorrow.
No bits from phil today. Hopefully tomorrow.
Hi Geoff
I've gone for alpine 1625s's. they were available online for around £25 for the pair. Coaxial but the tweeter isn't so prominent it fouled the grille.
As for subs I've previously gone for the stock 6 1/2" size. They tend to be more expensive and poorer quality than 8" subs (pretty much the car audio standard). I got a pyramid 8" sub from eBay for around £20 delivered.
I've not spent much time listening to them yet but initial results are promising! I'd buy the same again. Back on page 4 I link to a page giving chapter and verse on speakers for pinball. I'd suggest a read as its very informative.
Cheers - must have looked through this thread half a dozen times without spotting that post on speakers D'oh.
Yep, have been using that link - and already swapped out the back box speakers on TZ for a set of pioneers (for a similar price to your Alpines - which look to have a bigger magnet, must investigate). Was struggling to find a decent 6.5" woofer, will take another look at 8".
Thanks
Geoff
Just for info, my replacement plastics are exactly the same. Did you have one missing from the set? The large clear plastic that goes over the right ramp?
Would be interested to know if your trunk fits snugly over the fixings cos. mine doesn't.
Feel for you on the refurb, it's a long process but will be worth it. One of the nicest looking machines ever built IMO.
Hi jmp
I was missing the same plastic. Luckily my old one was in good nick. Not sure where to source one. The ramp doesn't come with it either.
My trunk is a terrible fit! It's splayed out at the bottom. It's firmly attached with cable ties holding the bottom in at the moment, in an effort to pull it back in.
Thanks for the kind words. Ill be glad when I can fire her up and get a game in!
Hi jmp
My trunk is a terrible fit! It's splayed out at the bottom. It's firmly attached with cable ties holding the bottom in at the moment, in an effort to pull it back in.
I have a shocking memory but I'm pretty sure when I put a replacement trunk on my TOM I warmed it gently in hot water and then moulded it to sit better. If someone can corroborate this though I'd be grateful before anyone melts their trunk on my say so!

