Congratulations mate, I'll be joining you on Sunday (not twins though!!) all the best to you and your family.
Pinball info
You are using an out of date browser. It may not display this or other websites correctly.
You should upgrade or use an alternative browser.
You should upgrade or use an alternative browser.
Complete Theatre of magic shop log
- Thread starter elrikos
- Start date
Many congratulations Rich - wonderful news!
Fantastic stuff, this is what it's all about so go and do your needful and we'll all be here for when you need a break from the baby madness. Probably tomorrow then.
Congrats Rich! Hope little un's and you/misses all doing well 
Yep ! Congrats Rich ....I remember when you bought my Family Guy, now you really are the Family Guy :thumb:
hi all,
thanks for the kind words. Its all a bit overwhelming but really cool!
anyway back to the pinball.
I had a chance to take some pictures and put them together into a before and after type thing. Henriks been busy!
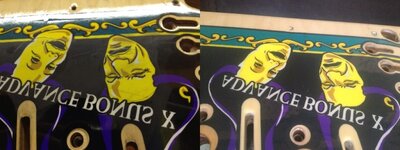
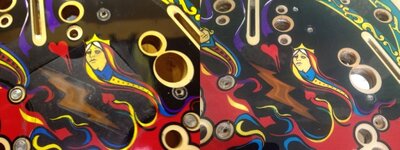
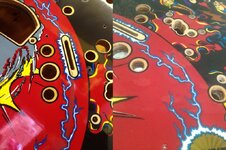
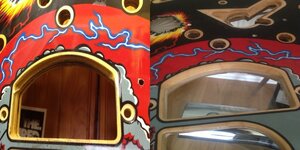
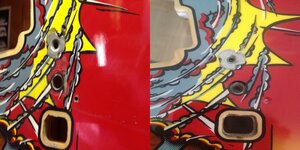
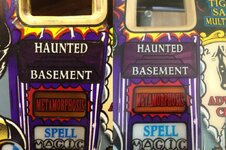
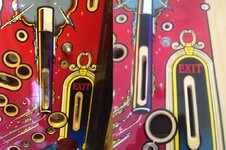
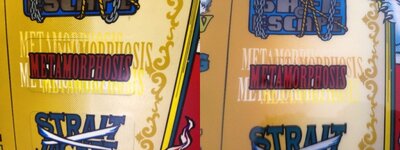
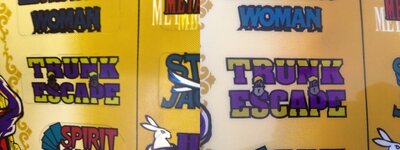
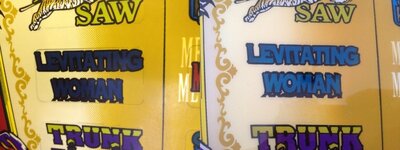

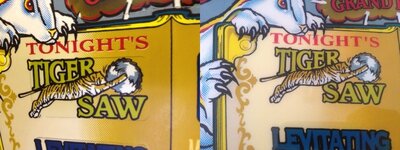

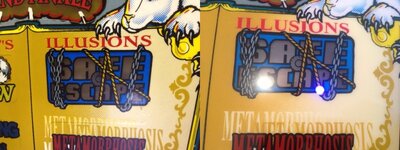
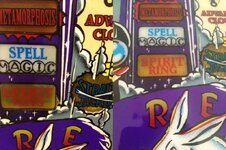
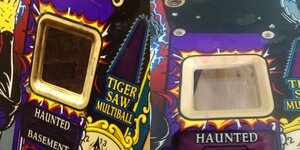
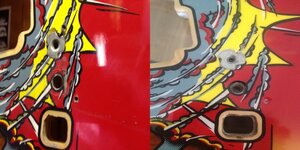
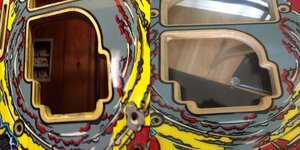
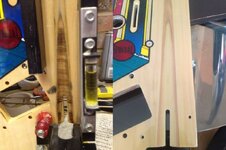
Some truly amazing work there. Some of the "after" photos look quite washed out and dull. Thats not the case but its so shiny and glossy that the camera picks up the reflection and washes it out. Its really hard to get a good photo, and using the flash just isnt an option!!
One stand out example of the attention to detail is the shooter lane. Looks like a normal cleaned, polished shooter lane? Look closer. What you see isnt wood but has been painted to appear to be wood. It even shows a replica of the plywood grain. I had to look closely to see what he'd done. Truly skilled work.
The only bit that didnt get totally sorted was the post by the trunk. If you look back to the very start you'll see that the main ramp entrance was smashed and someone had opened up the post hole, and screwed a dirty great screw into the PF, to hold an aluminium ramp protector. Henrik and i had agreed that that would be sorted but its still there. Its a shame but i'm not going to ship it back to him for a third time to get it sorted. We've agreed that with the judicious use of a post you won't see it anyway.
As you can see from the pictures its clear that i got my moneys worth. Henrik wasn't cheap, and certainly shouldnt be viewed as a cheap alternative to sending your PF to one of the names in the states, but i think that its clear he's up there with the best, and should be supported in what he's doing. I'm very happy with the end result and will be sending things to him in the future (if indeed i get the chance to do any more!!).
As you all know the playfield did have to go back to him to sort some minor bits out. These were very minor things that just weren't quite right. In the interests of even handedness i'll give you an insight.
There were a couple of inserts which had sunk, and the ball had damaged the edge of the wood, showing the grain, rather than the black ring around the insert. One or two of those were missed.

Also at the trunk and trapdoor kickout, the wood was slightly damaged. The whole PF had been clearcoated and then the wood colour paint applied, but the area hadnt been filled and smoothed, so it showed an uneven surface.
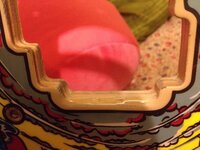
They weren't big issues and Henrik was very good about getting the PF back and fixing them quickly. I have no complaints at all.
The next step is to start building everything back up again! I'm not sure if i mentioned but i had some bits sent off to Bill Caulton the polisher for chrome plating. They're back and looking great. Pics to follow soon!
thanks for the kind words. Its all a bit overwhelming but really cool!
anyway back to the pinball.
I had a chance to take some pictures and put them together into a before and after type thing. Henriks been busy!


Some truly amazing work there. Some of the "after" photos look quite washed out and dull. Thats not the case but its so shiny and glossy that the camera picks up the reflection and washes it out. Its really hard to get a good photo, and using the flash just isnt an option!!
One stand out example of the attention to detail is the shooter lane. Looks like a normal cleaned, polished shooter lane? Look closer. What you see isnt wood but has been painted to appear to be wood. It even shows a replica of the plywood grain. I had to look closely to see what he'd done. Truly skilled work.
The only bit that didnt get totally sorted was the post by the trunk. If you look back to the very start you'll see that the main ramp entrance was smashed and someone had opened up the post hole, and screwed a dirty great screw into the PF, to hold an aluminium ramp protector. Henrik and i had agreed that that would be sorted but its still there. Its a shame but i'm not going to ship it back to him for a third time to get it sorted. We've agreed that with the judicious use of a post you won't see it anyway.
As you can see from the pictures its clear that i got my moneys worth. Henrik wasn't cheap, and certainly shouldnt be viewed as a cheap alternative to sending your PF to one of the names in the states, but i think that its clear he's up there with the best, and should be supported in what he's doing. I'm very happy with the end result and will be sending things to him in the future (if indeed i get the chance to do any more!!).
As you all know the playfield did have to go back to him to sort some minor bits out. These were very minor things that just weren't quite right. In the interests of even handedness i'll give you an insight.
There were a couple of inserts which had sunk, and the ball had damaged the edge of the wood, showing the grain, rather than the black ring around the insert. One or two of those were missed.

Also at the trunk and trapdoor kickout, the wood was slightly damaged. The whole PF had been clearcoated and then the wood colour paint applied, but the area hadnt been filled and smoothed, so it showed an uneven surface.

They weren't big issues and Henrik was very good about getting the PF back and fixing them quickly. I have no complaints at all.
The next step is to start building everything back up again! I'm not sure if i mentioned but i had some bits sent off to Bill Caulton the polisher for chrome plating. They're back and looking great. Pics to follow soon!
Well as you all guessed there's been precious little time for pinball recently!
I have got a few minor things done.
I identified that the old speakers were knackered and needed updating a bit. Using the information on this website, http://www.dziedzic.us/wpc_speaker_replacement.html, I picked some replacement speakers. I went with some alpine 1325s speakers for the backbox (£30 from halfords) and a pyramid 8" woofer (eBay, £20). The alpine speakers are coaxial speakers with tweeters mounted in the cone. Luckily the tweeter doesn't protrude too much to doesnt foul the speaker grille. I simply used a jigsaw to enlarge the right hand speaker hole. I'm at the point now where the panel has been repainted and is ready to go back together.
The cabinet speaker requires a different spacer place for the cab as the original hole is 6" across. I removed the old spacer plate and installed a new one. I ordered an Mdf speaker ring from eBay. Perfect size and cost £4 delivered. I've painted it black and am in the process of mounting it into the cabinet. Should be a worthwhile speaker upgrade for not a huge cost.
Pics will follow when it's all completed!
Pictures!! Nothing terribly exciting
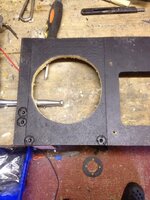
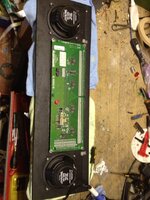
my new issue is the 8" woofer. I removed the old speaker spacer and enlarged the hole. The new Mdf ring is circular rather than a square like the original. Some if the old glue was visible so I set about sanding it down flat. I then resprayed the affected area with primer, feathering the edges.
When dry I realised that the primer was a slightly different colour to the old stuff. Cue me spending my afternoon removing everything from the cabinet insides and masking the whole cab floor. First coats just gone on
You would have been the only one to see it inside the machine. :biggrin1:
Good for you though, I am considering a speaker upgrade at some point so appreciate the speaker numbers.
Good for you though, I am considering a speaker upgrade at some point so appreciate the speaker numbers.
Few more bits to update. The cab inside is finished and the speaker is in. Ill snap a picture soon!
also finished the speaker wiring and the display panel. Looks really nice.
Spent my evening drilling through all the holes on the playfield. The clearcoaters applied by henrik had filled in all the holes. I was concerned about just putting the screws in in case it cracked the clearcoat.
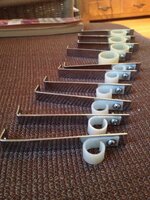
Ive also spent the evening reuniting the playfield wiring support brackets with the plastic rings. I had the metal brackets chrome plated. It looks really nice. Cue picture!
And a pic of the playfield post drilling!
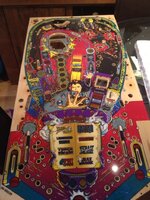
after lots of patiently waiting I've recieved the ramps from phil at pinball heaven. Really nice!
ive also been seeking the curtain decal for the backboard. I had tried to rescue mine but it was crispy and just shattered when I tried to clean it. I've ordered one from a company in Germany.
Im debating changing the ramp flaps for stainless ones from pinbits. I like the look of them and my current flaps aren't the best (even the new ones!).
also finished the speaker wiring and the display panel. Looks really nice.
Spent my evening drilling through all the holes on the playfield. The clearcoaters applied by henrik had filled in all the holes. I was concerned about just putting the screws in in case it cracked the clearcoat.
Ive also spent the evening reuniting the playfield wiring support brackets with the plastic rings. I had the metal brackets chrome plated. It looks really nice. Cue picture!

And a pic of the playfield post drilling!

after lots of patiently waiting I've recieved the ramps from phil at pinball heaven. Really nice!
ive also been seeking the curtain decal for the backboard. I had tried to rescue mine but it was crispy and just shattered when I tried to clean it. I've ordered one from a company in Germany.
Im debating changing the ramp flaps for stainless ones from pinbits. I like the look of them and my current flaps aren't the best (even the new ones!).
nowt worse than not being pleased with flaps :eyebrows:
It's beginning to come together nice,I'd change flaps to stainless but be careful not to damage ramps when doing it.
Your absolutely right pudsey. I need to replace the entrance flap anyway. Pinbits now have more of my money.
Also ordered some gerlitz wax to give the pf a final shine up.
bill the plater has yet more parts that just aren't shiny enough. Should be back in a fortnight.
Also ordered some gerlitz wax to give the pf a final shine up.
bill the plater has yet more parts that just aren't shiny enough. Should be back in a fortnight.
Your going to be needing shades to protect your eyes with all those super shinny parts.
Fingers crossed!!Your going to be needing shades to protect your eyes with all those super shinny parts.
didnt get much done today. I spent the day clearing the garage which had, even by my standards, got a bit dirty! All set for the final assault now.
I've been looking into replacing the mirror that reflects the rollovers. I was hoping to reuse mine, but there are a couple of areas where the mirror effect has delaminated. I'd looked in to getting a mirror but no one seems to do them. I then found an ebay company that will cut mirrrored acrylic to your dimensions. £15 later and a gold mirrored mirror will be on its way to me soon. Should fit the theme nicely i think!
I did spend a bit of time putting all the lamp PCBs through the dishwasher today. They're looking 100 times better than they were! Also the clear plastic subway which was literally black! now, apart from some ball trails it looks good. I may flame polish it but it may be going a little far!
Not much else to report. The parts are on the way from Germany and Pinbits have sent me my ramp flaps. The flaps werent listed on the theatre of magic page but i happened across them. Pam very decently gave me a discount on the postage as i pointed out that i would have ordered them with my last order had i have known they sold them!
Anyway, fingers crossed i'll get half an hour tomorrow to get some stuff done. Need to get out for a run as well though as my marathon training is being slightly neglected (did i mention i'm running the london marathon in 3 weeks time? busy busy busy!!)
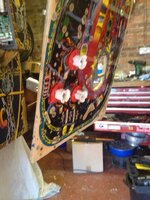
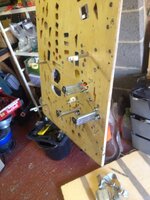
Bit more progress today. Managed to get the PF hung up on the ratchet straps. The playfield support bars are on along with the hooks. They look nice after chroming!. I spent my time yesterday cleaning out all the holes on the PF. They all had white cutting compound in them. A result i guess of Henriks polishing of the PF. Either way it was a PITA to remove. Not hard as such, just time consuming. I managed to put the pop bumpers on. I wanted them to be the first thing to go on the underside of the PF as then i would have a lot of space to staple the lamp socket leads. All went well and theyre looking ok. I had spent a while on my TZ restoration finding the correct colour staples so it looks pretty factory. The staples are a different gauge so theyre a bit bigger. I was going to order up the pinrestore staple gun but by the time shipping, customs etc was added it was just too much money to justify for the correct gauge staples! The pop bumper coil brackets are new. 3.99 euros each from the same company who supplied the decal.
Heres progress as of yesterday afternoon when baby feeding stopped play.
So i got out again this afternoon for an hour. First job was to clean out all the compound from the switch slots. Cotton buds this time and i got it all scraped out. I then cleaned the inside of the inserts using the cotton buds and glass cleaner. Henrik had clearly already done this so my cleaning was just to get rid of the small amount of compound that found its way in there!
Next up i waxed the PF. On advice on another thread i bought some gerlitz wax. Wow!!! Here's a picture which i think shows off the shine.
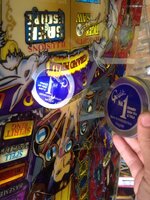 crazy shiny!!
I've then put the wooden rails on the PF. I didnt like the look of the standard black wood covered in plastic rubbish so i persuaded my grandfather to raid his wood store and make me some of oak. I've then polished and oiled it to within an inch of its life! I'm not 100% convinced at the moment as to whether i like it. I'll reserve judgement until its finished. I do have another set made up in some random tight grained wood so if i looks rubbish i'll spray the other set black and use those. Here's a picture. Comments would be appreciated.
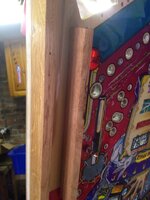
One thing of note with the siderail fitting. The hole in the PF is quite tight, such that the screw threads bite into it. This can cause a problem when screwing the rails on as the screw holds the rail and PF together, but has no way of pulling them tight against each other, as each turn of the screw winds it tighter into the PF and the rail. Thus if you start with a small gap between the PF and the rail, it will stay like that. The reason for the rails is to stop the PF warping and if the tension of each screw is different then it can actually make the problem worse. I ran a 4mm drill through the holes in the PF so that the screws could spin freely in the hole. That way, when tightening the screw, it pulls the rail onto the PF.
I've now started to put the insert PCB's on the PF. All lamps checked for chroming and whether they work. I'm not replacing every lamp as i think thats just excessive and a bit wasteful.
Heres where i got to today until again baby feeding stopped play!!
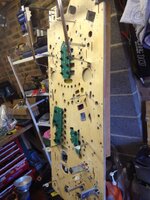
Heres progress as of yesterday afternoon when baby feeding stopped play.


So i got out again this afternoon for an hour. First job was to clean out all the compound from the switch slots. Cotton buds this time and i got it all scraped out. I then cleaned the inside of the inserts using the cotton buds and glass cleaner. Henrik had clearly already done this so my cleaning was just to get rid of the small amount of compound that found its way in there!
Next up i waxed the PF. On advice on another thread i bought some gerlitz wax. Wow!!! Here's a picture which i think shows off the shine.
 crazy shiny!!
I've then put the wooden rails on the PF. I didnt like the look of the standard black wood covered in plastic rubbish so i persuaded my grandfather to raid his wood store and make me some of oak. I've then polished and oiled it to within an inch of its life! I'm not 100% convinced at the moment as to whether i like it. I'll reserve judgement until its finished. I do have another set made up in some random tight grained wood so if i looks rubbish i'll spray the other set black and use those. Here's a picture. Comments would be appreciated.

One thing of note with the siderail fitting. The hole in the PF is quite tight, such that the screw threads bite into it. This can cause a problem when screwing the rails on as the screw holds the rail and PF together, but has no way of pulling them tight against each other, as each turn of the screw winds it tighter into the PF and the rail. Thus if you start with a small gap between the PF and the rail, it will stay like that. The reason for the rails is to stop the PF warping and if the tension of each screw is different then it can actually make the problem worse. I ran a 4mm drill through the holes in the PF so that the screws could spin freely in the hole. That way, when tightening the screw, it pulls the rail onto the PF.
I've now started to put the insert PCB's on the PF. All lamps checked for chroming and whether they work. I'm not replacing every lamp as i think thats just excessive and a bit wasteful.
Heres where i got to today until again baby feeding stopped play!!

thanks russ. i was surprised that the wax came up as well as it did. it was about £9 including shipping from a company called posh guitars. Small tin but you use so little of it i think it will last a long time!
thanks for the comments on the rails. My only concern is that its a little light. slightly darker would be good, but i also want to keep the wood natural.
i dread to think how many hours ive spent on it. Must be well over 100 by now. As far as cost goes im not counting. Ive a feeling that it has cost more than it will ever be worth (however with current prices who knows!)
Absolutely stunning work Rich.
I'm new to the forum and found my way here after discussing a really rundown Pinball on another forum. There's nothing quite so sad as seeing a machine which hasn't been maintained and is in serious decline, but it's equally amazing to know that people like you are restoring them to their former glory.

I'm new to the forum and found my way here after discussing a really rundown Pinball on another forum. There's nothing quite so sad as seeing a machine which hasn't been maintained and is in serious decline, but it's equally amazing to know that people like you are restoring them to their former glory.
Mini update. Managed to get a bit more done over the past few days. I've now got all the lighting boards fitted and I've started to add the lighting loom. Looks like Ill need to clean out the lamp sockets a bit as they're looking a bit manky. I think some kind of abrasive pencil would be good so I'm on the lookout!
My ramp flaps arrived from pinbits yesterday. Very nice indeed!! Also 100 playfield screws from Jon at 1stoppinball. Very reasonably priced and look much nicer than the old stuff!!
I managed to grab some nos parts a few days ago and I'm now back up to strength on #44 and #555 lamps. I had considered LEDs but every type seems to have some big downside, be it ghosting or blue white light. Proper bulbs don't have any of those!!
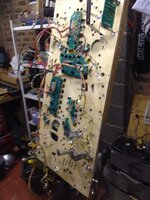

Another small update. As you can imagine time is at a premium, however I've got one of the more dull jobs half done.
The light board behind the translite was looking very grubby!! Here's the before picture
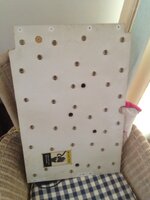
so step one was to remove the wiring and lamp holders. I kept the wiring connected to the lamp holders as I didn't want to damage the wiring from where the idc lamp holders had gone.
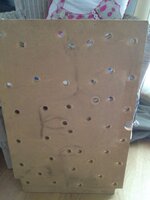
so, out with the sandpaper. The grime came off the back nicely and left a nice finish.
A coat of satin varnish just to seal and it looks good. No pic in afraid!
next on to the front. It looks like the white paint may have been screen printed as its a pretty thick layer. Anyway it was discoloured and nasty so another sanding later and it's a bit better. Not good enough though!
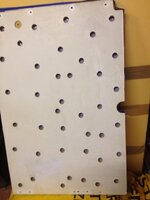
out with the white primer. This is the current state of play after 1 coat. Looks better already.
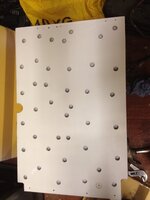
the plan is to get a couple of coats on over the next few days. Then replace the wiring.
The light board behind the translite was looking very grubby!! Here's the before picture

so step one was to remove the wiring and lamp holders. I kept the wiring connected to the lamp holders as I didn't want to damage the wiring from where the idc lamp holders had gone.

so, out with the sandpaper. The grime came off the back nicely and left a nice finish.
A coat of satin varnish just to seal and it looks good. No pic in afraid!
next on to the front. It looks like the white paint may have been screen printed as its a pretty thick layer. Anyway it was discoloured and nasty so another sanding later and it's a bit better. Not good enough though!

out with the white primer. This is the current state of play after 1 coat. Looks better already.

the plan is to get a couple of coats on over the next few days. Then replace the wiring.
You don't generally screen print just one solid block of colour (unless they did things differently in pinball)
Good stuff, keep 'em coming!
FYI about leds. There is a guy building an external led board aptly named 'ledocd'. The board makes normal leds into a non ghosting/strobing variety Check it out here:
http://herg.homeip.net/ledocd/index.html
Thoguht i would post it for you if you fancied saving your lovely inserts from incandescant bulb heat.
Good stuff, keep 'em coming!
FYI about leds. There is a guy building an external led board aptly named 'ledocd'. The board makes normal leds into a non ghosting/strobing variety Check it out here:
http://herg.homeip.net/ledocd/index.html
Thoguht i would post it for you if you fancied saving your lovely inserts from incandescant bulb heat.
Thanks for the tip russ. It's amazing how much time he's spent on it! Can't quite justify it though. Seems everyone is spending loads of cash on LEDs in an effort to make them look like incandescents. I think ill just stick with good old 44's for the time being.
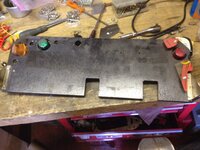
Little more progress. I've started on the backboard. The original curtain decal was crispy and dirty. As I cleaned it it just cracked and flaked off. I found a company in Germany who did a replacement. Here's the photo of the board stripped down.
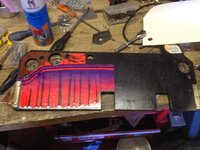
and here's the after
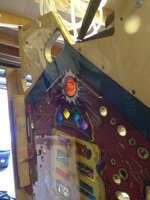
next up replacing the metal wire guides into the playfield. Truly nerve racking!! I carefully drilled the holes in the playfield to the right size (clearcoat had tightened the holes). Then carefully tapped in the wires. So glad it all came out good!!
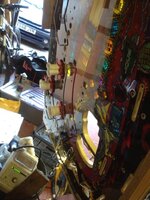
next up I've started to fit the switch loom. Only just clipped the wiring into the stand offs but even that is time comsing!! I've been carefully checking the wiring looms as I've fitted them. Glad I had as I found another "quality" operator repair in the loom. Now properly soldered and shrink tubed.
The backbox light board is just fully curing. Hopefully ill get half an hour to reassemble that tomorrow.
Little more today. Got onto the incredibly tedious job of polishing the stainless ball guides. In hindsight I should have sent them out to bill the polisher but didn't!!
anyway I started with some p240 wet and dry to remove the ball marks (they will completely sand out with a little effort). Then p400, then p600. Then onto my bench grinder. I removed the grinding wheels and fitted felt bobs. Perfect for polishing the guides. It's not a perfect mirror finish but its not far off. It's pretty durable too (I did the same on the guides and metal ramps on my tz ad a year later they're showing no signs of dulling or ball marks.
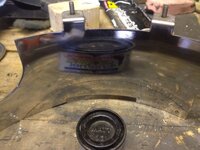
before
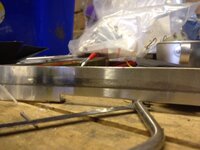
and after
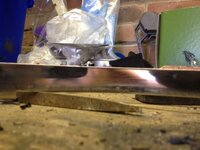
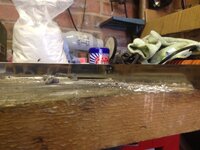
anyway I started with some p240 wet and dry to remove the ball marks (they will completely sand out with a little effort). Then p400, then p600. Then onto my bench grinder. I removed the grinding wheels and fitted felt bobs. Perfect for polishing the guides. It's not a perfect mirror finish but its not far off. It's pretty durable too (I did the same on the guides and metal ramps on my tz ad a year later they're showing no signs of dulling or ball marks.

before


and after


Did mine yesterday it's very tedious indeed
Hi all
Not got a massive amount done this week. I've almost finished attaching the switch matrix back on the pf. I've also had a look at the solenoid loom. The coil wrappers are a bit nasty, despite their cleaning in the dishwasher. Something needed to be done. Rudedogg has come through though and I'm waiting for the wrappers to arrive.
Bill the plater has promised my parts back today. Once that arrived it will be the first time in almost a year where every part of the Tom is in the same place! Exciting stuff!!
Popped over to Dave the taxmans last night to pick up some walnut shell media. Turned into an expensive trip! He had a colordmd on his taf. I now have one on the way. My man logic kicked in. The Tom dmd had a little burn in and needed changing. I'm taking the nice dmd off the afm and fitting the colordmd. It kind of makes sense in an odd way! If anyone wants a dmd with small amount of screen burn, make me an offer!
