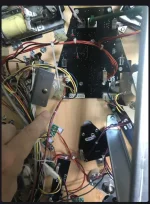
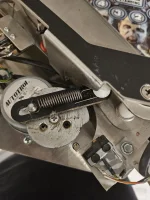
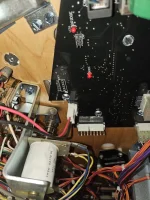
My Crossbow was a real pain and moving erratically.
I had a replacement motor but it did not cure the problem.
As I had two I decided to take one apart to see what the issue was.
The gearing looked solid but the coil was pretty loose. You can tell by just moving the lead on your to see if its loose.
By bending the prongs internally that place pressure on the internal coil fixed the problem.
I did end up adding some spots of adhesive on the base of the coil to make sure it does not move again
To take apart use a screwdriver to lever the lid off.
Start at the cable end. It's glued but does come off.
Just inch around the base of the cap bit by bit to raise the cap.
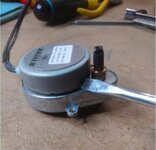
There are three parts so its a pretty simple design. Just the movement of the coil effects the rotor.
I placed the coil back into the same way but probably does not make any difference.
The cable does have a plastic clip which I placed down.
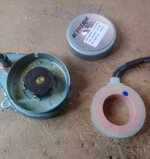
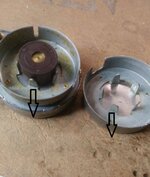
Lever all the tags out slightly ,so spreading out.
Careful not to over do it as they have to allow the coil to go back on.
Do the same on the cap.
Check that the coil and cap fits.
If you dont want to glue just check that the cable does not wiggle and your good to go.
I placed some Araldite on the base internally so that the coil stuck in firm.
Push the coil in and press firmly and allow to dry.
Using a quick set Araldite speeds things up.
Once back together it will run smooth with no judder or change of direction.
I had a replacement motor but it did not cure the problem.
As I had two I decided to take one apart to see what the issue was.
The gearing looked solid but the coil was pretty loose. You can tell by just moving the lead on your to see if its loose.
By bending the prongs internally that place pressure on the internal coil fixed the problem.
I did end up adding some spots of adhesive on the base of the coil to make sure it does not move again
To take apart use a screwdriver to lever the lid off.
Start at the cable end. It's glued but does come off.
Just inch around the base of the cap bit by bit to raise the cap.

There are three parts so its a pretty simple design. Just the movement of the coil effects the rotor.
I placed the coil back into the same way but probably does not make any difference.
The cable does have a plastic clip which I placed down.

Lever all the tags out slightly ,so spreading out.
Careful not to over do it as they have to allow the coil to go back on.
Do the same on the cap.
Check that the coil and cap fits.
If you dont want to glue just check that the cable does not wiggle and your good to go.
I placed some Araldite on the base internally so that the coil stuck in firm.
Push the coil in and press firmly and allow to dry.
Using a quick set Araldite speeds things up.

Once back together it will run smooth with no judder or change of direction.
Last edited:


