Thanks RudeDogg. Two of the target colours on this table are pretty much unobtainum so i'll have to buy red targets for those and just switch the post over. It'll be ok for a little while I suspect but i'll put it in for another 'job to do' next year.
Pinball info
You are using an out of date browser. It may not display this or other websites correctly.
You should upgrade or use an alternative browser.
You should upgrade or use an alternative browser.
In Progress Rocky & Bullwinkle Shop Log
- Thread starter Wiredworm
- Start date
Thanks RudeDogg. Two of the target colours on this table are pretty much unobtainum so i'll have to buy red targets for those and just switch the post over. It'll be ok for a little while I suspect but i'll put it in for another 'job to do' next year.
Arnt the coloured bits just riveted on? Just unrivet them and re rivet
Unrivet? Re-rivet?
How? What tools and techniques will I need for that?
Carefully drill them out.
Then borrow someone's rivet press, rivets you can prob get from the legend
Thanks. Worth knowing and I may well take that route. Only slight concern to me would be that if I screw up when drilling out the rivets then i've effectively knackered a target that I can't get a replacement for. Hmmmmm, food for thought over the next few weeks maybe.
Alternatively I could look into getting what colours I can and see if I can find a way to modify them. The targets are known as 'deep oblong' targets and Marcos carry orange, yellow, transparent green and transparent orange. I need red, yellow, green and blue. Perhaps I could make the missing colours somehow.
Alternatively I could look into getting what colours I can and see if I can find a way to modify them. The targets are known as 'deep oblong' targets and Marcos carry orange, yellow, transparent green and transparent orange. I need red, yellow, green and blue. Perhaps I could make the missing colours somehow.
Have a look on pinball resource looks like they have em all
Ha I didn't see that bit
They seriously need to modernise that site
The Pin is looking a little forlorn right now. In bits and sitting on the floor with no way of playing.
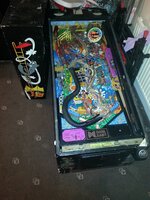
Of course the good news is that the lockdown bar, legs, side rails and backbox brackets are all now stripped and should be going to the powder coaters tomorrow.
Also managed to get the plastic strips that hold the glass in place removed so might well get some replacements for those (assuming I can find a UK supplier) and fit them whilst i've got it in bits. Other key parts i'm after will be leg protectors and bolt protectors so that my nice new shiny chrome bolts don't damage the newly powder coated legs. Also need to get some new leg levellers.
Should look nicer after that's all done. Having the cabinet stripped has made me realise how bad the back of the cab is. Really need to strip it down and get it filled but suspect i'll end up delaying that until next year when the weather starts to improve. In the meantime i'll be looking to pick up a scanner and get the artwork recreated in Photoshop ready for having decals made.
Last edited:
Jesus dude you've really gone to town on that machine, I'm totally impressed. Many wouldn't have gone to all that trouble for a non-rare item, but it's a fine game and you never forget your first pin, and I bet you've enjoyed every minute of it. Learnt loads too and spent loads and all well spent. New playfield still on your to-do list?
How about making a list of what you've done so far?

How about making a list of what you've done so far?

Thanks Dan. Like you say it's not a especially rare or popular machine but i've got no intentions of selling it on so the money spent on it really isn't a massive concern. If I had to total everything up so far i've probably spent around £300 on it but i've had massive fun playing it as has the wife and the kids. It'll only get more and more use in the future as the grandkids get to an age where they can start to play it properly; our 3 year old grandson loves playing it but initially he was just smashing the flippers as quickly as he could. He's gradually improving and now actually seems to target the ball.
Funnily enough I was thinking about doing a list of the work done so far on the way to work this morning so i'll try to put that together. Although there is still a lot to do i'm quite pleased with the progress so far.
I'm still interested in doing a playfield replacement but funds just don't allow it right now and I don't know when they will. The NOS playfield I spied online is still there but whether it will be when I have the money to afford it is another matter. I can't obsess over it though so i'll just leave it and if it's there when I have the cash then great; if not then i'll just have to strip my playfield out again and see if I can get it fixed up. Absolutely worst case I could probably invest the money i'd spent on that NOS playfield and post it over to Germany to see what Henrik could do with it. Again, some might say it's overkill for an old DE table but my objective here is to make it as nice as possible; and at the same time i'm learning skills that I can hopefully apply to a more expensive table (which hopefully will come along in a few years once we've got the wedding out of the way and got moved somewhere with a bit more space).
Still not sure what i'll be doing about the cabinet artwork. At the moment i'm thinking of grabbing a scanner and seeing how well it scans and how much of a cleanup job I can do on it.
But yeah, it's coming along. I don't expect it to be fully 'done' anytime soon though. Priority now is to get those bits coated and at least the legs back on so I can actually play it again.
I don't think you'll ever get the Nell mech working again. If I was you, I'd buy another game with original working mech, swap it over then sell it on. I think it's the only way.
Sounds like a challenge to me Dan. ;-)I don't think you'll ever get the Nell mech working again. If I was you, I'd buy another game with original working mech, swap it over then sell it on. I think it's the only way.
It's still on my list to do and I will return to it. When I finally do get it working you'll hear the cheering all the way down there in London.
So here we are. The list of what's been done so far. I'll most likely remember new stuff so i'll add those items as I remember them.
But so far i've:
I think that's pretty much it for now. It's a reasonable list when you consider I only got the machine in June. There is still plenty more to do as well including some woodwork on the cabinet and fixing up that shark bite at the back of the cabinet. Only issue there is that that's more outdoor work so it will most likely get postponed until later.
The list of jobs i'd like to do looks like this:
But so far i've:
- Stripped the playfield and cleaned it using the Treasure Cove cleaning kit. It did a reasonable job but I don't think i'd want to use something as abrasive on a non-clear coated playfield again. Need to try something else next time.
- Cleaned all metal parts
- Replaced the GI and the majority of inserts on the playfield with LEDs. Only a handful of bulbs under the playfield remain and these will get swapped out in the next few weeks.
- Replaced the broken Lion plastic in the back box.
- Replaced the rubbers. Now using white rubbers on the playfield and red on the flippers.
- Cleaned all mechanisms and replaced the coil sleeves.
- Fitted Cliffy Protectors on the Spin & Win Ramp and the Aesop Hole. There's already a protector (custom made) on the WABAC ramp so i'lll leave that as is. At some point later I want to replace the WABAC ramp so i'll fit the proper protector when I do that.
- Did a coil mod which drops the voltage on the Lion coil. This is to stop it getting smashed up (although the new PETG lion is much more robust anyway)
- Fixed the Nell Log Motor which seemed to have become siezed. Refitted with a new meccano wheel which means the saw blade now spins. Just the spring to source now so I can get Nell moving.
- Replaced the flipper springs
- Fitted padding underneath the hat trick plastics to give them something soft to land on. The original padding had pretty much entirely worn away.
- Fitted new support legs on the playfield.
- Replaced the balls
- Waxed the playfield
- Replaced missing screws on the lane return guides
- Replaced missing screws from ramp flaps
- Fitted foam behind the BOMB targets and regapped leaf switches
- Fixed a few of problems of my own making.
- Replaced a switch which I managed to knacker
- Replaced Q51 after I managed to wire things up wrong and blew it
- Stopped the orbit gate from making a hideous noise when activated. Only started doing it after I rebuilt the table after cleaning.
- Labelled up all cables in the head of the Pin
- Upgraded the software to 1.3
- Removed the legs, side rails, lockdown bar and backbox brackets.
I think that's pretty much it for now. It's a reasonable list when you consider I only got the machine in June. There is still plenty more to do as well including some woodwork on the cabinet and fixing up that shark bite at the back of the cabinet. Only issue there is that that's more outdoor work so it will most likely get postponed until later.
The list of jobs i'd like to do looks like this:
- Replace the missing screws in the backbox. Some of the boards are only held in with one or two screws.
- Replace the playfield glass
- Fix up the woodwork on the cab. The section below the head needs replacing as it's badly split
- Re-powder coat the habitrails in yellow, blue and green (better than just repainting them)
- Fill in the shark bite at the rear of the cab.
- Drill and fit a cord cup so the power cord can be routed correctly
- Re-instate the original roto-lock locking mechanism.
- Scan the cabinet artwork and touch up so I can produce vinyl decals.
- Fill, sand and repaint the cabinet. (This is subject to the decals of being good enough quality and me biting the bullet and removing the original screen-printed artwork)
- Fit the above decals (subject to them being of good enough quality - will most likely start with the head as a test run)
- Recreate any broken plastics which aren't available as either NOS or repro. Where NOS or repros are available i'll buy replacements.
- Get the Nell Assembly fully working
- Fix up the paint on Bullwinkles Nose
- Replace the final inserts under the playfield with LEDs.
- Replace the Back Box GI with LEDs
- Fit a NOS playfield (dreaming here probably)
Last edited:
Have you seen there's some hat trick plastics on the bay atm?
I'm guessing they're the ones being sold by Classic Arcades?
Jeff did a run of the Lions which is where I grabbed mine from. My other two are in pretty good condition so no need to do anything with those. They run at a lower voltage than the Lion originally did so they don't take as much punishment.
Jeff has also done Bullwinkles arm but again mine looks to be relatively good condition. In fact it's got a reinforced plate on the back of it which I thought had been added by someone else but i've seen it on a few tables now so i'm not sure if that's the norm.
No idea I didn't view them I just rem seeing the lion and an arm
I've ordered new leg levellers, bolt protectors and some felt cabinet protectors for now. Decided against the metal protectors for the moment at least until i've managed to repair the back end of the cabinet. Didn't go for the plastic coloured ones either because until I get the legs back from the coaters I can't be sure of the match. The felt protectors will at least offer some protection and I can always swap them out at a later date.
I'm picking up the metal parts on Saturday so these bits should arrive in time for me to refit the legs and the side rails at the weekend.
The glass channel I need isn't available in the UK it would appear, although i'm still awaiting a reply from Andy. Worst case Phil says he'll be getting some in before Christmas. This means i'll either leave the side rails off entirely or if I do affix them I won't use any ahesive for the moment as i'm going to have to take them off again anyway to replace the glass channels.
Boooo!! Slight delay on things.
Couldn't get the side rails into their shot blasting cab so they've had to run them up to another place to get them done. Means my bits won't be done until Monday now and i'm stuck in Belgium most of next week.
More news hopefully after next Thursday.
Couldn't get the side rails into their shot blasting cab so they've had to run them up to another place to get them done. Means my bits won't be done until Monday now and i'm stuck in Belgium most of next week.
More news hopefully after next Thursday.
Arrived back in the UK from Belgium today and thankfully had arranged to work from home for the day. Took a detour via the powder coaters on the way home and was happy to find my bits were ready for collection, all that is apart from one back box bracket which he'd managed to chip the coating on. Unfortunately when he packaged things up he'd not realised the end wasn't secured and the bracket hit the floor and chipped. I've brought everything else home and will go back to collect that later; it just means I can't drop the head for now which isn't really any issue.
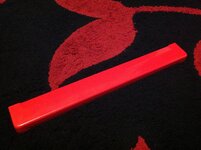
Anyway. Here's some pictures of what they did. The lockdown bar.
And the legs.
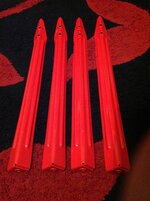
Was pretty happy with the work they did. I spotted a couple of minor faults but I think i'm probably being a little picky and i'll just fit these at the rear of the table as they won't be so viisble.
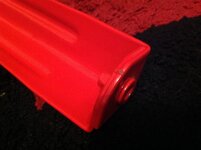
First we had a tiny chip on the inside of the bottom of one of the legs.
And a tiny mark at the top of one of the legs.
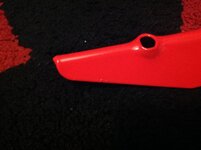
Anyway I grabbed the new leg levellers, bolts, bolt protectors and felt leg protectors i'd bought and set about putting the legs back on.
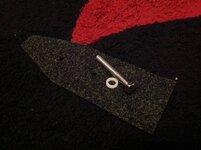
It became clear pretty quickly that the felt protectors were going to be visible at the edges of the legs so I decided to trim them back slightly to prevent this. Here's how they were overhanging initially.
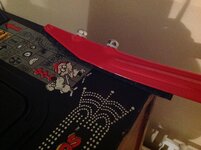
Unfortunately at this point I got a bit enthusiastic and didn't take so many photos. I've refitted the legs, the side bars, the lockdown bar and the one back box bracket. The side rails aren't fitted back properly as there's still some of the old adhesive padding that needs removing but as I also want to replace the glass channels I figured i'd put the rails on to see how they look and remove them in the near future to clean off the remaining adhesive and replace the glass rails.
Anyway, here's what it looks like with everything back in place.
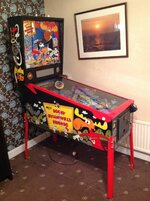
Next jobs to do are:
1. Remove the bolts/fitting for the back box brackets and side rails. Clean them up and repaint in satin black.
2. Remove the side rails and clear off the rest of the adhesive left over from the old rails.
3. Replace the glass channels on both sides as they are badly chipped.
4. Apply new adhesive pads to the rails, refit and secure with the newly painted bolts.
5. Replace the flipper buttons with new yellow ones.
Anyway. Here's some pictures of what they did. The lockdown bar.

And the legs.

Was pretty happy with the work they did. I spotted a couple of minor faults but I think i'm probably being a little picky and i'll just fit these at the rear of the table as they won't be so viisble.
First we had a tiny chip on the inside of the bottom of one of the legs.

And a tiny mark at the top of one of the legs.

Anyway I grabbed the new leg levellers, bolts, bolt protectors and felt leg protectors i'd bought and set about putting the legs back on.

It became clear pretty quickly that the felt protectors were going to be visible at the edges of the legs so I decided to trim them back slightly to prevent this. Here's how they were overhanging initially.

Unfortunately at this point I got a bit enthusiastic and didn't take so many photos. I've refitted the legs, the side bars, the lockdown bar and the one back box bracket. The side rails aren't fitted back properly as there's still some of the old adhesive padding that needs removing but as I also want to replace the glass channels I figured i'd put the rails on to see how they look and remove them in the near future to clean off the remaining adhesive and replace the glass rails.
Anyway, here's what it looks like with everything back in place.

Next jobs to do are:
1. Remove the bolts/fitting for the back box brackets and side rails. Clean them up and repaint in satin black.
2. Remove the side rails and clear off the rest of the adhesive left over from the old rails.
3. Replace the glass channels on both sides as they are badly chipped.
4. Apply new adhesive pads to the rails, refit and secure with the newly painted bolts.
5. Replace the flipper buttons with new yellow ones.
Last edited:
woah, it's armoured!
looks great mate
looks great mate
Another job that i'm going to have to do is to sort out this part of the machine. As you can see from the photos below it's badly damaged and the lack of cord cup means that the cable has to route out through the damaged area in order to be plugged in. This is going to stop me re-instating the original roto-lock mechanism.
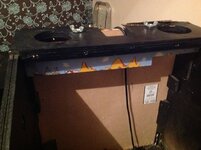
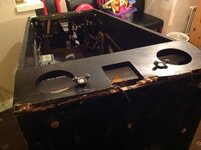
I'm not quite sure how this piece at the top is fixed in place. I've removed the three screws on the back and whilst it's a bit looser it's still not shifting. There's no signs of screws on either side but i'm pretty sure there is something at the edges holding it in place. I'm going to have to approach this very carefully as I don't want to cause unnecessary damage but the plan is to fully remove this entire piece and make a new section to go back in place of it. Before doing so though i'm going to have to order a new cord cup and get that fitted. The issue I face right now is that I can't find a UK supplier who sells them.
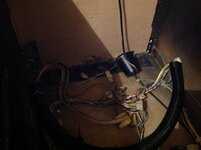
Once the cord-cup is fitted and the roto-lock back in place I can hopefully get the braiding issue sorted. As you can see below the majority of the cabinet is braided but there should be a section which usually would go up to the bottom half of the roto-lock. When the lock is engaged this would bridge the braid up in to the top box. This missing segment was why I was having issues using my multimeter to read voltages when I was diagnosing faults previously.
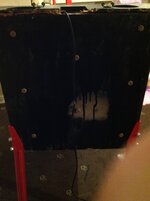


it's a thing of beauty ain't it. it was me that put that bit of MDF in there, and spraypainted the back (but ran out, hence the blank drippy area) - as originally there was no back/base on it at all, just an empty hole that a tramp could crawl into for some slumber. that MDF is ok i suppose, but it's not exactly a great job, is it?
anyway. what i'm saying is that since you've already invested so much time and cash in this, maybe you should prise off that junk that i did (for one thing, fitting the back legs on properly has never been right) and do it properly, including that top flat bit you're on about. otherwise that cup is never gonna fit through properly. that or drill a circular hole to fit the cup (buy a new cup) and take the plug off to feed it through
fixed the Nell yet?


Nice choice on the powder coat colour, really suits the game 
what about the wallpaper and carpet though?
