What's new
Pinball info

Register a free account today to become a member! Once signed in, you'll be able to participate on this site by adding your own topics and posts, as well as connect with other members through your own private inbox!

In Progress Oh no not another Roadshow shop log...

setchuk

Site Supporter
Joined
Sep 1, 2024
Messages
14
Location
Wales
My Roadshow has been sat in storage for a number of years, it was fully working up until Ted's Eyes went wonky and while I ordered the part to fix them, it never got fitted and it was packaged up ready for me to relocate.

Well I decided to move it into the house a few weeks ago but it was generally quite tatty with typical art fade and a fair few war wounds, to get it in the house I literally had to start dismatling it and then realised If I put it back together as is not only will it not look great indoors but I always promised myself i'd restore it one day.. and i'd just put it off again and never do it.

So this was initially just going to be a re-decal but one thing has led to another and well.. with the exception of the playfield.. which i doubt i'll have any hope in getting, every cabinet based nut and bolt is being replaced..

I was never going to post much on this if at all but here seems as good a place with likeminded people who might appreciate a complete Pinball novice trying to restore a Roadshow.
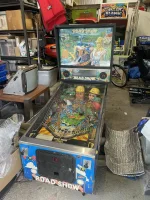

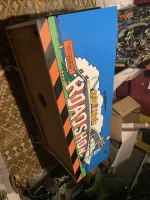
IMG_2615.webp
This was after it was unwrapped and I was pre-restore mode.

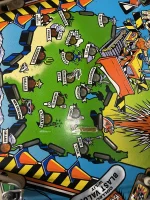
And my moinor playfield blemish.. Im leaving this as is for now.. until I find a new playfield and then that will also undergo a complete restoration.
IMG_2616.webp

IMG_2992.webp

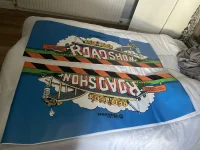
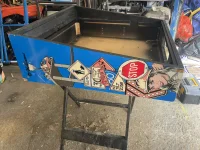
I eventually decided before I was going to strip the cabinet, Id order some artwork.. in the end I flipped a coin from 2 suppliers and ordered some from Pinballdecals.eu.. other than terrible communications the artwork arrived and entered the point of no return and stripped it down. I am very happy with the quality of the artwork.
IMG_3034.webpIMG_3053.webp

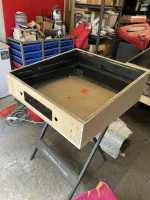
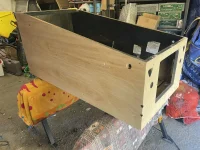
I probably should have taken more photos but in the end I spend 3 weeks trying to patch every little blemish.. the quiality of the head especially out of the factor was terrible.. so lots of sanding and filler.

The head and base were both primed and I clearcoated the head, rather than replace the black vinyl on the top and bottom I chose to keep the wood effect as I think it looks much nicer. I'll grab some more photos of this but for now there is this with the first side of artwork on.
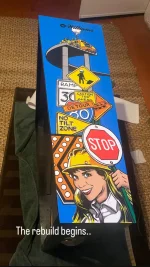
C4144C00-A185-4CBC-9715-1CCCD3D4509C.webp
 
A Happy mistake.. or should i send them back. ? one of the reasons why i've decided to post my progress in here.

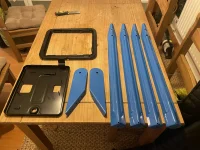
So I dug the legs out of storage and thought they were better condition than they were, and while I had a selection of metal work to strip and replace and based on how much i spent on primer and paint for the head & body.. plus my time.. I figured Id save myself the hassle and get them powder coated.. picked them up today and they messed up, but I sort of like them.

The head hinges... they've said i can drop them back and they will re-do them but I sort of like them in Roadshow blue.... what do you think ?

IMG_3104.webp
 
Hinges look fine to me.

You can get a playfield from


They also make the best repros in my opinion.
Yeah i've seen these.. but wow thats a chunk of change I may bite the bullet by the time the cabinet has been done but I'd like to get it back together soon to clear up all the parts that are scatered about the house.. maybe i'll treat myself in the new year.

Ironically, reading back through the posts i missed a Playfield on ebay back in April when I wasnt even thinking about this but a fellow member on here got it.
 
Without wanting to upset you, the prototype shown on the flyer also had the side rails and front moulding in blue. Would that be a little too 'overspray special' for you?
 
Without wanting to upset you, the prototype shown on the flyer also had the side rails and front moulding in blue. Would that be a little too 'overspray special' for you?

Oh yes, I prefer the chrome finish on the side rails and front Bar, I've seen one done in Yellow on here.. its nice but not for me.
 
Roadshow is way underrated. It’s got really good shots and decent code. Still tweaking mine. New lockdown bar ordered and flipper fidelity speakers bought for it..
 
Bit of progress, after some last minute ordering of bits and bobs that i didnt expect to need.

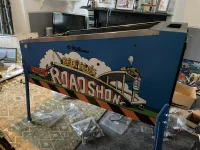
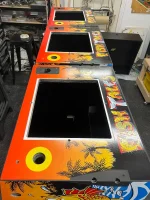
I've been terrible at getting decent pictures of things as I go, but here's the Decals, really quite happy with the quality of these, although.. up until now they havent even been lined up with the cabinet to confirm they fit.. 🙃

IMG_3112.webp

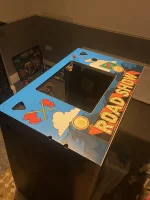
After getting a hand to drag the machine indoors, I lined up the side and confirmed they were the right size so though i'd crack on with the decals.. First time nerves here..

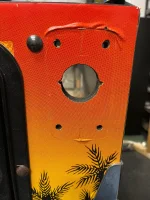
But whats did i find, so the front decal has a couple of alignment points, notably the location of the start and Extra ball buttons.. the coin door (which has some wiggle room based on the coin door surround.. but the botom... when everything else was lined up it appeared id have to cut at least an inch off the bottom of the decal and through the Road Show wording.. this is either an error in the artwork design or just a failing on the design itself..

I looked up lots of pics of other cabs and my original pictures and while the cutting of the artwork isnt as pronounced there is some that certainly gets cut off.. and i didnt like it.

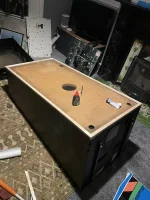
So I measured up what it would need and confirmed there was just enough extra decal on the side, and added an extra bit to the bottom of the cab, mine was very worn anyway and it now gives me somewhere i could put some blue LED downlights if I wanted to.

What this did mean though was I was turing my living room into a sanding and painting booth as Im not dragging it back outside again.

IMG_3098.webp

A tiny bit still needs to be shaved off but at least you see the whole decal as it was intended.

IMG_3105.webp

Sides went on too without too much drama.
IMG_3194.webp

After this I left it sitting for at least a week to allow the glue to settle on the decals, then cracked on with the rebuild.

Couldnt wait to get it back on its feet, side rails and new Flipper buttons.
IMG_3196.webp
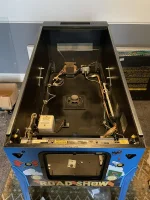
Starting to rebuild the internals, which is now done.. I need to get a batch of new "internal stickers" i've seen them online somewhere butwill need to get these at some point and remove the peeling old ones.
IMG_3197.webp

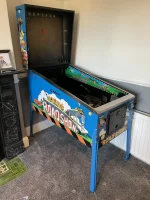
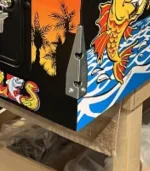
There she stands.. looking grand.. id forgotten how big this one is.. Picked up some side blades too as an added extra..

IMG_3206.webp

Now just need to work out my plan for the playfield..

seeing this as it stands looking pretty fresh I'm torn between just throwing the old playfield back in while I hunt for a replcement that I dont need to sell a kidney to aquire or wait..

I'll likley give it a quick spruce up and get it back in for now so i can at least play it.

Pretty happy with my first Pinball restore so far, its not perfect.. but its a million times better than it was.
 
Looking good. If you need new internal labels I can help you out with those 👍🏻

I would recommend swapping those plastic leg protectors out with the hidden metal protectors as those plastic ones will cause the new decals to wrinkle for sure.
 
Looking good. If you need new internal labels I can help you out with those 👍🏻

I would recommend swapping those plastic leg protectors out with the hidden metal protectors as those plastic ones will cause the new decals to wrinkle for sure.
Thanks, re labels, yes that would be great, I’ve found them on eBay.com but not found anything in uk yet.. can you replicate serial number etc ?

As for the leg protectors, ok.. you’ve twisted my arm.. assume you mean the ones that screw into the sides and then pull the legs away.. I’ll grab some from pinball heaven on my next order, I’ve red somewhere about cutting the decals as well, but wasn’t too keen on that idea without knowing much about it.. I don’t like the idea of cutting new decals..
Yes I can get all the labels you need, including the serial numbers. Just send me a on with what you need.

In regards to the leg protectors, I get the ones from @David retro as I find the gauge metal used is slightly thicker than any others on the market.

When I did use the thinner ones in the past, the legs still marked the decals in places.

You have to cut around the leg protectors when fitted. If not the decals under them will start to wrinkle up. I also like to cut around the shooter rod plates or handles depending on the game, as these can cause wrinkling to newly applied decals, especially if they are over tightened.

Just use a sharpe blade and score around them. It’s not difficult, just take you time and go slowly. You can then either leave the decal on and peal it off. I personally like to remove the small piece that’s been cut.
Also when fitting them, use a small washer with the screws. It helps push the leg away from the newly applied decals.
 

Attachments

  • IMG_4622.webp
    IMG_4622.webp
    300.8 KB · Views: 13
  • IMG_9391.webp
    IMG_9391.webp
    144.5 KB · Views: 13
  • IMG_7371.webp
    IMG_7371.webp
    69.5 KB · Views: 12
Back
Top Bottom