Pinball info
You are using an out of date browser. It may not display this or other websites correctly.
You should upgrade or use an alternative browser.
You should upgrade or use an alternative browser.
Complete Hook - The Restoration You've Been Waiting For!
- Thread starter PeteB
- Start date
Nice
Bubbled up translites.... and how to fix them!
So I mentioned a while back I would show people how to fix this. Seems like no matter how much and many times you clean the glass you always end up with these annoying bubbles:
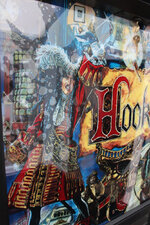
The answer is to use ANTI STATIC TV cleaner and a microfibre towel:
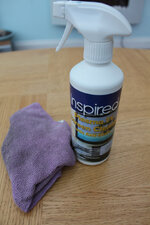
Remove the translite from the glass. Clean both sides with the anti static, and do the same with the glass. Reassemble, and hey presto:
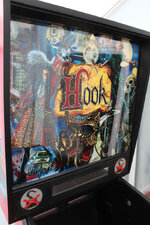
Just say "NO" to bubbled translites.
So I mentioned a while back I would show people how to fix this. Seems like no matter how much and many times you clean the glass you always end up with these annoying bubbles:

The answer is to use ANTI STATIC TV cleaner and a microfibre towel:

Remove the translite from the glass. Clean both sides with the anti static, and do the same with the glass. Reassemble, and hey presto:

Just say "NO" to bubbled translites.
Can't say I've ever had that prob
Can't say I've ever had that prob
Lucky you
It's definitely a common problem, I've had it happen on a few pins. See it on eBay listings all the time too.
Lucky you
It's definitely a common problem, I've had it happen on a few pins. See it on eBay listings all the time too.
Good tip Pete, I've had this on several pins before and never been able to resolve it
Progress, progress, progress....
It's playfield time:
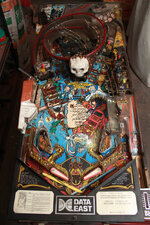
Getting the main items off and uncovering the filth beneath:
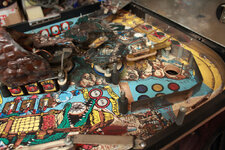
Loving the dirt. That's gonna be so satisfying to clean up:
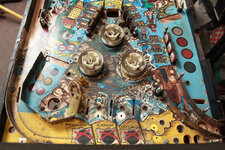
Top side completely bare, and sorry but I couldn't help but give it a quick wipe already so not a true reflection of how dirty this thing was:
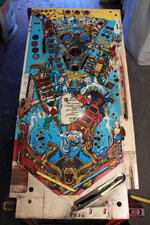
Getting it clean and giving it a shine up! You've all seen in my previous shop logs how I do this, so for this one just look at it and admire:
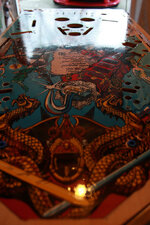
Mmmm shiny:
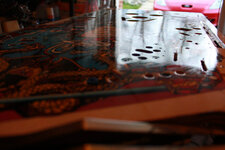
It's playfield time:

Getting the main items off and uncovering the filth beneath:

Loving the dirt. That's gonna be so satisfying to clean up:

Top side completely bare, and sorry but I couldn't help but give it a quick wipe already so not a true reflection of how dirty this thing was:

Getting it clean and giving it a shine up! You've all seen in my previous shop logs how I do this, so for this one just look at it and admire:

Mmmm shiny:

A little more progress today. Flipped the playfield over and starting work on the underside. So far nothing too offensive and not much else that I hadn't posted about earlier, except for:
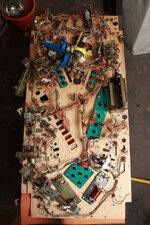
Speaking of cleaning, all the insert lamps are being removed and I'm washing the under side of the inserts with a cotton bud and some alcohol:
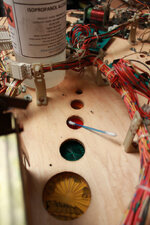
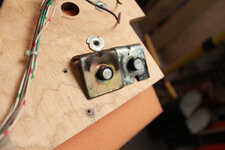
Check out how beat up the flipper coil stops are:
More updates to follow soon!
- Flipper coils are trashed, the sleeves in them were absurdly tight so they're getting renewed.
- Couple of other coils with either broken lugs or tight sleeves, one particular offender was the right hand scoop. How unusual.
- 2 out of 3 pop bumper housings are broken, and the 3rd one looks a bit brittle so they're all getting replaced with nice shiny new blue ones. At least they will all match.
- Couple of missing lamp sockets, with wires dangling, but easily replaced.
- Everything is incredibly dirty, which means this all needs a thorough good cleaning.

Speaking of cleaning, all the insert lamps are being removed and I'm washing the under side of the inserts with a cotton bud and some alcohol:

Check out how beat up the flipper coil stops are:

More updates to follow soon!
Anymore progress??
A little bit of progress....
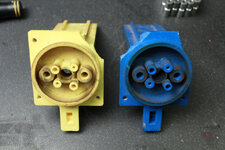
Rebuilding of the pop bumpers. Old on the left, new on the right. The old one doesn't actually look too bad here, I guess the photo is quite forgiving. All pop bumpers now have new (blue) brackets:
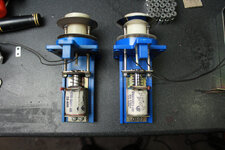
This is unfortunately what happens to those plastic brackets over time. The cracks couldn't be seen while they were installed but as soon as I unscrewed them they fell apart. Plus, it was no good having an odd yellow one:
Each standup target has been taken apart, cleaned, new decals applied and new foam buffers installed, then switches were adjusted to perfection. There are 10 in this game. Took a while to do all of these. Here's one done compared to 2 scruffy ones:
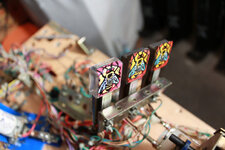
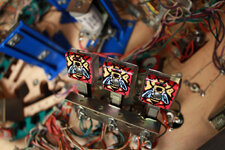
The same set, now all done:
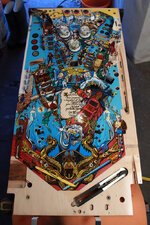
Finally, with 99% of the underside done I can now flip the playfield over and start rebuilding the top. For me this is exciting part, seeing a super clean game coming back together:
The targets are all looking nice now:
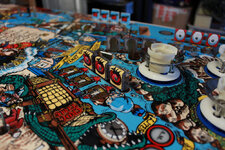
The drop target mech was taken apart and fully rebuilt. The targets themselves cleaned up nicely and look brand new once new decals are installed:
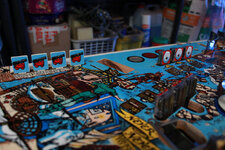
LED's, posts and rubbers now going in:
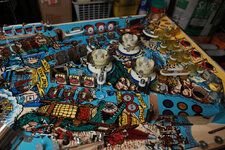
Starting to look nice:
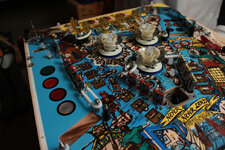
The full playfield so far. Slow but steady progress, taking my time to make sure things go in the right place and are adjusted properly so the game plays the best it can:
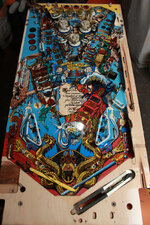
To be continued....
Rebuilding of the pop bumpers. Old on the left, new on the right. The old one doesn't actually look too bad here, I guess the photo is quite forgiving. All pop bumpers now have new (blue) brackets:

This is unfortunately what happens to those plastic brackets over time. The cracks couldn't be seen while they were installed but as soon as I unscrewed them they fell apart. Plus, it was no good having an odd yellow one:

Each standup target has been taken apart, cleaned, new decals applied and new foam buffers installed, then switches were adjusted to perfection. There are 10 in this game. Took a while to do all of these. Here's one done compared to 2 scruffy ones:

The same set, now all done:

Finally, with 99% of the underside done I can now flip the playfield over and start rebuilding the top. For me this is exciting part, seeing a super clean game coming back together:

The targets are all looking nice now:

The drop target mech was taken apart and fully rebuilt. The targets themselves cleaned up nicely and look brand new once new decals are installed:

LED's, posts and rubbers now going in:

Starting to look nice:

The full playfield so far. Slow but steady progress, taking my time to make sure things go in the right place and are adjusted properly so the game plays the best it can:

To be continued....
Nice job Pete, I appreciate the details you always put into these logs, thank you. The shop log forum pages are my secret pleasure.
Those blue DE bumper brackets, they always crack and snap but I didn't know you could still get new replacements. Are they good? pricey?
Those blue DE bumper brackets, they always crack and snap but I didn't know you could still get new replacements. Are they good? pricey?
Love theses restoration threads....

Nice job Pete, I appreciate the details you always put into these logs, thank you. The shop log forum pages are my secret pleasure.
Those blue DE bumper brackets, they always crack and snap but I didn't know you could still get new replacements. Are they good? pricey?
Thanks mate!
Got the bumper brackets from Pinball Center, as with most of my parts. They're about £13 each: http://www.pinball.center/en/shop/p...mper-parts/2368/bumper-housing-data-east-sega
Once they start snapping you lose performance due to them flexing. They're not ideal to start with but hey ho, it is what it is.
A little more progress today.
Got the wood rails painted and installed. Mirror polished ball guides done and installed. Few of the supporting structures installed and the rest of the rubber:
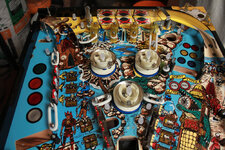
Cleaning all the muck off plastic parts and then flame polishing them is a slow process:
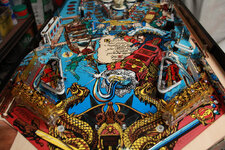
But the end result looks super nice:
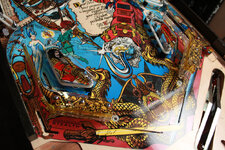
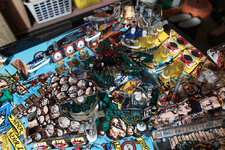
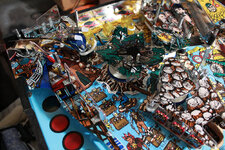
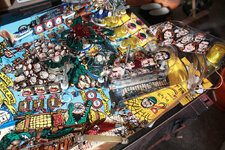
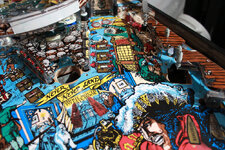
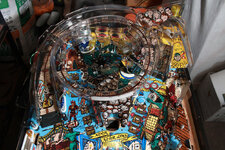
Playfield overview so far:
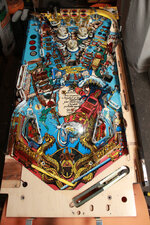
Got the wood rails painted and installed. Mirror polished ball guides done and installed. Few of the supporting structures installed and the rest of the rubber:

Cleaning all the muck off plastic parts and then flame polishing them is a slow process:

But the end result looks super nice:

Playfield overview so far:

Been at it again tonight...
More plastics installed:
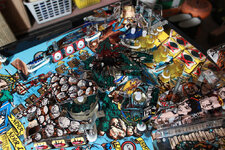
Looking good:
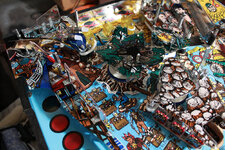
Right ramp all cleaned and polished:
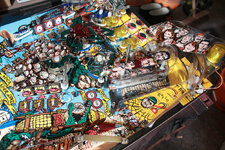
I have some playfield touchups to do around the scoop holes. Hole protectors will take care of most of it but the wear protrudes just slightly:
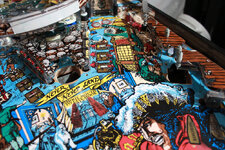
Left ramp almost done, just need to sort out the light rope and they its done. Love how clean and shiny the ramps are turning out, they always look so cloudy on other Hook's:
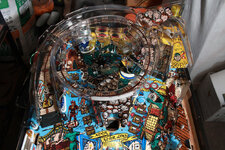
Progress overview:
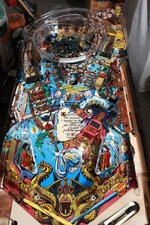
More plastics installed:

Looking good:

Right ramp all cleaned and polished:

I have some playfield touchups to do around the scoop holes. Hole protectors will take care of most of it but the wear protrudes just slightly:

Left ramp almost done, just need to sort out the light rope and they its done. Love how clean and shiny the ramps are turning out, they always look so cloudy on other Hook's:

Progress overview:

Wow looks great. Let me know what colours you use around the wear holes I have the same issueBeen at it again tonight...
More plastics installed:
Looking good:
Right ramp all cleaned and polished:
I have some playfield touchups to do around the scoop holes. Hole protectors will take care of most of it but the wear protrudes just slightly:
Left ramp almost done, just need to sort out the light rope and they its done. Love how clean and shiny the ramps are turning out, they always look so cloudy on other Hook's:
Progress overview:
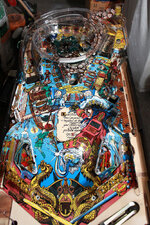
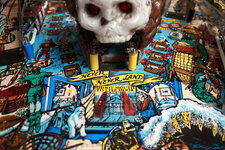
Playfield touch up done, hole protector installed, and yellow post sleeves added to blend in nicely. The touch up wasn't easy as their is no exact match for the blue so I went through lots of mixing and experimentation until it looked right:
Cleaned and reinstalled the light rope. Just so happens that I had some small red cable ties handy so I tried fixing it in place with these instead of standard black. I think it looks better:
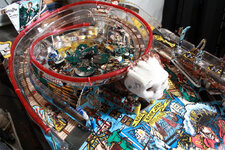
Shooter lane plastic cleaned, polished and installed:
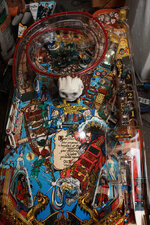

Cleaned and reinstalled the light rope. Just so happens that I had some small red cable ties handy so I tried fixing it in place with these instead of standard black. I think it looks better:

Shooter lane plastic cleaned, polished and installed:

Looks awesome what colours did you use to get the blue?
How do you clean up the plastics they look like new?
Lastly how did you remove the start button as I tried to remove it but has a white plastic bit on it I can't remove.
How do you clean up the plastics they look like new?
Lastly how did you remove the start button as I tried to remove it but has a white plastic bit on it I can't remove.
Looks awesome what colours did you use to get the blue?
How do you clean up the plastics they look like new?
Lastly how did you remove the start button as I tried to remove it but has a white plastic bit on it I can't remove.
For the blue, I just mixed a light blue from a Reeves selection pack with some white until the balance was right. The yellow scroll near the scoop also had to be touched up and for this I just took a standard bright yellow and mixed a tiny bit of orange to darken in slightly. Fine lines retouched with black. Then the whole piece was masked off and shot with clear to protect it.
Plastics are thoroughly washed with Cif ActiFizz and a clean soft paint brush, then I like to blast them with compressed air to remove the water and so it doesn't leave any water marks. Once fully dry all the plastics get flame polished. This is a tedious process and you have to be very careful, as what it does is melt the surface very slightly to remove scratches. Finally, they are polished with Pledge and a microfibre towel.
Not sure what you mean with the start button. Do you mean the actual switch on the back of it? If so it should just unclip and then you can unscrew the button.
Brilliant - really good work.
Excellent work - flame polishing !!! Sounds scary. When you say you shot with clear - what brand are you using ? I have a couple of touch ups required on my RFM which I can do but don't know much about clear coating
Sent from my iPad using Tapatalk
Sent from my iPad using Tapatalk
Pete if you had the choice to paint the cabinet again or to get a sticker kit for the machine what would you do?
I have found someone who makes the sticker kit to one of the best standards seen in the hobby but in two minds about it
Do i keep it original or sticker it but then it looses its originality
I have found someone who makes the sticker kit to one of the best standards seen in the hobby but in two minds about it
Do i keep it original or sticker it but then it looses its originality
Pete if you had the choice to paint the cabinet again or to get a sticker kit for the machine what would you do?
I have found someone who makes the sticker kit to one of the best standards seen in the hobby but in two minds about it
Do i keep it original or sticker it but then it looses its originality
Never ever, ever, ever, ever, ever will I paint a cabinet like this again. Did I say never? I mean NEVER!! It's taken months! I thought at first that just doing a bit of filler and then repainting the red would be a fast and easy job, but no, it was a VERY long process. Also, the artwork is so detailed that touching up a lot of it was one of the most painful things I've ever gone through.
From now on I will only ever do decals. If I restore a pin in the future with a scruffy cabinet that I can't get decals for, I will just clean it up, do all the other restoration work and make it look the best it can but leave the artwork alone.
Finished installing the last of the playfield components today, including polishing up the wire forms. Everything now locked down tight:
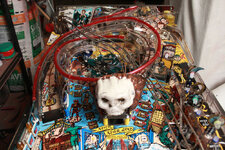
New yellow flipper bats installed (with the DE logo), and red superbands added. Looks well smart:
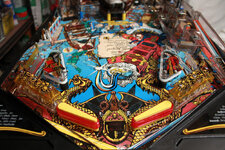
Under the apron coils refurb'd and reinstalled, along with the cleaned up apron. That's the playfield more or less complete now and it's ready to go back in the cabinet for testing:
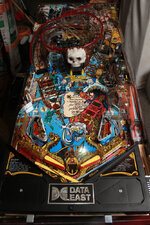
All I need to do now is either repair the left pirate ship plastic or buy a new one. I have managed to source a NOS one but it doesn't come with the base plastic or any of the lamps riveted inside. It's also a tad expensive. So I'm going to try repairing one of the 2 broken ones I currently have.
In other news....
I have scanned and photographed the entire cabinet, and sent the images off to a friend who is going to recreate the artwork in Photoshop ready for printing. We will have Hook cabinet decals available soon which will be for sale on my website at a very reasonable price, along with RoboCop, Batman Forever and Terminator 3 cabinet decals, as well as some other Data East/SEGA titles too.
Also, I've just found out that Chad Hendrickson of PinballCode.com is currently working on a major overhaul of Hook's game code which should be available soon. This is fantastic news! I get the feeling Hook is about to become a much more popular game!

New yellow flipper bats installed (with the DE logo), and red superbands added. Looks well smart:

Under the apron coils refurb'd and reinstalled, along with the cleaned up apron. That's the playfield more or less complete now and it's ready to go back in the cabinet for testing:

All I need to do now is either repair the left pirate ship plastic or buy a new one. I have managed to source a NOS one but it doesn't come with the base plastic or any of the lamps riveted inside. It's also a tad expensive. So I'm going to try repairing one of the 2 broken ones I currently have.
In other news....
I have scanned and photographed the entire cabinet, and sent the images off to a friend who is going to recreate the artwork in Photoshop ready for printing. We will have Hook cabinet decals available soon which will be for sale on my website at a very reasonable price, along with RoboCop, Batman Forever and Terminator 3 cabinet decals, as well as some other Data East/SEGA titles too.
Also, I've just found out that Chad Hendrickson of PinballCode.com is currently working on a major overhaul of Hook's game code which should be available soon. This is fantastic news! I get the feeling Hook is about to become a much more popular game!
Last edited:
That's brilliant news, I saw he posted a bug on the Hook Club thread on pinside so he's obviously on the caseAlso, I've just found out that Chad Hendrickson of PinballCode.com is currently working on a major overhaul of Hook's game code which should be available soon.

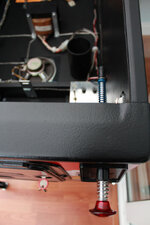
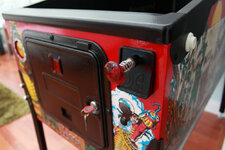
I've discovered a major problem with my shooter rod - it's too short lol!
The new red one is actually a bit longer than the black one I pulled out, which was too short, and so I thought this would be fine, but it's not!
Anyone else have a problem with short shooter rods on Hook?
The new red one is actually a bit longer than the black one I pulled out, which was too short, and so I thought this would be fine, but it's not!
Anyone else have a problem with short shooter rods on Hook?

