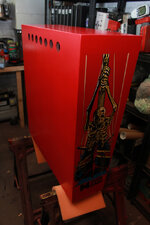
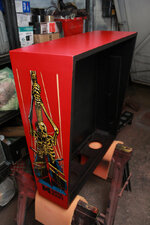
Just what is that chain for on the bottom of the cab? I couldn't work it out when I had mine.
Pinball info
You are using an out of date browser. It may not display this or other websites correctly.
You should upgrade or use an alternative browser.
You should upgrade or use an alternative browser.
Complete Hook - The Restoration You've Been Waiting For!
- Thread starter PeteB
- Start date
Looking good! Question (again) does the heat gun just speed up the drying or does it make it harder than letting it dry naturally? I'm going to tart up my lock down bar side rails and legs on a tommy, is it worth buying a gun for? Can I use a hair dryer? Have you ever though about having your own q&a thread?
Let it dry naturally for about 20 - 30 mins, then heat is applied to hard it. No, a hair dryer wont be hot enough lol. As its for BBQ's they made it so you can bake it on by lighting it. So you need to heat up the metal to a decent temperature.
I dont think a q&a thread would be much use haha, its probably better to ask as i go along with the restore. I dont mind questions lol
Just what is that chain for on the bottom of the cab? I couldn't work it out when I had mine.
Seen them in a few DE cabinets and I've never been able to work them out either haha. But it's all there, clean, and has a pretty label to look at.
Seen them in a few DE cabinets and I've never been able to work them out either haha. But it's all there, clean, and has a pretty label to look at.
Me neither, can't see what to hook it to...
Looking good! Question (again) does the heat gun just speed up the drying or does it make it harder than letting it dry naturally? I'm going to tart up my lock down bar side rails and legs on a tommy, is it worth buying a gun for? Can I use a hair dryer? Have you ever though about having your own q&a thread?
I'm restoring the metal on my HOOK this very weekend using @PeteB BBQ paint - I'm up to etch priming today, 3 coats done then 24 hr to cure. Then I'll be onto BBQ paint tomorrow and Hammer paint for the door and will write up in my HOOK shop log. Once you start stripping the paint you won't believe how rusty it is underneath.
If I can make it look nice anybody can.
There is supposedly a hoop somewhere on the bottom of the playfield to attach the chain to when it's standing upright. All it does is prevent the playfield from tipping forward while you're working underneath. I prefer cabinets with prop rods.
There is supposedly a hoop somewhere on the bottom of the playfield to attach the chain to when it's standing upright. All it does is prevent the playfield from tipping forward while you're working underneath. I prefer cabinets with prop rods.
That's my understanding too. I have the pf out at the moment and definitely no signs of a hoop on the back.
Are you starting the pf strip soon? Am looking forward to that.
Looking forward to seeing that, soz to be naive but can you define etch priming? What primer should I use and do you mean 3 coats of primer before top coat of plasticote? Heat gum used on primer too? Cheers in advance!I'm restoring the metal on my HOOK this very weekend using @PeteB BBQ paint - I'm up to etch priming today, 3 coats done then 24 hr to cure. Then I'll be onto BBQ paint tomorrow and Hammer paint for the door and will write up in my HOOK shop log. Once you start stripping the paint you won't believe how rusty it is underneath.
If I can make it look nice anybody can.
You can buy etch primer from halfords. Halfords sell the Single pack version - easiest to use...
From experience, easy to apply, Sandable, however you'll need 3-4 coats with a very fine sand between them for best results.
The difference between standard primer and Etch primer is that Etch primer Chemically bonds to the metal (so if prepared correctly should never rust)..... in theory....
From experience, easy to apply, Sandable, however you'll need 3-4 coats with a very fine sand between them for best results.
The difference between standard primer and Etch primer is that Etch primer Chemically bonds to the metal (so if prepared correctly should never rust)..... in theory....
Works really well on Lockdown bars, which are then coated with hammerite  (A La RFM for example)....
Great build........... 

Couple of small updates I did before this project was abandoned.
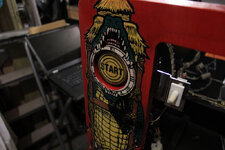
New start button:
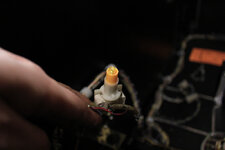
I gots me a proper button LED, instead of grinding down the regular ones to make them fit:
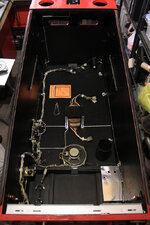
Cabinet interior is looking bang tidy now:
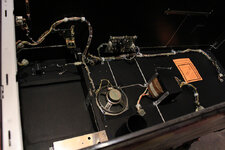
Another angle of that sexy interior:
On all my restores I replace the power cord, but I'm not a fan of those DIY plugs and a bit of cable off a drum. Too many idiots can tamper with it. Instead, I go for a nice thick high quality 5m cord with a fully moulded plug. These come with an IEC connector on the other end and are fitted with a 13A fuse (which I will drop down later).
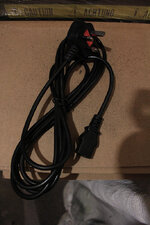
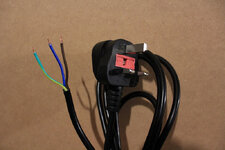
Snip the IEC off and it's ready to be soldered into the game:
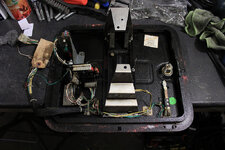
Work on the grotty coin door has started (and since been finished - pics later):
And that's it until 2016! Hook has been shelved due to games for customers getting in the way, and I'm still waiting on a major plastic for the playfield. Maybe I'll resume this in the spring, but for now it's wrapped up and tucked away.
New start button:

I gots me a proper button LED, instead of grinding down the regular ones to make them fit:

Cabinet interior is looking bang tidy now:

Another angle of that sexy interior:

On all my restores I replace the power cord, but I'm not a fan of those DIY plugs and a bit of cable off a drum. Too many idiots can tamper with it. Instead, I go for a nice thick high quality 5m cord with a fully moulded plug. These come with an IEC connector on the other end and are fitted with a 13A fuse (which I will drop down later).

Snip the IEC off and it's ready to be soldered into the game:

Work on the grotty coin door has started (and since been finished - pics later):

And that's it until 2016! Hook has been shelved due to games for customers getting in the way, and I'm still waiting on a major plastic for the playfield. Maybe I'll resume this in the spring, but for now it's wrapped up and tucked away.
Totally stunning work.
It's mirrored at the back. I think it would look really good.
Your project inspires me to try harder to get my Hook back in shape. Hook's a cracking machine.
On a side note, how do people feel about mirror blades in Hook? I'm tempted to do it. Should I?
It's mirrored at the back. I think it would look really good.
Your project inspires me to try harder to get my Hook back in shape. Hook's a cracking machine.
Nice work as always @PeteB!
Just FYI but CPC sell IEC cables with bare wire ends. Save the hassle of cutting and stripping. Think they do them 5m long.
Ah yes:
http://cpc.farnell.com/unbranded/h8-5amvb/lead-iec-socket-c13-bare-end-blk/dp/PL13293
Just FYI but CPC sell IEC cables with bare wire ends. Save the hassle of cutting and stripping. Think they do them 5m long.
Ah yes:
http://cpc.farnell.com/unbranded/h8-5amvb/lead-iec-socket-c13-bare-end-blk/dp/PL13293
Nice work as always @PeteB!
Just FYI but CPC sell IEC cables with bare wire ends. Save the hassle of cutting and stripping. Think they do them 5m long.
Ah yes:
http://cpc.farnell.com/unbranded/h8-5amvb/lead-iec-socket-c13-bare-end-blk/dp/PL13293
Thanks!
I'll have another look on CPC. That one doesn't have a molded 13A socket or an earth wire.
Lovely. I think the mirror blades look great
Doh! Totally wrong item. I got mixed up with needing the IEC not the UK plug!Thanks!
I'll have another look on CPC. That one doesn't have a molded 13A socket or an earth wire.
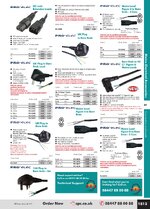
You'll want stuff from page 1813 of the CPC catalogue http://www.easyflip.co.uk/CPC_2015/?page=1813.
They've got two 5m options, one with 0.75mm cores and another with 1.5mm cores. Both fully molded plugs with pre-fitted fuses (3A and 5A respectively). They have a 6m version too.
Pete thanks for this log it helped me loads. Re. the mirror blades I'm not sure, since painting the inside of my cabinet Mars Black I kinda like the black Jolly Roger look.
View attachment 23797
Looking great @astyy - is that you done with Hook now?
Looking great @astyy - is that you done with Hook now?
Yup pretty much I dismantled the playfield and it all cleaned up really nice in a couple of hours once I could get to it - you know the type of thing. I'm knee deep in my VECTOR basket case now but could do with finishing my HOOK log. I also fitted the pt cliffys on both of the sink holes and coloured posts like you.
Btw, your windcoaster ramp looks sparkly clean - how did you clean that up?
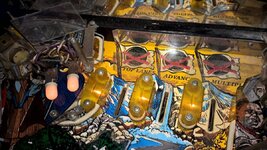
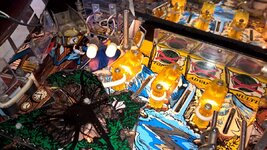
View attachment 23812 View attachment 23813
I haven't even started on my Hook playfield yet. That photo belongs to my friend Mike who just shopped a Hook. Ramp was probably flame polished, and that's what I do on all my plastic parts.
Well I was supposed to resume this next year, but the idea of sitting around to "relax" over Christmas just seems horrifying. So, I've started on the back box.
Gonna have to rip all this out to do it properly but at least the light board was already done earlier:
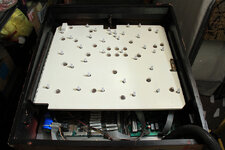
Boom!
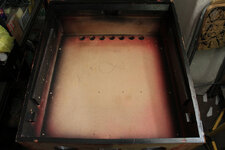
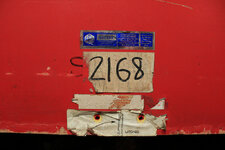
Hmm, I wonder what that number mean't on the back? Also never seen that blue foil sticker on any of my previous DE games:
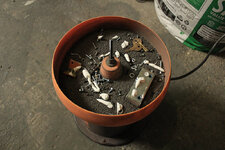
All parts thrown in the tumbler for a few days with some Autosol. There's even a set of keys in there:
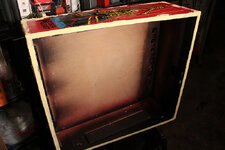
Let the filling commence! Might as well smooth off those edges while I'm at it. I kinda like that look on the new build cabinets:
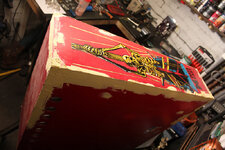
More filling, this is no where near as much work as what the main cabinet required. Same with the paintwork, as although I will repaint all of the red, the detailed artwork isn't badly damaged and will require only minimal touch up:
Gonna have to rip all this out to do it properly

Boom!

Hmm, I wonder what that number mean't on the back? Also never seen that blue foil sticker on any of my previous DE games:

All parts thrown in the tumbler for a few days with some Autosol. There's even a set of keys in there:

Let the filling commence! Might as well smooth off those edges while I'm at it. I kinda like that look on the new build cabinets:

More filling, this is no where near as much work as what the main cabinet required. Same with the paintwork, as although I will repaint all of the red, the detailed artwork isn't badly damaged and will require only minimal touch up:

It looks like that tumbling media has done a lot of work! 
you got an after picture of the tumble? I've never seen what the result is from these
Thinking I may need to get one
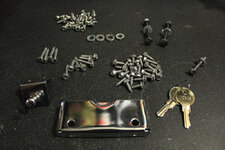
There you go. Look nice don't they?
It looks like that tumbling media has done a lot of work!
Indeed it has. Still get plenty of rounds out of it yet though. The blackening seems to be mainly caused by the Autosol. It turns black after it's first go.
I only replace the media once the old stuff is so dirty it's leaving too much dust on the cleaned parts.
Glad you're back on this love a HOOK shop log me!
I was reading this restore article to the front cab art under the Start button, but every cab is like it - do you think its a flaw? I was of the view its the shadow of the Crocs mouth.

I can recommend the cliffys from PinballPT and Red shooter rod from 1StopPinball for this machine.
Must be some kind of Op serial number as it was marker written on the bottom of your cab too under the coin box before you repainted it.Hmm, I wonder what that number mean't on the back? Also never seen that blue foil sticker on any of my previous DE games:
I was reading this restore article to the front cab art under the Start button, but every cab is like it - do you think its a flaw? I was of the view its the shadow of the Crocs mouth.

I can recommend the cliffys from PinballPT and Red shooter rod from 1StopPinball for this machine.
Last edited:

