Jay yes you're right, it says this when the ball drains (to the right I think), I saw the graphic on the DMD but now I hear the speech from Voice ROM2. Those pesky lost boys had the marbles.My favourite bit of speech from Hook (at least I think it's from Hook) is "I've lost my marbles.."
Pinball info
You are using an out of date browser. It may not display this or other websites correctly.
You should upgrade or use an alternative browser.
You should upgrade or use an alternative browser.
In Progress Hook, line and sinkered...
- Thread starter astyy
- Start date
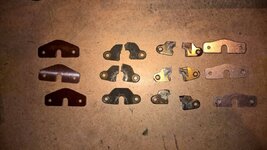
The parts arrived to finish the pops. For comparison here are broken DE yolks vs new and shiny Williams equivalents from Andy.
After mithering @PeteB about what order and ignoring the manual fitted them offset with metal facing in and closest to the pf. Not sure if it was my lack of technique but very fiddly to get back on (x3). One needed a new coil and sleeves throughout whilst they were off.
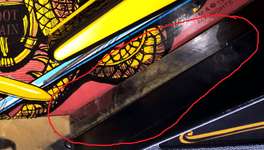
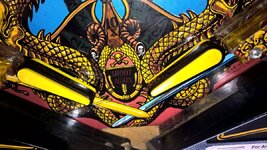
That's pretty much everything fixed under the pf for now so time to get a few games in - first off fit my new black super bands to my nice yellow DE flippers which I de-grimed with a toothbrush. I thought the super bands were the wrong size until I found the articles describing how tight they are - I slid them on with a bit of Novus #1. Whilst we are on this photo the sheet attached to the black below the right flipper is lifting - not sure what to do about that yet.

After mithering @PeteB about what order and ignoring the manual fitted them offset with metal facing in and closest to the pf. Not sure if it was my lack of technique but very fiddly to get back on (x3). One needed a new coil and sleeves throughout whilst they were off.

That's pretty much everything fixed under the pf for now so time to get a few games in - first off fit my new black super bands to my nice yellow DE flippers which I de-grimed with a toothbrush. I thought the super bands were the wrong size until I found the articles describing how tight they are - I slid them on with a bit of Novus #1. Whilst we are on this photo the sheet attached to the black below the right flipper is lifting - not sure what to do about that yet.

Whilst we are on this photo the sheet attached to the black below the right flipper is lifting - not sure what to do about that yet.
Does that translate as: there's paint lifting from the apron and I'm not sure what to do about it?

Actually my apron is moulded plastic so it's not painted, not sure about yours, but it does have strips of mylar like what's used on the playfield. It's just to keep the apron in good order I think where the ball runs.
If it's bothering you then either take it off completely or replace it.
If it's bothering you then either take it off completely or replace it.
@PeteB yes the apron is plastic so you're saying that's a strip of mylar lifting up - any suggestions on a replacement to make it minty fresh
On mine it's just strips of mylar so yes. Not sure where to buy it though, mylar is usually something I either remove or leave alone haha. I'm sure somebody around here will have a lead on where to buy sheets of it and you can just cut your own to size.
Andy does Mylar, at least he used to...
@Jay Walker supplied me this Williams Knocker he had recovered from a Gorgar (I have a Jay Walker part in both of my machines now!) I'm not familiar with this setup and wondered why it didn't have a spring - doh, it needs to fit vertically and use gravity to reset the plunger.
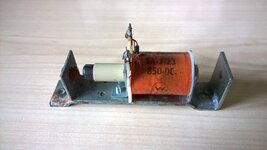
disassembled, note the rubber grommet is a tad crystalised

A bit of a dremel over, and a foam pad to replace the crystal grommet. The coil was a different spec' and testing low resistance so I re-used an old one I had knocking around.
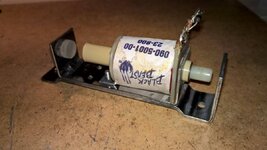
Installed in a new vertical location - coincidentally the Hook @PeteB is restoring appears to have a Williams knocker installed here too. I read that DE taped over the lugs as standard - I'm using blue as I go so I know which work is mine.
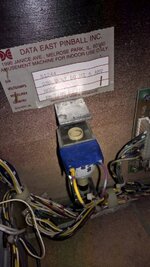
Best of all it works and we have knocking! A small thing, but I really like this feature as it is so pointless other than making an unnecessarily loud noise.

disassembled, note the rubber grommet is a tad crystalised

A bit of a dremel over, and a foam pad to replace the crystal grommet. The coil was a different spec' and testing low resistance so I re-used an old one I had knocking around.

Installed in a new vertical location - coincidentally the Hook @PeteB is restoring appears to have a Williams knocker installed here too. I read that DE taped over the lugs as standard - I'm using blue as I go so I know which work is mine.

Best of all it works and we have knocking! A small thing, but I really like this feature as it is so pointless other than making an unnecessarily loud noise.
Because....
Not sure about that myself as my R&B has no tape on any of the coils. Some of them have a plastic 'boot' on the wire which pushes over the lug though.
I read that DE taped over the lugs as standard - I'm using blue as I go so I know which work is mine.
Not sure about that myself as my R&B has no tape on any of the coils. Some of them have a plastic 'boot' on the wire which pushes over the lug though.
It's hiding a nasty that's none of your businessTape!!!!
Why?
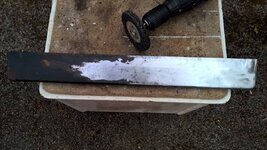
Once I get the paint off the lock-down bar (a couple of posts above), does the metal need more prep before using the etching primer?
I read that on Pinside, and everything on mine is taped (similar to PeteB) but am not keen myself and will remove as I go. This one is currently serving a purpose that super glue (may) or a new coil will resolve.Not sure about that myself as my R&B has no tape on any of the coils. Some of them have a plastic 'boot' on the wire which pushes over the lug though.
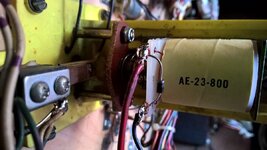
The bob thats on its way to you also has a 23-800 coil in the box. Not sure if its working but you might as well test it as it saves me 
Thanks @BigIan I'll paypal you some beer vouchers - you can't refuse as I have your paypal address!The bob thats on its way to you also has a 23-800 coil in the box. Not sure if its working but you might as well test it as it saves me
Btw, new Knocker must be good as I got complaints from indoors of the noise it was making from my detached brick garage

It's hiding a nasty that's none of your business
Once I get the paint off the lock-down bar (a couple of posts above), does the metal need more prep before using the etching primer?
I've never seen any tape on any DE game apart from this Hook I currently have, and I thought that was operator hacks. When buying a pin, I always look at the condition of coil lugs and if the soldering is neat. It's a good indicator of how the rest of the machine has been treated. When I see tape, I think hacks, and I then form an opinion that the game is worthless crap haha!
Other people might not be that bothered about it though.
Lockdown bar - just cleaned it off with alcohol or white spirit etc.
I don't like tape either - when I first got into this hobby I watched the Ray pinball maintenance vid's on Youtube and remember him saying something (drolly) like "you never find anything good under electrical tape"
Re. Hook tho this thread on pinside says that DE taped the coil lugs;
https://pinside.com/pinball/forum/topic/de-hook-reimport-questions-normal-my-first-data-east-too
Either way tape will be gone!
Re. Hook tho this thread on pinside says that DE taped the coil lugs;
https://pinside.com/pinball/forum/topic/de-hook-reimport-questions-normal-my-first-data-east-too
Either way tape will be gone!
Thanks, wasn't sure if it needed smooothing further before painting.Lockdown bar - just cleaned it off with alcohol or white spirit etc.
I have some offcuts of vinyl/Mylar from the edges of my PARAGON overlay. Send me some measurements and I'll post a couple of strips to you.
That's cleaned up nicely, astyy.
I'm pleased you're getting a good loud 'knock' with the 23-800 coil. At the time that bracket was made, Williams games would also knock either when a coin switch closed or when Credits were posted (can't quite recall which), so it wasn't the almighty 'thwack' of the later backbox-mounted knocker.
Re. using insulating tape; I sometimes used shrink tubing on solenoid drive (return) wires, especially if the wire was a thin gauge. As much for a little mechanical protection as for insulation.
Just to keep things noted, here's BOB back home with knocker. I like both of these features working in the machine.
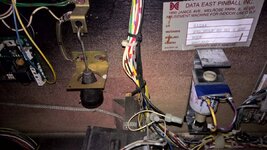
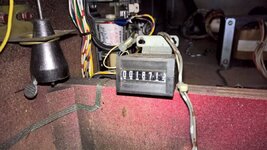
whilst in this area, here's the coin/credit counter thingy reading 18713 - I haven't got round to this investigating this yet and the coin mechs which I'd like working
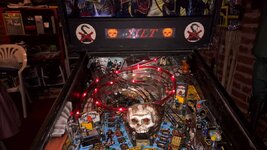
Cool BOB does his job properly, I like the way the lighting dims and the rope light pauses when tilted - kind of onimous
Scratching for things to do now before I have to start patching up this scruffy cabinet!

whilst in this area, here's the coin/credit counter thingy reading 18713 - I haven't got round to this investigating this yet and the coin mechs which I'd like working

Cool BOB does his job properly, I like the way the lighting dims and the rope light pauses when tilted - kind of onimous

Scratching for things to do now before I have to start patching up this scruffy cabinet!
No, I've only replaced the faulty Voice ROM2.Have you updated your game roms yet?
This is what it shows on startup, which is latest I can see on ipdb - are there newer?
Display 4.0.1
USA 4.0.8
I believe I got the latest roms at the time, thouigh that was about 7 years ago.
Probably havent been update much since then
Probably havent been update much since then
Good stuff man! Looking great!
Had a bit of fun today playing with some of the new bits I've picked up.
First replaced a broken plastic from the spares I bought off eBay - Philip Glenister looks happier now.
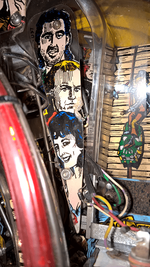
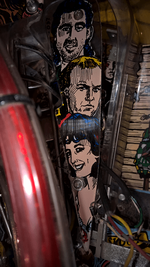

The back mirror is broken at both edges and difficult to replace because the lane change lights are inset in it. Crack Damage left corner.
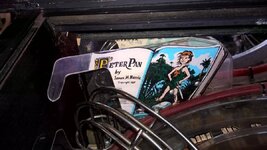
right corner
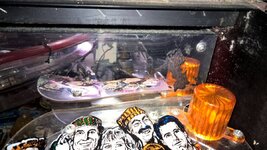
my idea is to cover it up with some of my spare plastics inc. the damage part I just took off - they actually fit really well and look good
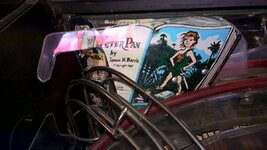
on the right I assemble a montage of two plastics - the twinker bell one is hardly noticeable in its normal location so nice to have a second to pull her out a bit
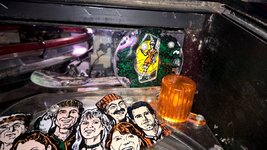
then replace this cloudy part - with a spare that is yellow painted - I dion't know why its different or if I prefer the yellow part yet
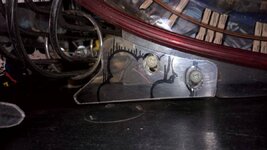
new parts all in position - new yellow cloud part at left
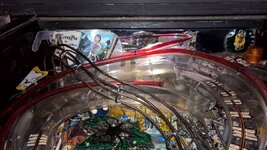
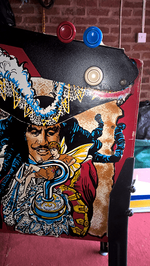
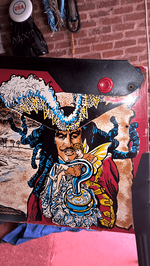
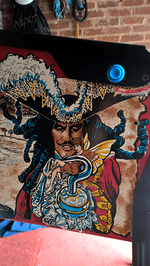
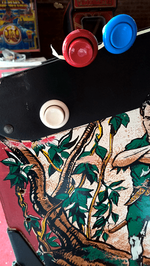
then experimented with new flipper button colour options - the turquoise I intended for my Gold Ball but think they look really good on this and perhaps a Green one for the Peter Pan side.
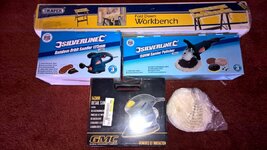
Finally, picked up some tools to do up this machine - I know these are a cheap home use only brand but I got this lot from Tesco Direct for £60 of vouchers on their current deal which I was pretty chuffed with and thought worth mentioning for others. Tesco Direct sells some of the same stuff as Toolstation at similar price.
First replaced a broken plastic from the spares I bought off eBay - Philip Glenister looks happier now.


The back mirror is broken at both edges and difficult to replace because the lane change lights are inset in it. Crack Damage left corner.

right corner

my idea is to cover it up with some of my spare plastics inc. the damage part I just took off - they actually fit really well and look good

on the right I assemble a montage of two plastics - the twinker bell one is hardly noticeable in its normal location so nice to have a second to pull her out a bit

then replace this cloudy part - with a spare that is yellow painted - I dion't know why its different or if I prefer the yellow part yet

new parts all in position - new yellow cloud part at left

then experimented with new flipper button colour options - the turquoise I intended for my Gold Ball but think they look really good on this and perhaps a Green one for the Peter Pan side.


Finally, picked up some tools to do up this machine - I know these are a cheap home use only brand but I got this lot from Tesco Direct for £60 of vouchers on their current deal which I was pretty chuffed with and thought worth mentioning for others. Tesco Direct sells some of the same stuff as Toolstation at similar price.

Looks like you're going to be busy with all the new tool purchases.
Don't forget the dust mask. 

