That's a very interesting documentary. Not tried these before and see, like regular plates, that they are made for different filament types. Is bed adhesion and/or warping any different/worse as I'm currently getting excellent results on my Mk4 using eSun PLA SL?
Pinball info
You are using an out of date browser. It may not display this or other websites correctly.
You should upgrade or use an alternative browser.
You should upgrade or use an alternative browser.
3D Printed items
- Thread starter Wayne J
- Start date
Adhesion is definitely less than from a standard textured plate, and I've found I need a brim to stop warping - but that could also be due to the model printed (similar to my bolt/ball carriers).That's a very interesting documentary. Not tried these before and see, like regular plates, that they are made for different filament types. Is bed adhesion and/or warping any different/worse as I'm currently getting excellent results on my Mk4 using eSun PLA SL?
Not sure how applying glue would impact on the holographic effect.
The fact that it can only work on the face on the bed, kind of limits its usefulness. Add in that grease from fingers also removes the effect means that its probably little more than a novelty .
On the plus side, the finer textured plate (than the Bambu original) on the other side works great. At only a tenner its worth it overall
Thanks. I'd expect glue to likely level out the surface and reduce the ability to transfer the micro indentations to the print, but only a test will find out for sure. Not a problem for me as oddly enough I've never needed to use glue sticks, hair spray and the like. Agree it seems a good novelty for the price and a feature advantage of filament over resin!Adhesion is definitely less than from a standard textured plate, and I've found I need a brim to stop warping - but that could also be due to the model printed (similar to my bolt/ball carriers).
Not sure how applying glue would impact on the holographic effect.
The fact that it can only work on the face on the bed, kind of limits its usefulness. Add in that grease from fingers also removes the effect means that its probably little more than a novelty .
On the plus side, the finer textured plate (than the Bambu original) on the other side works great. At only a tenner its worth it overall
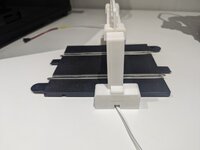
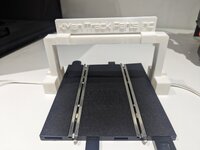
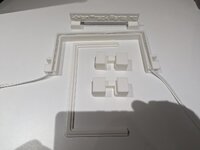
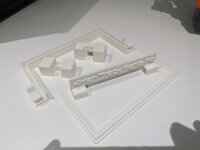
Made this prototype for a bit of design engineering practice. If you're familiar with Slot Car/Scalextric tracks, then you'll know that to overcome the effect of voltage drop on long tracks it's necessary to effectively shorten the path by running intermediate cables linking the tracks. Depending on layout, these often need to run under tracks which is a bit of a nuisance as space is very tight. This adds a feature to the circuit and is a neat way to route the cable across tracks.
Attachments
Yup, that definitely exceeds the weekly safety limit for filament unit consumption 
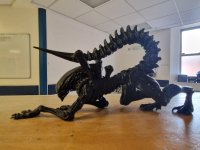
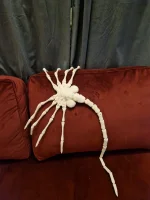
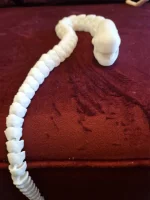
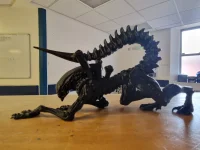
This has been BY FAR the most challenging print I have managed to succeed with.
I tried printing it on my Flashforge, but just couldn't get the supports to detach successfully.
I then tried again with the dual headed Creator Pro. After the first attempt when I got the soluble PVA and the Black PLA the wrong way round - so the supports printed in PLA and the model was soluble I tried again but it really didn't come out well.
Finally after getting my P1P Bambu I thought I'd give it another try. However after slicing it with full PVA support and model in Black PLA on highest quality settings it was showing as a 48hr print costing over £60 for a 25cm model!
I sliced again using 2nd best quality but instead using the soluble PVA, just as the interface between support and model. This came out at a 30hr print at only £25. The issue I had, despite drying the PVA in my dryer for over 8hrs was that it was still a little tacky and causing the AMS to not feed correctly, stopping the print. After 2 failed attempts like this I re-dried the PVA and gave it another go.
This time success although I had to manually loosen the PVA by spinning the spool every couple of hours, turning it in to over 40hrs printing anyway.
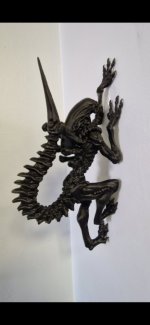
It might be a bit small to work as a topper (but there is a version to print larger and assemble together) , but it could be attached to the side of the backbox, so it looks likes it's climbing up the wall.
I tried printing it on my Flashforge, but just couldn't get the supports to detach successfully.
I then tried again with the dual headed Creator Pro. After the first attempt when I got the soluble PVA and the Black PLA the wrong way round - so the supports printed in PLA and the model was soluble
Finally after getting my P1P Bambu I thought I'd give it another try. However after slicing it with full PVA support and model in Black PLA on highest quality settings it was showing as a 48hr print costing over £60 for a 25cm model!
I sliced again using 2nd best quality but instead using the soluble PVA, just as the interface between support and model. This came out at a 30hr print at only £25. The issue I had, despite drying the PVA in my dryer for over 8hrs was that it was still a little tacky and causing the AMS to not feed correctly, stopping the print. After 2 failed attempts like this I re-dried the PVA and gave it another go.
This time success
It might be a bit small to work as a topper (but there is a version to print larger and assemble together) , but it could be attached to the side of the backbox, so it looks likes it's climbing up the wall.
Attachments
I've not tried it but apparently you can use petg as support for a play print (and vice versa I assume) because the 2 don't stick to each other very well.
never tried it though.. on my todo list
never tried it though.. on my todo list
Yes tou can as they have similar melting temps. On the bambu tou have to edit the pla to change the plate to the same temp.I've not tried it but apparently you can use petg as support for a play print (and vice versa I assume) because the 2 don't stick to each other very well.
never tried it though.. on my todo list
If you used bambu filament would it "just work" I wonder - since it knows what temp based on the RF tag ?
I don't think so as the default bed temp is 0 and it needs to be the same as petg at 70.If you used bambu filament would it "just work" I wonder - since it knows what temp based on the RF tag ?
Mine's set to 60 for PLA. Helps with AdhesionOnly the smooth plate on mine has a temp of 0 - with PLA at least
View attachment 252144
Well I have a tweaked profile which has it at 60. (Think the nozzle for that is 23) - so yeah you can set to whatever - the default tho is 55 for PLA anyway.. Not sure about PETG
Will get around to trying pla or petg for support one day...
Will get around to trying pla or petg for support one day...
On my x1, 220 nozzle, 70 plate. For petg.
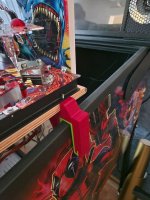
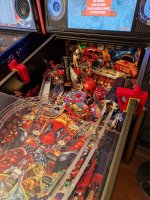
Printed out some of the jacks for working on the playfield near the back. Even got printed rubber inserts so it won't scratch your machine or slip down the siderails.
Attachments
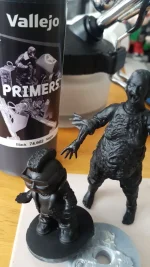
yeah I normally use an aerosol for primer first.
looking forward to painting it.
looking forward to painting it.
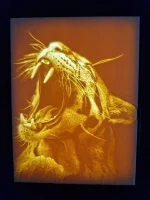
Been dabbling with Lithophanes on my bambu. Ive made the before on my old CR-10 but obviously just greyscale.
However, with the advent of colour...Not much to look at as they stand
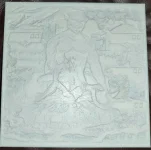
A little better held up to a light.. not too shabby

However, pop it in a box (also 3d printed) with some LEDS

You cant really see the box in that photo - but it frames it nicely
However, with the advent of colour...Not much to look at as they stand

A little better held up to a light.. not too shabby

However, pop it in a box (also 3d printed) with some LEDS

You cant really see the box in that photo - but it frames it nicely
The Lithophanes really are amazing aren't they? Cartoony images certainly work better due to the resolution, but you can get some good images of photo like quality.Been dabbling with Lithophanes on my bambu. Ive made the before on my old CR-10 but obviously just greyscale.
However, with the advent of colour...Not much to look at as they stand
View attachment 263568
A little better held up to a light.. not too shabby
View attachment 263569
However, pop it in a box (also 3d printed) with some LEDS
View attachment 263570
You cant really see the box in that photo - but it frames it nicely
I've also done plenty of them, as well as a custom box (https://www.facebook.com/media/set/?vanity=Wonderful3DPrintedThings&set=a.122104122908184108)
Attachments
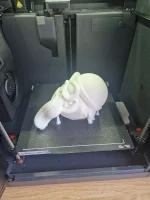
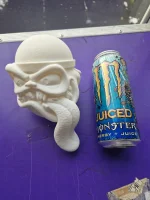
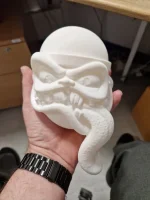
Was asked to do a few Metallica related prints. Including 'stencils' to block out the light bleed around the cross inserts as well as new Sparky head to be painted.
Difference being the Sparky head is twice the usual size
Difference being the Sparky head is twice the usual size
Attachments
If anyone has any idea re; the best type of paint to use to paint Sparky, please let me know (mine will be black & white/grey to go with my b&w Funko pops)Was asked to do a few Metallica related prints. Including 'stencils' to block out the light bleed around the cross inserts as well as new Sparky head to be painted.
Difference being the Sparky head is twice the usual size
Latest 'invention'
Saw this yesterday - brilliant idea!!
Latest 'invention'
I missed from the video that it comes complete with 2 machine bolts and nyloc nuts to secure it. Will post pics when I get back from work.Saw this yesterday - brilliant idea!!
Obviously, or it should be, that discount for bulk purchases, or for purchases through Pinball Info
Great illustration of what's possible to do with a bit of ingenuity and 3d printing capability that's readily available at relatively low cost in a 'home environment'. My reservation with the design is that by having the cover screwed shut you are effectively adding a delay/obstacle in a situation where whatever is powered off the socket needs to be isolated urgently (i e. switched off/plug pulled). I get that the design is intended to stop people meddling with a socket in use but reckon a (quick release/lift off) cover with a warning label ought to be enough to dissuade people. Obviously essential medical kit that needs to have an uninterrupted power supply needs to ideally be set up separately.
It was originally asked to be designed by a company that provides monitoring devices in care homes. Some of the older homes don't have the facility for the equipment to be hardwired in, so a standard UK plug socket must be used for the power.Great illustration of what's possible to do with a bit of ingenuity and 3d printing capability that's readily available at relatively low cost in a 'home environment'. My reservation with the design is that by having the cover screwed shut you are effectively adding a delay/obstacle in a situation where whatever is powered off the socket needs to be isolated urgently (i e. switched off/plug pulled). I get that the design is intended to stop people meddling with a socket in use but reckon a (quick release/lift off) cover with a warning label ought to be enough to dissuade people. Obviously essential medical kit that needs to have an uninterrupted power supply needs to ideally be set up separately.
What was happening on a regular basis, was that senile and/or geriatric patients were switching off or removing the plugs (as we were all told years ago to do), or even staff unplugging to charge their phones!
There are many devices readily on sale which isolate the plugs in a similar way, needing a key to open them. Such as this https://www.amazon.co.uk/Socketsafe-Electrical-Protector-Off-White-DO-61000/dp/B005EVP5K0/ref=sr_1_9?crid=19ZDTSSRT5WKX&dib=eyJ2IjoiMSJ9.lZgx7EJImBZV6ngDXGdZxwNhr3l5bjnS0eeHrCAndcAcQGcsEJBvuJWiQ98sAC4h_rh_W5HFZDBPzUBmlSQlRa-E5sQAdJp0iozC2lkm08daWe92UMGWQsJrjAL4T16_NVgravXemrayciEJGV1d_KZoPJN0efCvD3SI3uJCJaEUZHO3xt-v3yuhWjzTwSc021M6RAUMuMqzc0C3AIuAeclvk9bvloIej--HC9jKGqwhFXjwnv4BJX-ENRi5xLgJbTjUR1Z_VSNuTU_b-mh2DtoUrxI9W0B3WH3LxI8NWGqjcTsYCyJ-ztNtjFzaUPZxa_kuuOsnhmZidjTYjR6bLo1NWzhwyZRDkRlu5k27XJpYnQMUUvGopY84sC2C75PH0POu7IthE0M1bFO_ma_dwrYy7zGY1SnmDDjSYUUAvMgmXlNIMr2Ux7HWYauPugiV.frUKQgBYUEOpa-j4Nf8hRXhmUfw1gCHXP0piiwFuAxc&dib_tag=se&keywords=double+socket+cover&qid=1737558021&sprefix=double+socket+cover,aps,146&sr=8-9&th=1
But this is the only one (I have found) which only covers 1 socket, leaving the other free for use. As the cover is symmetrical and the base plates can be reversed, it can isolate either the left or right socket.
It was designed to a specific need by the customer, and can be unlocked with a screwdriver, no need for a key. (I've printed 1,200 of them, so far for them.)
Thanks Wayne. Crikey that's a lot of printing. Yes, you've clearly come up with a good solution for them which is all that really counts.

