What's new
Pinball info

Register a free account today to become a member! Once signed in, you'll be able to participate on this site by adding your own topics and posts, as well as connect with other members through your own private inbox!

Complete Gottlieb Lucky Strike

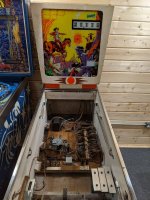
Not been a huge amount of progress with this what with the cabin build and me now starting on the garage. The cab and head have been re-united and everything cab hardware wise has been cleaned up and re-fitted so this part is basically done :thumbs:

PXL_20201215_222933643.jpg

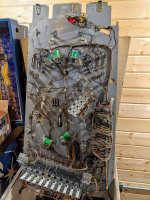
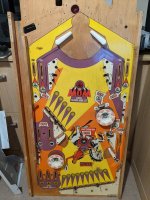
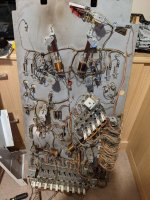
All of the remaining work is on the playfield so I've begun the process of stripping it down, top and bottom. The top side strip was relatively easy as I'd already done it once before so everything was clean but the underside is very grimy (looks a lot better in the pic than it does in reality). I need to dig out my saw horses for working on the playfield as it's a lot better than having it propped up vertically!
PXL_20201123_164536605.jpg

PXL_20201123_172048603.jpg
 
Re. the WoW feature - maybe this is how Steve Kirk, designer of Meteor (and other games) for Stern got the idea

And @DAD, I'm sorry, but the only Abra Ca Dabra I saw in the u.k. was one that was pensioned off for parts at a local operator who I asked for spares. Outside the rear doors were a M&M PacMan, a Solar Ride and an Abra Ca Dabra.

It's strange to see how El Dorado, and some of its variants like Lucky and Gold Strike, are numbered before the simplistic Spin Out, also a 1975 game, though it's really an update of the then 10-year-old Buckaroo.
 
Last edited:
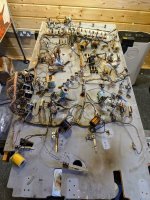
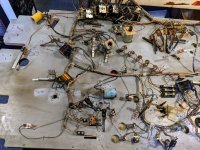
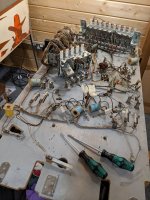
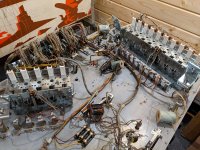
Managed to spend a bit more time on this recently and I've pretty much stripped everything off the bottom of the playfield. I've got a load of bags of bits to work my way through as well as clean up the underside of the pf:

PXL_20210101_232356300.jpg

PXL_20210101_232413061.jpg

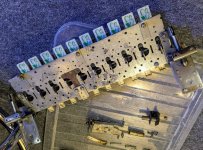
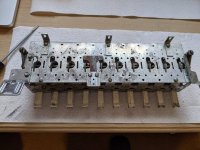
One of the bigger jobs from underneath is to strip and rebuild the 10 bank drop target mech which I should be able to start on tomorrow:

PXL_20210101_232427532.jpg
 
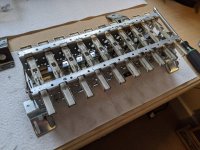
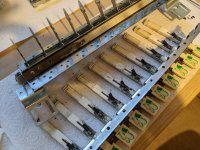
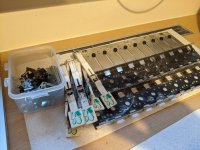
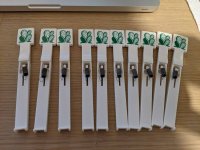
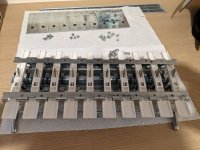
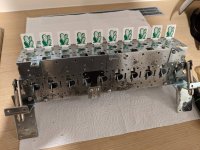
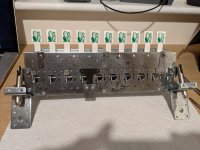
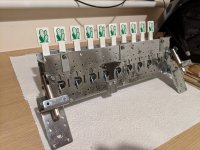
Finally got round to looking at the 10 bank drop target mech this week. It's been a while since I've worked on any Bally or Stern mechs of similar vintage but from memory this Gottlieb one seems a bit more complex and better designed than those. It's a chunky beast as well that needs two big coils to reset it.

PXL_20210126_105123771.jpg

PXL_20210126_105028181.jpg

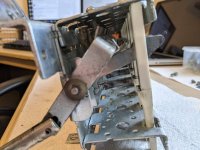
You can get an idea of the complexity of it from this side pic:

PXL_20210126_105432001.jpg

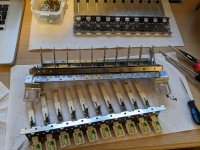
I stripped it all down for cleaning and gave everything a good scrub. As with the rest of this game, getting it looking like new isn't the goal. I just want it all clean and working right. I didn't find anything broken or damaged, it was just really dirty with a thick layer of grime on some parts.

PXL_20210126_160953230.jpg

PXL_20210126_161001820.jpg

PXL_20210126_161429326.jpg

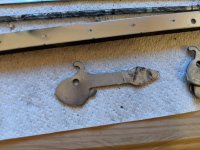
Gottlieb picked an interesting design for these actuator arms :rofl:

PXL_20210126_162917360.jpg

It all cleaned up nicely and with the addition of a brand new set of drop targets from The Pinball Resource I started putting it back together.

PXL_20210128_165854722.jpg

PXL_20210129_174251660.jpg

PXL_20210129_181317112.jpg

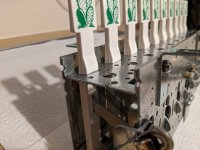
Just when I thought I was finished and please with my work I noticed a problem as shown in the pic below......

PXL_20210129_183518864.jpg

I'd fitted the top panel of the cage upside down so when the targets reset they weren't able to catch on the frame and stay in their up position :rolleyes: :mad: After some swearing and a partial teardown I put it back together correctly and it looks and works great :thumbs:

PXL_20210129_185518405.jpg

PXL_20210129_185522721.jpg
PXL_20210129_185530839.jpg
 
Nice work Chris. They really did engineer those things back in the day.
ive just ordered my new set of drop targets for Rocky, so got all this joy to come 🙈
 
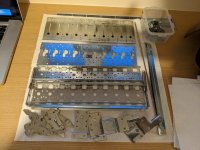
Spent a bit more time on this recently and taking some inspiration from @AlanJ I bit the bullet and worked through cleaning the box full of dirty metal parts :rofl: That's all done and ready to go back on but before that it's time for what can be one of the most rewarding but also most frustrating parts of doing up any old game (at least for me).....the paint touch ups :eek:

PXL_20210213_173516770.jpg

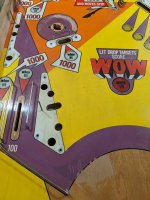
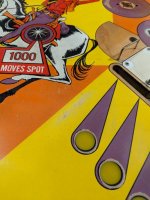
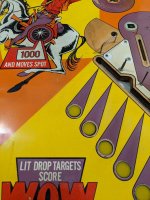
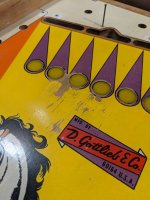
My weapons of choice for this work are a decent set of acrylic paints, some sort of pallet or board to mix on (and a mixing stick), a set of small artists brushes, a hairdryer and a couple of cloths (one for applying paint and the other for removing it along with some IPA). Sometimes I start with the lightest colour and work towards darkest before finishing off with the insert key lines but most of the time I'll start with the colour I think I'm going to have the hardest time matching. In this case it was also the lightest as I expected the yellow to be a difficult colour match what with the ball swirls and 45 years of fade and change. This is also going to be the most obvious if I get it wrong as there's a big patch very close to the player that needs work!

I follow the same process every time where I'll have a first attempt at mixing a colour match and then paint it on to a small area. Use the hairdryer to immediately dry the paint and see how it looks. I never get it right first time so I'll use the cloth with the IPA to wipe it off and then do some more mixing. Paint it on again, eyeball it, wipe it off, mix some more etc etc. Each time I'm only adding a touch of colour to lighten or darken, make it duller or pop more and it probably took me 10 attempts with the yellow before I got something I was happy with.

Once I've got a match I'll then do all of the touch ups for that colour using a couple of methods. For area's where chunks or patches of paint are missing and we're down to the wood I'll use a small brush to build up some initial layers before moving to using a cloth to wipe on the final finish. For areas where there's small specs missing or planking I just use the cloth to wipe the paint on as I seem to be able to get a better finish. For both approaches I'm building the paint up in thin layers and using the hairdryer between each one to dry things quickly.

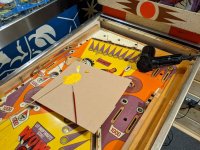
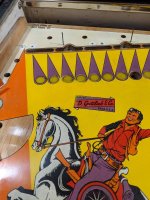
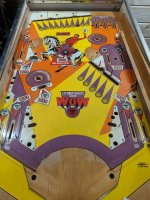
You'll never get things perfect unless you're a talented artist (which I'm not) and I'll be putting a playfield protector on this game later which will help hide a lot of the texture differences so my aim was just to get a close enough colour match that makes it not obvious that I've had to do some painting. The pics below show some before and after shots of the 3 main areas I had to touch up with the yellow plus a final playfield shot. I'm relatively happy with this so time to move onto the next colour (probably purple) :thumbs:

Before

PXL_20201121_175046146.jpg

After

PXL_20210213_182742633.jpg

Before

PXL_20210213_175302473.jpg

After

PXL_20210213_182747467.jpg

Before

PXL_20210213_175306654.jpg

After

PXL_20210213_182752631.jpg

PXL_20210213_182737515.jpg
 
Last edited:
Lovely job. Can't wait to see it in the flesh. I'm such a poor artist I've never done any touch up work, but seeing this I might experiment on an old playfield
Go for it Dave :thumbs: I'm a shocking painter but as you can wipe off anything you're not happy with using some IPA on a rag it makes it much less of a worry as you can't really make things any worse :D A steady hand is needed for the detail work but I find resting my hand on the playfield or against my other hand really helps with brush control.

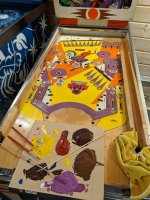
Moved onto the purple yesterday and whilst I was expecting this to be an easier time than the yellow it turned out to be way harder for me to get a match. All of those slightly different browns in the below pic are my failed attempts to mix a purple before I finally got there with the match at the bottom of the board :rofl:

PXL_20210214_173932644.jpg

Lots of quite detailed work to paint in around the inserts so a steady hand and taking it really slow were the name of the game. A few tea breaks whenever it started to p*ss me off helped as well :thumbs:

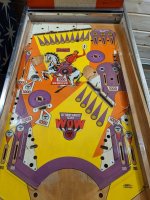
Really pleased with how it's coming together now! The yellow and purple are both done to a decent enough standard and they were the two main colours in terms of wear. Got some very small red and white areas to do (the white could be tricky) before looking at re-doing the key lines. I find that one of the hardest jobs to get looking good and consistent and I've got a couple of options re: how to tackle it but will post more info on that when I get to it. Progress so far......

PXL_20210214_173947648.jpg
 
Great work. What is your plan to protect the acrylics that you're laying down?

I knew nothing of colour mixing and found some color wheel chart basics useful. Better still, I took flakes of my backglass to the Range to match the colour tubes directly!
 
As you say, a playfield protector will solve several problems. Unfortunately I found a protector on an EM games makes it eerily quite - when you plunge the ball instead of that familiar rolling sound it is almost silent!
 
As you say, a playfield protector will solve several problems. Unfortunately I found a protector on an EM games makes it eerily quite - when you plunge the ball instead of that familiar rolling sound it is almost silent!
Yeah I think it's going to have to be a necessary compromise in this case as I don't have anywhere suitable at the moment to do a proper clearcoat job and with the amount of paint touch up I'm doing I don't think just wax will be good enough :( I'll have to report back on it once I'm finished :thumbs:
 
Been a little while since I've done anything with this as I was sorting out the cocktail arcade cab but now that's finished I can start re-assembly. Got some of the major mechanisms re-attached last night and should be able to finish most of the underside over the next couple of days. I do need a new coil for one of the pop bumpers as what's there is completely fried and I also need to look at the 4 flipper mechs as I've got a lot of new parts for these that will require some sub assembly off the game first. Here's how it looks at the moment....

PXL_20210316_230642745.jpg

PXL_20210316_230649915.jpg
 
Great work. What is your plan to protect the acrylics that you're laying down?

I knew nothing of colour mixing and found some color wheel chart basics useful. Better still, I took flakes of my backglass to the Range to match the colour tubes directly!
I did that old school, i used some OHP transparencies, and a hair dryer and mixed up the colours i needed, put spots on the OHP and overlaid that on the playfield, then quickly dried the spots with a hairdryer until i got the dried match near as. Sometimes i was lucky, sometimes it took ages to get right. :-)
 
Really learning a lot from this thread, Chris. I gave up on e.m.s about 10 years ago when i suffered an electric shock due to being a professional doofus. Love a bit of “greasy spoon” E.M. Magic. (Was the main haunt to find an e.m. Pinball machine to play after school. ) Always accompanied by the cafe owner bellowing.....
“If you are going to be on that thing for hours and only spend 10pence you need to buy a drink or your out on your ear nipper!.......” lol.
I do own an e.m. But it’s being sadly ignored. Maybe this will move me to repair it.
Keep up the good work. Playing and hearing the sounds of an e.m. Is soooo nostalgic it’s incredible. Prompting all those good times and young emotions......
All the best and take care..... Keef.
 
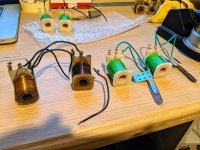
Quick update as the bottom of the playfield is pretty much back together now. I've replaced all 4 flipper coils as they'd seen some serious usage over the years :eek: Must have been a popular game in Italy :D

PXL_20210322_181436536.jpg

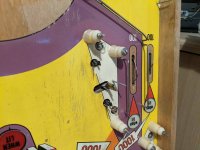
The plan was to start working on the topside as that should be relatively quick with it being a simple game but I discovered that to fit the playfield protector requires removal of one of the pop bumpers which I'd already re-fitted and soldered in a new lamp socket.....looks like that's coming out again :mad:

PXL_20210323_203133701.jpg
 
The game is mostly back together and at the point where I won't put the final bits on until I've tested and fixed all the issues I'm sure I've introduced during the teardown :rofl:

PXL_20210325_212849446.jpg

My usual approach is to fire it up and make a list of everything that's not working. In this case, the game currently doesn't reset properly to start a game so there's a few things to work on before making a full snag list. Game powers on ok without anything setting on fire and as this is an add-a-ball game there's no concept of having credits on the machine. Instead a new game is started by putting a coin into the game (or in my case, flicking the coin switch) which results in the ball count unit reseting back to 5 balls but something isn't registering as the coil continues to fire even after the stepper unit has moved to it's home position. This needs sorting first before I even think about looking at anything else....time to break out the schematic!
 
I've sorted out the reset issue that was stopping me moving any further into testing :thumbs: It was the 100 point and 1000 point score reels not resetting to 0 which meant the game was stuck in it's reset loop. A closer inspection of the reels and comparing them to the 10 point reel showed I'd messed up when rebuilding them and the run out switches weren't operating due to their blades being stuck in the wrong bit of the plastic actuator. The run out switch tells the game that the reel is at a value other than 0 or 9 so needs resetting (in conjunction with the other score reel switches) but in my case the game didn't know so wasn't trying to reset those reels.

With that fixed I was able to make my initial list of issues that need working through (not as bad as I'd feared):
  • 2 GI lamps on the left side of the playfield not lighting
  • GI lamp at the top of the left sling is a bit flickery
  • Lower pop bumper lamp is a bit loose so goes on and off
  • Middle rollover switch in the top 3 lanes isn't registering (the other two work fine)
  • 3rd and 4th from left drop targets on the 10 bank stick sometimes when dropping
  • The add a ball lamps in the backbox don't light in the expected order
  • Trough switch that controls ball count lamps isn't registering 100% so likely needs adjusting
  • Number of balls per game isn't right. I seem to be getting 6 balls instead of 5 and when you add extra balls it gets even more screwy.
  • 4th add a ball lamp in the backbox is constantly on
  • The 200K and above lamps in the backbox don't light up when the score is reached. The 100K one does but then it's like it gets stuck there and won't go any higher.
There's a few items all linked to the lightbox advance unit and the ball count unit so they'll need investigation but I'll start with the (hopefully) simpler stuff first :D
 
great progress, as you say those 2 counter units are probably the cause of a lot of that. great to hear someone makes a methodical list of issues and then works through them.

Haha - I'm sat here with a list of 43 items I need to sort out on my "bally 6 digits to 7 digit score conversion" project!
 
I've not had much time to tinker with this recently but there's a small update on the issues list:
  • 2 GI lamps on the left side of the playfield not lighting - FIXED bad lamp sockets so I've done the old wire them directly to the nub on the bottom trick :thumbs:
  • GI lamp at the top of the left sling is a bit flickery - FIXED cleaned this out using the wire brush dremel attachment and it no longer flickers when I wiggle it.
  • Lower pop bumper lamp is a bit loose so goes on and off - FIXED the socket is new so it was just the LED I was using needed a little tweak and now stays on all the time even with the vibration of the bumper.
  • Middle rollover switch in the top 3 lanes isn't registering (the other two work fine) - cleaned and adjusted the switch again but still no joy so needs further investigation
  • 3rd and 4th from left drop targets on the 10 bank stick sometimes when dropping - FIXED for now. Tweaked the switches a bit and seems to be working ok when hit by the ball but I'll keep an eye on these as I suspect only more play testing will really show whether they're all working as they should.
  • The add a ball lamps in the backbox don't light in the expected order
  • Trough switch that controls ball count lamps isn't registering 100% so likely needs adjusting - FIXED. Gave the switch a better clean and re-adjusted it and it seems to be much more consistent now.
  • Number of balls per game isn't right. I seem to be getting 6 balls instead of 5 and when you add extra balls it gets even more screwy.
  • 4th add a ball lamp in the backbox is constantly on
  • The 200K and above lamps in the backbox don't light up when the score is reached. The 100K one does but then it's like it gets stuck there and won't go any higher.
  • Lower pop bumper switch needs adjusting as it doesn't register well with ball strikes from the right hand side - NEW
So the update list of remaining items is:
  • Middle rollover switch in the top 3 lanes isn't registering (the other two work fine) - cleaned and adjusted the switch again but still no joy so needs further investigation
  • The add a ball lamps in the backbox don't light in the expected order
  • Number of balls per game isn't right. I seem to be getting 6 balls instead of 5 and when you add extra balls it gets even more screwy.
  • 4th add a ball lamp in the backbox is constantly on
  • The 200K and above lamps in the backbox don't light up when the score is reached. The 100K one does but then it's like it gets stuck there and won't go any higher.
  • Lower pop bumper switch needs adjusting as it doesn't register well with ball strikes from the right hand side - NEW
All the things to do with balls per game and lights in the backbox are going to be something to do with the stepper units so I'll focus on getting the last two switch issues sorted first and then have a look at those last :)
 
Back
Top Bottom