What's new
Pinball info

Register a free account today to become a member! Once signed in, you'll be able to participate on this site by adding your own topics and posts, as well as connect with other members through your own private inbox!

Complete Gottlieb Lucky Strike

ronsplooter

Site Supporter
10 Years
Joined
Jul 21, 2011
Messages
6,552
Location
Nottingham
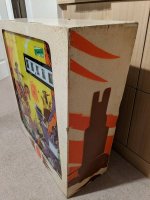
I've not done a shop log in ages and as we don't get many for EM games on here I thought it might be of interest to people as something a bit different :D Lucky Strike is the Add A Ball variant of El Dorado that was made for the Italian market back in 1975 (Gold Strike is the AAB version for the US). There were approx 1K games made and I got my one from Jamie at CoinOp King who imported it from Italy. It was previously operated by Manzomatic in Salerno judging by the stickers on the apron and it looks like they still exist in some form today under the name New Manzomatic and are still involved in the amusement industry :thumbs:

When I got it, the game basically functioned in 5 ball mode but add a ball mode was a bit flakey. Lucky Strike is one of those cool EM's where you can adjust the type of game it plays using a jones plug in the head:
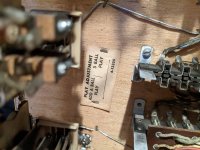
PXL_20201109_155820467.jpg

Overall it was pretty dirty, cab is rough, coin door was basically layered in rust etc but it powered up and you could get a game out of it...the usual type of stuff :D First up was to decide the plan of attack for this one! I'm aiming to bring this to a few shows as it's the only game that'll easily fit in the car so I decided on the following:
  • Clean the exterior
  • Sort out the rusty door as best as I can for now
  • Have a look at the chime unit as it wasn't working
  • Strip and clean the top side of the playfield so I can at least play it in 5 ball mode without causing any damage
This gets me to the point of having an acceptably working game for at home. Then it's a case of getting it fully working by:
  • Strip down the head and service all mechs, reels, relays etc
  • Strip, clean and service all of the things on the cabinet bottom board
  • Strip, clean and service everything on the underside of the playfield
  • Re-visit the top side of the playfield for new parts, paint touch ups and anything else I can think of
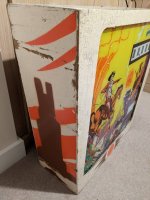
The only thing I won't be doing anything about is the cabinet. It's structurally solid but she's had a hard life in Italian bars and cafes over the years so the paint isn't the best, lots of scratches, scuffs, chips etc. As I'm planning on this being my show game there's no point spending ages making the cab all pretty again when I'll be dragging it in and out of the car. One day in the future when I retire it from shows then I might look at doing the cab but tbh I quite like the rat look, shows it's served it's purpose in life. The age old adage of "you don't play the cab" definitely applies here :thumbs:

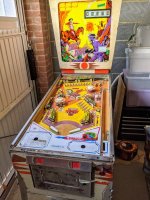
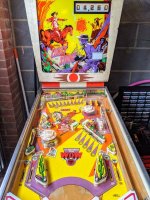
This pic is from when I first picked it up, all I'd done is give it a quick wipe to get the dust off. Not too bad but you'll see where the issues are as I have a closer look.
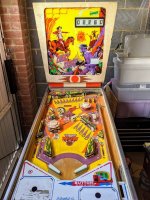
IMG_20200814_184455.jpg
 
Last edited:
Gorgeous!..... some “greasy spoon” (this was the most common place to find an e.m. Back in my school days😆)
E.m. Action. Love it! Looking forward to this one, Chris. Shop logs are my favourite threads by a country mile!.....
 
No videos this time I'm afraid :D

So the first job was to clean the outside of the cabinet which I generally always do with glass cleaner and a magic eraser. It gets the major crap off and can also clean up a lot of the marks but isn't so harsh I start taking paint off, especially important on these older games. I didn't take any pics of this part but tbh you wouldn't notice much difference as it still looks pretty rough but feels cleaner and smoother if that makes sense :thumbs:
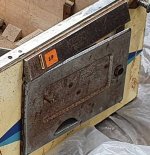
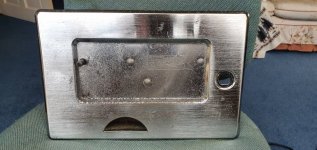
Next up was the coin door which was basically completely covered in a layer of rust. Again, I didn't take any before pics but you can see it below after I'd done my initial work. I removed the door, took it outside and attacked it with a DA sander. It's still not that great and I'll probably revisit it and paint it but it's far less offensive to me than it was :p I also fitted a new lock at this point as the door kept swinging open on it's own and smacking me in the balls!!!!

IMG_20200814_184503.jpg

You can still see the rust on the coin entry plate in this pic as I hadn't looked at that yet. The door was a lot worse than that!

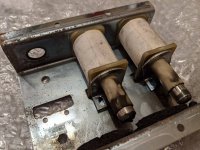
Next up was the chime unit as you can't play an EM without chimes :eek: This had been disconnected for the usual reason of it being completely gummed up so the plungers didn't move. I removed it from the game, stripped it down and cleaned everything up. At this point in time I hadn't put a PBR order in and didn't have a proper chime rebuild kit so when rebuilding I used circular felt runners instead of foam and cut up some rubber posts for the chime bars. The coil tabs had also snapped on a couple of coils so I repaired these with some thick metal staples as the coils themselves still worked fine :D I've now got a proper chime rebuild kit so will revisit this later but it works spot on as is with my ghetto fixes.

IMG_20200814_211926.jpg

IMG_20200814_211112.jpg
 
Next up was to strip and clean the playfield so that I could play the game for a bit in a semi decent condition. However, before starting in on that I decided to sort out the coin entry plate, shooter rod housing, coin door strike plate and the flipper buttons as they were all rusty or dirty and whilst I wasn't going to get them super nice I could at least bring them in line with the coin door.

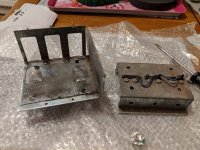
Everything was removed from the cabinet and most of the metal parts were submerged in white vinegar overnight and then rubbed down with tin foil the next day which got rid of the rust. All the plastic parts were scrubbed clean (I don't think my new ultrasonic cleaner had turned up yet) before being refitted. I still wasn't really taking many pictures at this point as I wasn't thinking of doing a shop log but below gives an idea of the rust and dirt I was dealing with.

IMG_20200816_195033.jpg

One other thing I had to fix that you can see in the above pic is the cabinet power switch. The old one was in the game but had been bypassed so the game turned on when it was switched on at the wall. On closer inspection it turned out that the switch was broken and fell to bits as I removed it, so I cleaned up the bits I was keeping including the Gottlieb stamped switch cover and fitted a brand new one :thumbs:

After all that I could start looking at the playfield :D The main issue here was ground in dirt and ball swirls from 45 years of play :eek: You can see the extent of the issue in the pics below, especially in the yellow, but it was all over the entire playfield.

IMG_20200820_203938.jpg

IMG_20200820_205158.jpg

IMG_20200821_184920.jpg

Before tackling this I stripped everything off the playfield apart from the flippers, metal guides and pop bumpers and gave everything a wash. Remember, at this stage I'm not got for a proper shop out so no tumbler, metal polishing or anything....I just want it all clean before refitting. Below is pretty much as far as I went with the topside teardown:

IMG_20200820_205325.jpg

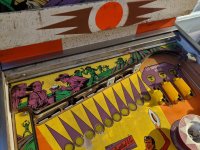
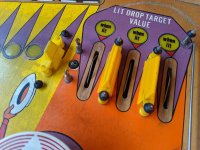
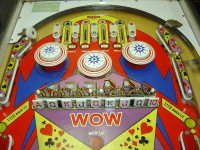
One thing to point out at this stage is Lucky Strike (and Gold Strike) have a slightly different playfield to El Dorado (the more common version). El Dorado doesn't have the concept of WOW which denotes the add a ball so where on my game in the middle of the pf it says "Lit drop targets score WOW when lit" and there's an insert, on an El Dorado it's just some artwork of a wagon wheel. This means you can't get a replacement playfield as easily so it's worth trying to get this one looking nice.

What followed was many hours spent scrubbing away at the playfield with a magic eraser and 99% IPA to try and get as much of the ground in dirt out without taking it down to a whitewood. The process I use for this is to work on a small area at a time, scrub for a little bit, wipe off with a paper towel and check the playfield to see if you're happy and the magic eraser for the paint colour. If you still see brown then you're working on dirt but if you start seeing yellow, orange, red etc then you're into the paint and it's time to stop and move to another area. Rinse and repeat for hours :cuckoo:

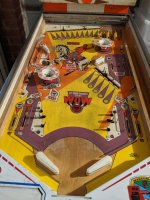
When I was finally done I put everything back on the playfield with some new white rubber and ended up with this....pretty pleased with how it came out at this stage :D

IMG_20200830_182337.jpg
 
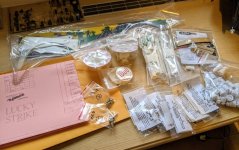
After putting some plays on it and really enjoying the standard 5 ball game I decided that if I'm going to spend a load more time going through all the mechs, relays, switches etc then maybe I should treat it to some new parts, have a go at touching up the playfield and make it as presentable as I can (bar the cabinet). @DAD very kindly allowed me to come in on his PBR order and a box full of goodies arrived :D

original_6332249b-ce86-4e11-a355-afe1c5f60697_PXL_20201028_142009644.jpg

In this pile we've got the following:
  • Lucky Strike schematic
  • Full plastic set
  • Full set of drop targets (10 cactus and 5 horse)
  • Pop bumper bodies and caps
  • Chime unit rebuild kit
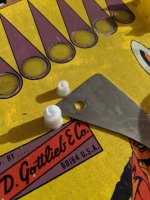
  • Replacement plastic posts for every one on the playfield (32 normal, 2 tall and 1 of the split type)
  • 3 stepper unit spring kits
  • 2 score reel spring kits
  • 5 of each type of shoulder screw (used on stepper units)
Time to remove the head and take it to bits :D
 
We all know that very few people on here will ever buy a 1970s Gottlieb, but ^^^^^^^^^ highlights the amazing parts availability for these games.
Thank god for Pinball Resource :D I'm already thinking that I might like to do another Gottlieb wedgehead when I'm done with this as it's been really enjoyable so far :thumbs:The one I really like the look of is Volley, anyone know if there's any in the UK @DAD @PinballDaze @pinballmania ? Others on my potential hit list are Jacks Open, Abra Ca Dabra and Tiger.
 
Jacks Open should be fairly easy to find as there were a lot of them around, I've had several, and a Volley, but all long since sold. Don't think Volley was common in UK. The company I bought games off imported stuff from Austria.

Tiger was only made for Italy, although there was at least one for sale in the UK recently

Not sure I ever saw an Abra Cadabra in the UK. Nearest one I know of is in Germany and probably not for sale. Certainly not in need of restoration!
 
Before you fit the new drop targets and plastics it is vital to put a large sticker under the lock down bar to say "Remove ball before lifting playfield", or you will soon need to replace again!
Even if you remember to remove the ball, others wont.
A ball dropped from the height of a vertical playfield onto plastics or drop targets does significant damage!

A good tip on cleaning the score reels is to use toothpaste - but do a test first.
I'm just finishing off a Jumping Jack and someone has used an oil spray everywhere.
Where it has got on the score reels the lettering comes away with the slightest touch - liberal use of the sharpie has been needed :)
 
Thanks gents, I'll have to keep my eye out for a Volley or maybe the AAB versions of Jacks Open :D I'll have another go at the coin door I think as I might be able to get it to a point where I don't have to resort to painting it which I'd rather not :thumbs:
 
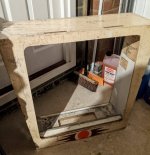
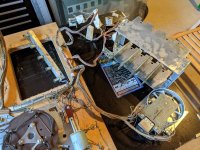
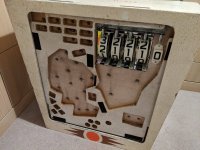
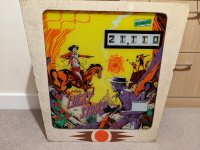
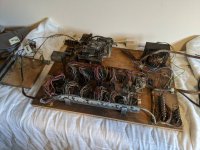
I removed the head from the cabinet, took out the very nice condition backglass and put it somewhere safe, removed the board with all the mechs on it and finally stripped the head of any remaining metal work and ended up with the below:

PXL_20201002_215850833.jpg

PXL_20201002_215829164.jpg

I found it so much easier to work on the various reels, steppers and relays with it out of the game like this as you had full access to everything and while I had the other metalwork removed I could put that in the tumbler as well as give the inside of the head a good clean as it was pretty filthy in there!

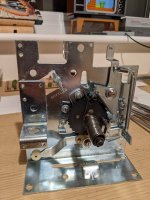
The above pic shows all the various bits and bobs that make up the guts of the head and I'll be working through them in order. At the back you can see a set of different relays and switches mounted to a long metal bracket that control different game functions (e.g. scoring 100 points). To the right hand side you can see the 4 score reels in their housing and from previous pics of the front of the head you'll notice the game looks like it has 5 reels when it fact there are only 4 real ones and the last position is just a zero painted on to a bit of plastic so doesn't change :D To the left is the ball count stepper unit which counts the number of balls left to play as you'd expect and finally, in the front, is another stepper unit that controls the lamps that light up higher scores than the reels can display. So when you reach 99,990 on the reels it lights up the 100,000 lamp and the reels go back to zero.

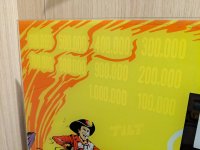
What's really cool about this game vs El Dorado or Gold Strike is that those pins only have a 100.000 point lamp so the max score you can get before you roll the game is 199,990 but on Lucky Strike there are lamps going all the way up to 1,000,000 so the max score can go to 1,999,990. You can see where these light up on the backglass pic below:

PXL_20201108_164339109.jpg

While we're on the subject of things lighting up in the backglass, this is also how you see how many additional balls to the starting 5 you've won during your game. The maximum number of balls you can get in Lucky Strike is 10, the 5 you start with plus up to an extra 5 balls for scoring WOW's. However you can keep adding balls as you lose them, so say you start with 5 then lose your first couple trying to get to WOWs meaning you have 3 left to play but then manage to score 4 WOW's on that ball then your ball count goes back up to 7 :D You lose a couple more trying to get back to WOW's so you're down to 5 again but then score 4 WOW's it goes back up to 9 :eek: What this basically means is, if you're good enough you can play this game forever! The normal 5 balls are just lit up as the numbers 1-5 in the backglass like most EM's but for any balls you win from 6 up to 10 it lights up the red cactus flowers shown below:

PXL_20201108_164345230.jpg
 
First job in the head was to tackle the score reels. A couple of them were a bit sticky and one of them had the run out switch not activating but I was always going to completely strip and service all of them anyway :thumbs: One thing I had noticed was all of the EOS switches for them had been disconnected and on closer inspection it turns out that's because the switch blades had snapped off on all of the reels. After doing some research it turns out the game will function perfectly fine without score reel EOS switches and a lot of people don't bother fixing them as they're prone to breaking, you just have to be aware if a reel ever locks on I guess. For now I'm going to leave this as is and she how she plays when finished, looks like those switch blades aren't a normal size anyway so I've not got any replacements.

They slide out of their metal frame by way of a plastic bracket and you're left looking at this:

PXL_20201003_154106285.jpg

First to come off is the plastic reel:

PXL_20201003_154200910.jpg

And then you can start to see the inner workings:

PXL_20201003_154208483.jpg

You keep working your way down, removing springs, plastic gears and the slider that actuates the reel:

PXL_20201003_154312473.jpg

You can then remove the coil stop bracket, plunger and the slider along with any switches and you're left with the base plate and a load of parts:

PXL_20201003_155650080.jpg

All of that lot went in the ultrasonic cleaner for a bit and came out looking much better. I also cleaned up the coil and switches and then reassembled with a new coil sleeve and most importantly using some superlube on the areas where plastic is rubbing against metal. The key area here is the bottom of the slider so I used some autosol to polish the metal side as well for the best possible movement. Bit more superlube on the shaft and plastic gears as it went back together and you have a nice and snappy score reel :thumbs:

This process is then repeated another 3 times and that's the reels all done! While I had all of the reels out I removed the metal frame they sit in and cleaned that:

PXL_20201004_160208870.jpg

You can see in the pic above that one of the reels (the 10K point one) has a pcb attached which isn't on any of the others. In most games this is to make the Match feature work but I don't think Lucky Strike has Match so I suspect this is used to control the score lights stepper unit so the game knows each time the reels roll over from 99,990.
 
Next up was the relay bank but I didn't take many pics of this as there's not much to it:

PXL_20201019_173426012.jpg

Each of the relays is attached to the long metal bracket using a cotter pin so I removed all of those and unclipped the relays. I gave the bracket a good clean ready for going back on and then worked through each relay, wiping the major crud off it and then cleaning the switch contacts using a flexstone file. As the game was basically working before I started this process I didn't go mad here as you're far more likely to introduce problems with an EM game if you start completely stripping these relays down. I find the best way to clean the contacts is to operate the relay by hand and trap the file in between the switch contacts using the same pressure the game would apply in operation. A few strokes back and forth with the file and the switch is done :thumbs: Once all the contacts were cleaned I re-fitted the bracket and attached all the relays back to it....job done! Whilst doing this job I also gave any Jones plugs in the head a good clean with a green scouring pad, just scrub them until they shine :D
 
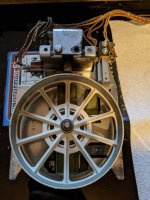
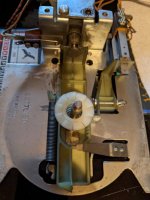
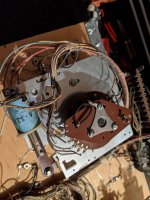
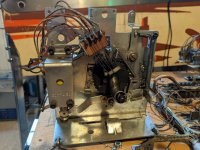
Last job in the head were the two stepper units. Whilst they look a bit different from the top, they're both the same type of increment/decrement unit that steps up or down one position at a time. You can see the different bakelite discs in the pics but they both use the same coils and mechanism on the other side.

PXL_20201008_193343820.jpg

PXL_20201101_172125186.jpg

PXL_20201009_151921093.jpg

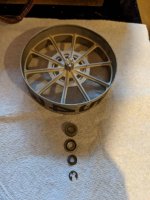
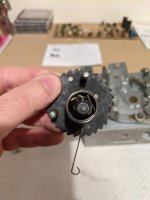
As with the score reels, it's just a case of stripping them down and chucking all of the parts in the ultrasonic cleaner. When you completely disassemble one of these there are a few things to be aware of:
  • Before starting to take it apart, advance the unit all the way to one of it's end positions, helps when reassembling.
  • Mark the top position of the moving bakelite disc so you know what position to put it back in relative to where the unit is advanced to.
  • When you come to remove the cog and torsion spring, count the number of turns it unwinds so you can repeat when winding it back on.
PXL_20201101_193648112.jpg

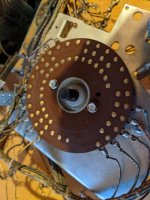
While all the removable parts are in the cleaner, I spent some time cleaning up the coils, switches and the bakelite disc, specifically the metal studs. The process I followed was to scrub with a scourer until they came up shiny and then give the whole surface of the disc a very thin coating of superlube so that the other disc will move smoothly across it as the stepper operates. Below is a pic of one of the discs before I cleaned it up:

PXL_20201009_172122914.jpg

With everything nice and clean the unit can be put back together, applying superlube to any joints or pivots that need it and using one of those new spring kits I got in the PBR order. I found it much easier to assemble the mechanical part on the desk and tweak it there before putting back in the head. I found both of the ones in Lucky Strike required a fair bit of fiddling with before I was happy with their operation. After cleaning and lubing you end up with something like this:

PXL_20201031_182925061.jpg
 
Last bit of work on the head was to clean up the front of the board, apply some new felt tape to protect the backglass, put new bulbs in and then rebuild it with the tumbled brackets, backboard channel etc.

PXL_20201108_164435851.jpg

And that's the head done :D It came out pretty decent in the end and certainly a massive improvement to when I started. I'm sure there will be tweaking and adjusting needed once all the game is done and I'm in the testing phase but for now I can move on :thumbs:

PXL_20201109_181930608.jpg

PXL_20201109_183021094.jpg

PXL_20201109_183029992.jpg

PXL_20201109_183010505.jpg
 
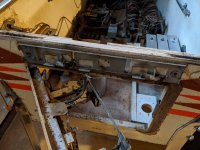
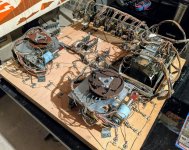
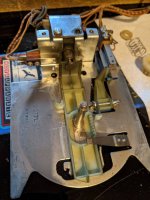
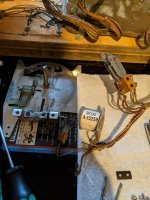
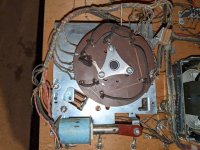
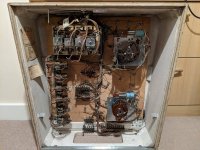
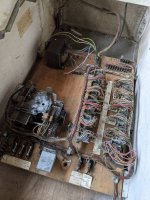
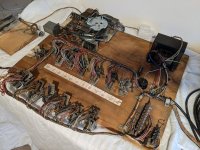
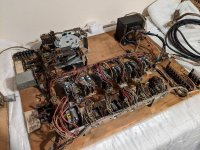
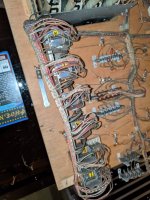
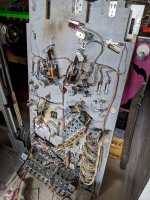
Next job was to have a look at the base board from the cabinet. It's pretty filthy but not too complex on Lucky Strike so shouldn't be too bad to clean up a bit....basically a load of relays and a score motor :thumbs: I had to take the playfield out to be able to easily remove the board so that's been put to one side as the final thing to visit.

PXL_20201112_131843346.jpg

PXL_20201112_131849692.jpg

As with the board in the head, it's so much easier to work on with it out of the game. Looking a bit grim but I reckon it's pretty much all working as the game was basically playing before so the less is more approach will be taken with this one. I don't want to introduce issues with my cack handedness so I'll try and clean off the worst of the grime, clean the switch contacts on the relays, sort the jones plugs out and that might be it. As the score motor was fine I probably won't even bother cleaning the switch contacts but will have a think on that as I do the rest of it.

PXL_20201113_124926098.jpg

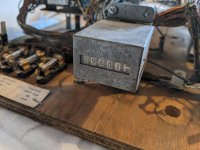
One thing I quite like doing, especially with really old games like this, is seeing if I can figure out how much money it made in it's life. Obviously this won't be that accurate but just to give a rough idea :D

PXL_20201113_125013529.jpg

So the coin counter shows 96,012 credits/plays and the sticker on the coin door says it was 100 Lira per game. Back in 1975 when this game was new, £1 = approx 1380 Lira (according to Google).

96012 * 100 = 9,601,200 Lira total takings
9601200/1380 = £6967 taken in it's lifetime
6967/2 for the 50/50 split between operator and location = £3478 made by the operator

I found some info on Pinside saying that mid to late 70's Gottlieb's were around $895 new so this game made its operator very happy (possibly Manzomatics in Salerno) :thumbs:

I'm pretty much caught up to where I am with this game as of today so the updates might slow down a little bit from here on :)
 
Next job was to have a look at the base board from the cabinet. It's pretty filthy but not too complex on Lucky Strike so shouldn't be too bad to clean up a bit....basically a load of relays and a score motor :thumbs: I had to take the playfield out to be able to easily remove the board so that's been put to one side as the final thing to visit.

View attachment 125067

View attachment 125068

As with the board in the head, it's so much easier to work on with it out of the game. Looking a bit grim but I reckon it's pretty much all working as the game was basically playing before so the less is more approach will be taken with this one. I don't want to introduce issues with my cack handedness so I'll try and clean off the worst of the grime, clean the switch contacts on the relays, sort the jones plugs out and that might be it. As the score motor was fine I probably won't even bother cleaning the switch contacts but will have a think on that as I do the rest of it.

View attachment 125069

One thing I quite like doing, especially with really old games like this, is seeing if I can figure out how much money it made in it's life. Obviously this won't be that accurate but just to give a rough idea :D

View attachment 125070

So the coin counter shows 96,012 credits/plays and the sticker on the coin door says it was 100 Lira per game. Back in 1975 when this game was new, £1 = approx 1380 Lira (according to Google).

96012 * 100 = 9,601,200 Lira total takings
9601200/1380 = £6967 taken in it's lifetime
6967/2 for the 50/50 split between operator and location = £3478 made by the operator

I found some info on Pinside saying that mid to late 70's Gottlieb's were around $895 new so this game made its operator very happy (possibly Manzomatics in Salerno) :thumbs:

I'm pretty much caught up to where I am with this game as of today so the updates might slow down a little bit from here on :)
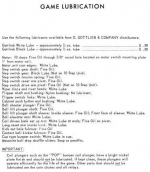
Remember to put a few drops of light oil on the felt pad under the motor whilst you have the board on the bench
 
Got the board all cleaned up and relays sorted so it's ready to go back in the cabinet :thumbs:

PXL_20201115_144837063.jpg

PXL_20201115_191338567.jpg

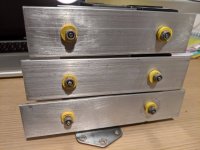
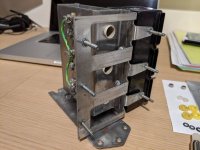
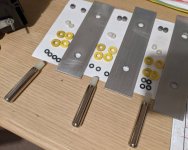
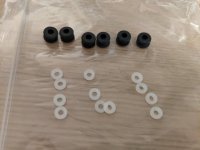
I also had another look at the chime box now that I have a proper rebuild kit so I could swap out my ghetto fix :D You can see the yellow post rubber I cut up for my home made grommits and the hard plastic post I used as the space to stop the chime bars banging into each other.

PXL_20201115_191826553.jpg

PXL_20201115_192243010.jpg

PXL_20201115_192258248.jpg

I swapped these out for the proper grommits and new nylon spacers and now have a more original looking chime box :D

PXL_20201115_192848889.jpg

PXL_20201115_193311904.jpg

PXL_20201115_193812782.jpg
 
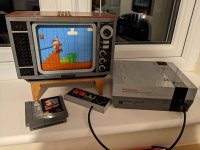
Thanks both, I've not done a shop log for ages but quite enjoying this one :thumbs: @astyy the Lego NES was released recently as part of the Super Mario 35th Anniversary celebrations. There's a mechanism inside the TV that makes the Mario level scroll, it's pretty cool :D

PXL_20201116_164917238.jpg

I am quite partial to a good Lego kit though, especially if it's Star Wars related :cuckoo:

PXL_20201116_164908183.jpg
 
Back
Top Bottom