What's new
Pinball info

Register a free account today to become a member! Once signed in, you'll be able to participate on this site by adding your own topics and posts, as well as connect with other members through your own private inbox!

Complete Earthshaker project

Russell,

Re. the queries about the solenoids;

Earthshaker may reset the target bank as it boots up
The flipper circuits on this game are enabled/disabled by the 4-pole relay on the Cpu board, which breaks the return side of each coil circuit. This is the total involvement of the electronics side of the machine with the flipper operation, the opto-coupler detection for Lane Change/Status Report/High Score Initial Entry was a recent introduction on this game
A slingshot 'chattering' like that is due to either/both of the switch contacts being too close, so that they close 'again' as the rubber band returns to normal
The relay on the Aux Power is the 'solenoid extender', which multiplexes the first eight* solenoid drives between Group 'A' when normal and 'C' when energised. It also has an opto-coupler detection chip, as with the Left and Right flippers

* usually the first eight solenoids, there are cases where other groups/numbers are allocated
 
Last edited:
Thank you Jay that is very helpful.

Iv been doing a bit of reading up on the a/c and like you say understand what its for (basically get 16 outputs from 8) on earthshaker the 8 flashers are on one side and some coils on the other (this relay is working correctly for me)

Just need to fix this bridge rectifier so i get my 50v dc back :)

On this machine the eject hole coil fires on boot hehe.

Regards
Russell
 
Ok so after swapping out both bridge rectifiers my 50v was still dead hmm, so thought maybe bad cap was shorting output so removed those, still dead hmm literally nothing else to go wrong so checked F7 fuse BLOWN ahhhhh (swear i checked it before!!)

Any way got my 50v back and coils iv tested so far look good and powerful :)

I did learn a lot about how the coils are wired / controlled and the whole flipper switch system so definitely not a waste of time :) and as expected game can detect flipper switches again :)

New ramp set turned up as well and they look great!!! looking forward to the tear down / clean and especially the rebuild with new plastics/rubbers/ramps/pop caps :) ill swap out all star posts for new as well. But metal work can get tumbled / polished.

Have also noticed bulbs have been directly soldered into the bumpers so will need to install a socket.


Regards
Russell
 
Indeed i said it would be loved :D

Slowly getting there don't get much time to work on it but try and sneak into games room on an odd evening to work on it :D

Gonna rewire flippers with new leaf switches and caps then hopefully thats the electrics mostly sorted :)

Regards
Russell
 
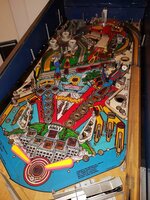
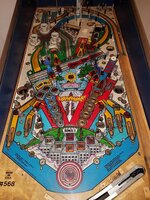
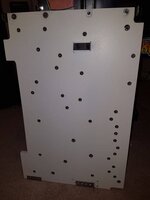
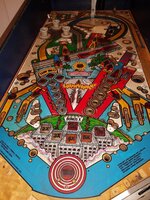
Tear town photos (might help other earthshaker owners)

Will add more once metal guides removed.

Regards
Russell
Brings back happy memories.

ES was my 2nd machine way back when. It was filthy dirty when I got it, GI shot etc. I had no choice but to dive in..,,, stripped it all down, cleaned, replaced, rebuilt.

First time I had really done any major pin work and loved every minute of it. Will always think fondly of that ES.

Sent from my D5833 using Tapatalk
 
Oh top tip. To make life a lot easier when working on the top/back end of the playfield you can lift the playfield off its pivot points, rest in on top of them and carefully slide it forward a good few inches. Rest it carefully on a blanket on the front of the cab.

Apologies if I'm teaching you to suck eggs.:-)

Sent from my D5833 using Tapatalk
 
That is very useful actually as iv been struggling with screws at the back! Thank you :)

Whats best way to clean the metal guides? Use a buffing wheel? or send off to be zinc plated?

Regards
Russell
 
That is very useful actually as iv been struggling with screws at the back! Thank you :)

Whats best way to clean the metal guides? Use a buffing wheel? or send off to be zinc plated?

Regards
Russell
Metal guides - just clean and polish with metal cleaner of your choice.

If you are trying to get rid of the ball trails/tracks then I wouldn't bother. They will be back again in no time.

Sent from my D5833 using Tapatalk
 
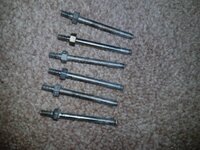
How do you guys remove the metal guides? the ones that have a thread going into the pf and a nut the other side, I have removed the nut but they are very solid. Do you just bang with a hammer? or use a screw driver on the top to pry them out?

Regards
Russell
 
How do you guys remove the metal guides? the ones that have a thread going into the pf and a nut the other side, I have removed the nut but they are very solid. Do you just bang with a hammer? or use a screw driver on the top to pry them out?

Regards
Russell
Yep. Tap tap tap carefully. Keep an eye that it isn't catching and splintering off any wood playfield side as you do it. It should be fine, never had one not come out but they can be stubborn.

I wouldn't use a screwdriver to pry- too much risk of damaging playfield. If tapping won't shift it then prying is unlikely to anyway.

Sent from my D5833 using Tapatalk
 
Perfect (i have day off work hehe) so will report back! :)

Thanks

Regards
Russell
 
Few taps on the stubborn ones and they all popped out :)

Just the posts to go now.
Ill remove the targets as well.

what do you do with the switches? is there a easy way to temporally tape them down? or best to unscrew them all?

80475

Regards
Russell
 
The playfield pictures remind me that Earthshaker must've had that mini-post between the flippers added at quite a late stage; the vacant dots below each flipper mark where metal anti-return wires would've been pushed in.

Edit - The machine pictured on the flyer is in this configuration, and also has at least one different feature lamp lens (the white arrow pointing at the r/h ramp says '3 miles' rather than 'Million')
 
Last edited:
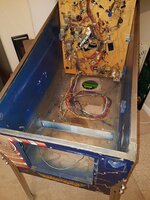
PF now completely stripped apart from the pops and a few flashers
80927

Snapped a few of these style posts DOH, ill replace them and even the ones that did not snap as they all seem very weak, will have to dig out the tnut thing and replace as well on the underside
80928

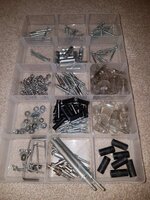
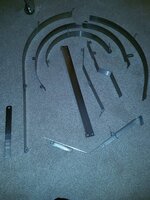
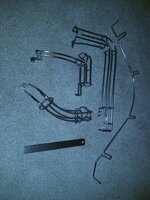
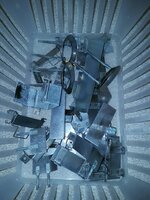
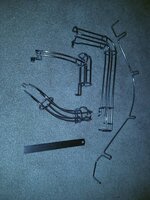
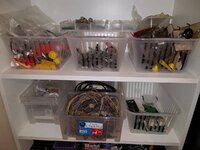
Have some nice piles of metal parts :)
80929
80930
80932
80933

Some questions
  • whats best way to clean the ball guides? like really clean them? some sort of buffing wheel? or certain type of polish that will remove all dirt / oxidization (ie brasso? / never dull?)
  • same with the chrome wire guides (or is it worth getting re -chromed?)

My plan was to stick all the posts / smaller parts in the basket into my tumbler (what media do you use? what polish do you add? how long do you leave it going?)

Regards
Russell
 

Attachments

  • 20190305_133416.jpg
    20190305_133416.jpg
    140.5 KB · Views: 8
  • Like
Reactions: DRD
Started to clean the pf but have scrapped that idea as the mylar bubbling is giving me nightmares / is quite a lot of paint wear in certain areas, apart from that is a pretty nice pf. So have ordered a new one from CPR only silver left but that is ok will be far better then what i have. Plus i have the pf stripped so is probably a good time to do a pf swap :D

Will try and strip the cabinet as well and move over to my dads garage for wood filler work / repaint :)
Then hopefully be putting back together a basically new earthshaker :D will just have to wait a little longer to have my first game on it! but be worth the wait :)

Regards
Russell
 
Several ways to clean metal

A vibrating tumbler works well, though you might need to leave things in there for up to 5 days. I use walnut shells and solvol autosol. Solvol autosol is also my metal polish of choice.

for really filthy metal I use buffing wheels. I have a set of 4. Something like this ..

 
Thanks my dad dropped off his grinding wheel i plan to turn into a buffing wheel :)

Basically new plan is i will not restore in stages but just do it all now! Ill strip down the cabinet soon and take to parents house to strip/filler/sand/paint/apply decals and attempt the pf swap at mine whist cab is getting done.

Having a quick look at the pf it looks relativity easy to swap over the back components. Only slightly annoying part is the stapled gi lights. From reading other shop logs some people just add new bolt on lamp holders to the new pf and run normal wire (which seems like a good solution to me)

Also how many types of tnut is there as ill need to order new ones for the new pf, is it just one size? or a couple? just so i get the right type / put in the right holes!

Plan is to
  • install tnuts
  • install gi
  • then literally just slide everything else over :D

Looking forward to actually having a game on this thing later in the year :)

Regards
Russell
 
The loom comes off in 3 parts, switches, solenoids and lamps. I number each and write on the old playfield a number as I remove it so c1, c2 etc s1, s2 etc and l1,l2 etc then I have a map of where to install on the new one. I leave all the solenoids connected.
The only real pain is the bumper lights which are on a stapled flat wire, otherwise its pretty simple.
 
ah thats good advice. I was literally just gonna slide the whole mess over and hope it all sort of matched up again :D

labeling might be a good shout :)

Regards
Russell
 
second thoughts i will move over in sections like suggested above :)

Regards
Russell
 
Cracking thread - looking like it'll be a great job - I would have a word with @chris platt - he can do wonders with a playfield, may be interested in the old one...
 
Media I normally use walnut media for the first day or 2 to get the filth off and corrosion

Then a day or 2 in corn cob with a squirt of polish
 
Perfect thanks guys, so walnut for cleaning and corn for polishing. Do you swap media each time you tumble or just every so often?

Another cleaning question (pinball restore appears to be more about cleaning then anything else lol) what are your thoughts on putting wiring looms in the dish washer? appears to be very popular on pinside. Long as you don't put microswitches in there? also lamp boards ok?


Yeah this was basically just meant to be a quick get up and running and restore later in year but sort of turned into full restore now :D (fingers crossed it all goes back together!)

I have moved all my tear down photos to this google photos (might be useful for any one else restoring a earthshaker) ill be adding photos to it as i continue to tear down :)

Regards
Russell
 
Last edited:
Grrr CPR cancelled my pf order :( which is rather annoying as I am half way through removing all tge looms/mechs! Will hunt for another NOS/CPR from members / give @chris platt a shout, my one would just need mylay removing a few touch ups on solid colour areas (so hopefully bit easier) and some insert decals adding / re clearing and it would probably look very good. But much prefer a new one!

Regards
Russell
 
Back
Top Bottom