What's new
Pinball info

Register a free account today to become a member! Once signed in, you'll be able to participate on this site by adding your own topics and posts, as well as connect with other members through your own private inbox!

Complete Creature from the Dank Saloon **Finished** .. Full Pics!!

stumblor

Site Supporter
5Years
Joined
Sep 16, 2018
Messages
3,776
Location
London UK
Back in the day, you proudly stood with your pinball brethren, arrogantly blaring your 50s midi tunes and yelling at people to move their car. The back seat was smooch central, and the snack bar stayed open all night. People would line up to play you, pumping in coins like it was going out of fashion. You were a king among kings. The good times were rollin, you thought they'd never stop.

Then the rains came.
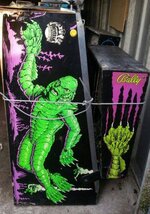
Creature_Cab.jpg

In a matter of days, you had become worthless. Just one more waterlogged asset to liquidate with the rest. You moved from one damp shed to the next, slowly rotting, rusting, disintegrating. Forever cursed to dream of the good ol days when your parts moved with purpose. When you were an 'amusement' for all the right reasons.
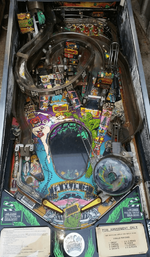
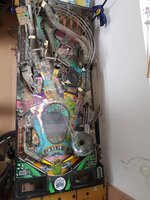
Creature_Playfield.png

Yet even in the midst of despair, a small fire burned within you. A small flicker of hope that one day you find a big enough idiot who believed that every machine deserved a second chance. Some foolhardy imbecile who didn't understand the task ahead of him. Who didn't appreciate the level of investment required or the basic properties of rust.

This is the story of that idiot.
 
Last edited:
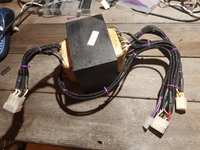
I started this project about 6 months ago, so I'm playing catchup a bit with this log. Over this time, the effort level has gone from 'just get it working' to 'get it working and looking nice' and finally to 'jesus christ what am I doing I've just spent 10 hours making a transformer look sexy'. Be prepared, this project is an absolute folly. I'm sure the more experienced among the group would have never considered doing it in a million years, and in retrospect, I never will again, at least not a machine in this depraved a state. But a lot of love has gone into it, and during a time of my life that has been pretty emotional (my mums sick). It'll mean a lot to me once it's done.

20190517_121148.jpg

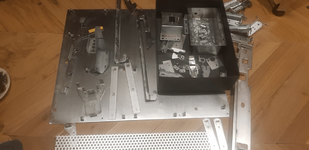
The playfield strip down. Even though I managed to snap about 50 screws, I still harboured hopes it could be reused.

20190517_125227.jpg

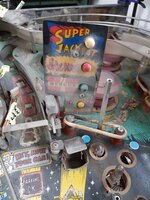
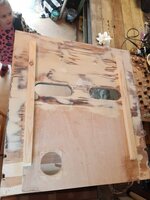
These hopes were firmly dashed when I began sharing my progress. Advice was given. Hearts were broken. Long story short, I got a new playfield from Chris B. It was the right decision. Because holy fcuk have you ever tried to drill out a broken screw. If it can be done, and I doubt it can, it wont be by me. Ever.

20190517_125400.jpg

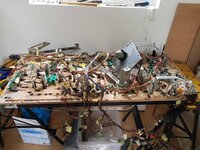
I like this photo because it sufficiently conveys the level of depravity this machine was subjected to. The above picture is what I imagine the inside of a crack pipe to look like.

20190528_134351.png

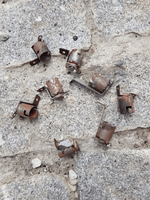
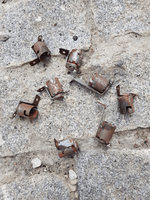
One thing they don't teach you at pinball refurb school is that when you've got a machine that is more rusted than the titanic you are going to have to replace parts you didn't even think about. Like lamp holders. And the thing about lamp holders is a) there are a lot of them b) there are lots of different types and c) you will need to order them from about 3 different suppliers.

20190908_123854.png


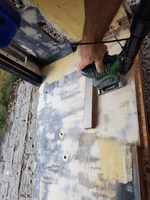
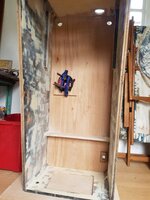
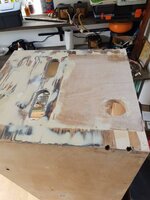
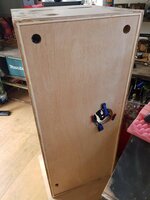
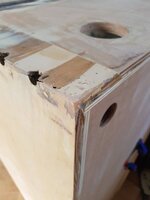
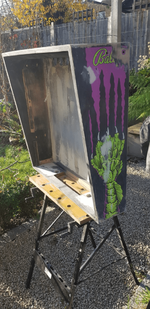
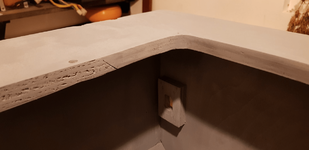
I used close to 5L of filler on the cab and completely replaced the front, rear, and bottom panels. It gets to that point when you realise that it probably would have been faster to make a brand new cabinet from scratch.

20191004_143042.jpg
20191004_143051.jpg
20191004_143132.jpg

Fibreglass on all the corners

20191004_143215.jpg

And new erm.. slidey back rails. Lovingly assisted by ms animal print of course.

20191103_144519.jpg

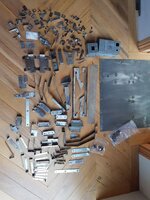
Although I've read that other people have sent their metal parts off to the platers rust and all, I couldn't fathom that there'd be anyone out there who would be happy to deal with the level of filth that these parts had on them. So I bought a dremel. Great tool the dremel. Became quite proficient with it. Bit of rust? That's a dremlin'. Trimming a screw? That's a dremlin'. Plaque on the kids teeth? That's a dremlin'.

All ready for the metal man:

20191102_122507.jpg

More filth and depravity to come.
 

Attachments

  • 20190528_134351.png
    20190528_134351.png
    424.3 KB · Views: 28
  • 20191103_144519.jpg
    20191103_144519.jpg
    83.9 KB · Views: 28
  • 20191103_144519.jpg
    20191103_144519.jpg
    83.9 KB · Views: 27
Last edited:
Looking forward to seeing this one done. Is it getting a new playfield?

Chris B had a decent one from a recent refurb he was doing, so I picked that up at Pinfest. Overall its in great condition. It's the light pink version, and has a little bit of wear around the snack bar, but is MILES better that what I had. Would ideally love to splash for the Mirco but for a hefty grand I can't stomach it at the moment.
 
Wow! And I thought my Star Wars was in bad condition. I find myself getting angry with the person who had in storage for so long. Instead of buying it and hiding it away from everyone for years, just let someone else who has the time buy it and restore it. It might also stop these stupid prices we are seeing.
 
Hooray for such an idiot for there are many!

While I am not one of the idiots (or at least not that kind!, don't have the skills for it either) nice to see its possible to rescue a classic machine from near oblivion rather than it just getting parted out.

I dread to think how many man-hours that has taken already.
 
Good on you showing that timber who's the boss! It starts looking grim when the base of a pin is all warped through damp and mouldy too.
The base of my mates T2 got really wet and I'd have to chop it out were it me.....

I think I'd have to change that left rear batton with the damn knot in the wood. It can be tricky finding decent timber as saw mills are nowhere near as abundant as they used to be.

Keep up the good work! 👍
 
Wow! And I thought my Star Wars was in bad condition. I find myself getting angry with the person who had in storage for so long. Instead of buying it and hiding it away from everyone for years, just let someone else who has the time buy it and restore it. It might also stop these stupid prices we are seeing.

While I totally understand the hoarding mentality (currently at my limit of 4 and struggling to decide which will be next on the block) it is indeed sad that they're not out and getting enjoyed (by me). Interesting thought though, I wonder what the percentage is of playable vs. stored machines in the UK?
 
While I am not one of the idiots (or at least not that kind!, don't have the skills for it either) nice to see its possible to rescue a classic machine from near oblivion rather than it just getting parted out.

I dread to think how many man-hours that has taken already.

I find that if i do it after a couple of beers and use leaded solder in a non ventilated room it's a lot easier to forget how many hours 👍
 
I think I'd have to change that left rear batton with the damn knot in the wood. It can be tricky finding decent timber as saw mills are nowhere near as abundant as they used to be.

Reckon I'll just hit it with a bit more filler! :D
 

Yikes indeed. So what's the lacquer used on JJP, Stern and Mirco playfields? 2K lacquer wouldn't compress like that. A little sinkage may happen over time but not to the extent I'm seeing with other playfield problems. I'd stick with what you've got and touch-up. If stripped then get the playfield 2K lacquered.

Shame you can't buy playfields un-lacquered and get it done yourself, innit?

We're I in the business I'd consider that option, it saves them time, money, hassle with some chemicals, fume extraction and comebacks on quality.
(If anyone making repro playfields reads this you can thank me with a free playfield!) ;)
 
Yikes indeed. So what's the lacquer used on JJP, Stern and Mirco playfields? 2K lacquer wouldn't compress like that. A little sinkage may happen over time but not to the extent I'm seeing with other playfield problems. I'd stick with what you've got and touch-up. If stripped then get the playfield 2K lacquered.

That was kinda one of the things I've always wondered - if you've got an existing playfield that has been clearcoated at some point, can you just go over the top with a new clear? Or do you have to remove the old somehow first?
 
For the most part and without knowing what the playfield is then yes, give it a light sand as a key and re-lacquer it. If it's a Creech ala a Diamond Playfield then no problem.

Re-do the artwork, degrease, remove all wax, a very light sand with 2000 paper get it dust free and 2K lacquer is the way to go out of a paint-gun. If you're just spotting it in you can apply with a brush - like I did with my Elvira touch-ups. If its stripped get the whole thing done.
 
I knew your Creech was bad but had no idea it was that bad mate! *Spoilers* The transformer is VERY sexy guys! 😂
 
Christmas is fast upon us and it's getting colder and colder in my little shed. The creech restore has been coming along nicely though, and I feel as though it's turned a bit of a corner. Less rust, more shine.

This is what I've done.

* All metal parts zinc plated
* Cab Armour powder coated
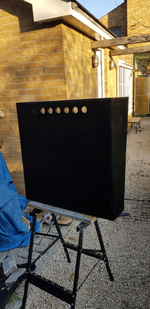
* Cabinet prepped and painted
* Backbox insert prepped, painted and decaled
* All wiring wrapped and molexed <-- time killer

This is the first time I've had parts zinc plated and I've gotta say I was pretty excited to open the box. So shiny!


1575304540420.png

Mostly really happy with how everything turned out. One thing I wasn't expecting was that the coil stops went black and kinda corroded looking. Not sure if they are still usable like that? Anyone experience that before?

Backbox preparing itself for undercoat. Bye bye original screen prints 😪

1575304555867.png

Done

1575304607853.png

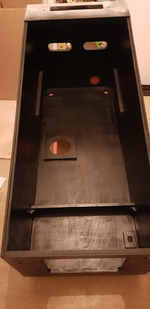
It's only when you get the paint on that you start to see all the little imperfections. I thought the new ply cab floor would be good to go, but it came up pretty rough after a paint. After this picture was taken I gave it another sand and coat, and it's a lot smoother now.

1575304566648.png

Really happy with all the panel repairs I did though. Can't even see that they were done after the paint had been applied. This cross section shows where I did the join:

1575304649471.png

Backbox insert after a lick of paint.

1575304588305.png

Hardware back on, and new decals applied.

1575304684300.png

Next up - finish painting the cab. Fill, sand, paint, fill, sand, paint. Every time I think it's done, my OCD kicks in and I go and ruin it with some more filler. It's like groundhog day, only dustier.
 
Nice work , just need that backbox screening now with the warning text.

Funnily enough I came across this post a few months back.

https://www.pinballinfo.com/community/threads/silk-screening-warning-notice-on-back-box.6419/

I figured I could probably send it to one of you helpful chaps to do it - but the guy on pinside still had some stock left so ended up ordering a set. I plan on screening the apron decals as well (with either the original flouro green, glow in the dark, or a combo of both) so hopefully my screen printing skills are up to the task.

Last time I did any printing was in reception using half a potato, glitter and noodles and my folks said it was the best Christmas card they'd ever seen, so should be fine.
 
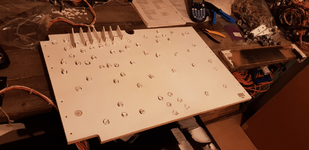
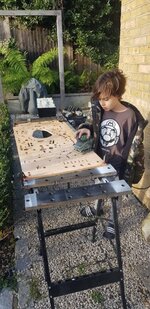
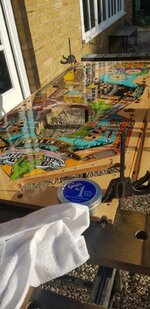
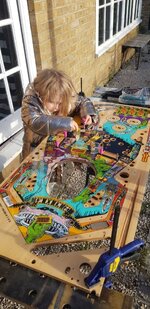
Wanted to get the kids involved today, so decided to get cracking on the playfield as that's more likely to keep them interested than sanding back the cabinet from the zillionth time.

So I got the big dude on the power tools. Unsupervised of course. The blasé one handed approach you see is a family technique.

20191208_111555.jpg

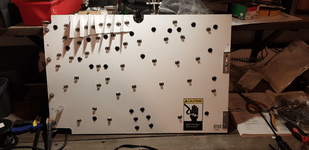
By the time we got around to waxing his interest had well and truly worn off. My first time waxing so didn't really know what to expect.. but pretty happy that I can see the reflection of the shed in it.

20191208_114400.jpg

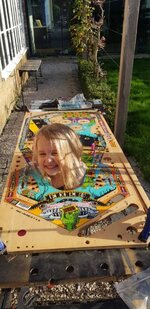
By this stage the little one had gotten bored of whatever she was doing, so I let her choose the post colour. Shoulda known..

20191208_121554.jpg


Super happy with the realistic quality of the repro holo:

20191208_121649.jpg
 
Had a 20min window tonight in between being asked to put suitcases back in the loft and cook dinner for the littluns, so what better opportunity to try a complicated new technique that I've 0% experience in. Screenprinting!

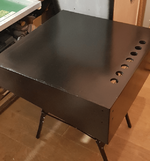
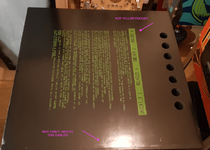
Backbox is, I think, as good as I can get it for the time being. Not like glass (if someone can explain how the f anyone manages that), but a damn sight better than it was.

20200104_171718.png

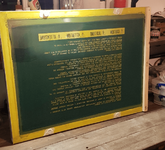
WPC warning screens bought from that dude on pinside. Yeeeaah I know I could have got someone in the UK who already had the screens to do it for me at a tenth of the cost and for a better result and in less time but.. like.. that would be totally contrary to the idiotic ethos of this build. Right?! Bet your @ss I'm right.

Cue screen!

20200104_171731.png

Bit of wood screwed in to the alu on the right which acts both as a guide and props the screen up when doing the first 'flood'. Couple of 20p taped the the underside which keeps the screen slightly off the target surface. I used some bright yellow water based stuff as recommended by another forum member, and diluted it about 20% since it looked a bit gluggy. 'Gluggy' is actually the technical term before you ask, derived from the germanic word 'glug', which means to drink ink with no chaser. Google it. Actually don't I'm a bit drunk.

Spooned the ink out in a line, flooded the screen, transferred to the backbox, did the second pass with a bit of gusto this time... and..

Viola!

20200104_173404.png

Goddam it. Back to sanding and painting Monday.
 
Had a 20min window tonight in between being asked to put suitcases back in the loft and cook dinner for the littluns, so what better opportunity to try a complicated new technique that I've 0% experience in. Screenprinting!

Backbox is, I think, as good as I can get it for the time being. Not like glass (if someone can explain how the f anyone manages that), but a damn sight better than it was.

View attachment 99249

WPC warning screens bought from that dude on pinside. Yeeeaah I know I could have got someone in the UK who already had the screens to do it for me at a tenth of the cost and for a better result and in less time but.. like.. that would be totally contrary to the idiotic ethos of this build. Right?! Bet your @ss I'm right.

Cue screen!

View attachment 99250

Bit of wood screwed in to the alu on the right which acts both as a guide and props the screen up when doing the first 'flood'. Couple of 20p taped the the underside which keeps the screen slightly off the target surface. I used some bright yellow water based stuff as recommended by another forum member, and diluted it about 20% since it looked a bit gluggy. 'Gluggy' is actually the technical term before you ask, derived from the germanic word 'glug', which means to drink ink with no chaser. Google it. Actually don't I'm a bit drunk.

Spooned the ink out in a line, flooded the screen, transferred to the backbox, did the second pass with a bit of gusto this time... and..

Viola!

View attachment 99251

Goddam it. Back to sanding and painting Monday.
Should of messaged me mate, I'd of come over and Sharpied it on for you for a tenner 😂
 
Back
Top Bottom