What's new
Pinball info

Register a free account today to become a member! Once signed in, you'll be able to participate on this site by adding your own topics and posts, as well as connect with other members through your own private inbox!

Complete Bally - Scared Stiff

too late :D but look good!
 
Last edited by a moderator:
Thanks @Neil McRae - I ordered some more with the star posts etc. The kit I ordered I was actually really annoyed with myself though as I said, it said playfield kit, and that was exactly all it was, ordered GI, but nothing in the back-box is currently LED'd... If you're getting rid of those rubber feet protectors though ;).

So a bit of a question to all, I have the black legs which I will be putting on shortly, I can get the siderails and lock down bar powder coated in black for free at work, should I do those too? Are the side rails hard to take off?
 
not sure I have any of them; let me check.

Side rails on BW are stuck on so can be troublesome. Worth looking on youtube there are a few videos of people taking them off.
 
Cheers @Neil McRae - :p

One thing I did this morning, and got me thinking, was to clean the outside of the cabinet, I always see in these logs that we spend hours and hours etc on the playfield and rightly so.... but never any mentions to the outside of the cabinet... The decals on this aren't perfect, so I didn't mind putting some 99.9% IPA on a rag and getting it cleaned a bit, this was a brand new and clean piece before starting, does the outside look any different? Probably not no, but I know in my mind it's clean when I put it in my pinshed.

Two sides...

01AFE89E-30D4-47DD-8522-A154ACC5415D.jpeg11D98F32-250C-4EED-AB36-B777F0358B8A.jpeg
 
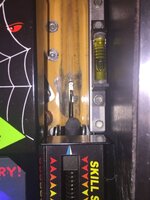
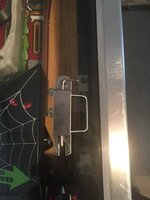
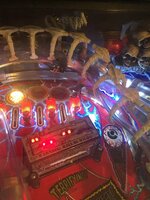
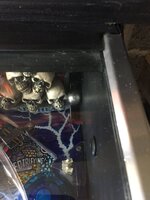
The right ramp, since re-installing it, I can get some ball jumping over the top and into the pop bumpers, or in this case, into the skull pile, contender for most amusing stuck ball this month? I cannot seem to see anywhere to maybe put some washers or something just to raise it up a little... any ideas?

IMG_6316.jpg

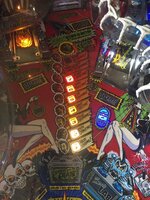
There was some insert ware on the 4, 6 and 8, which was causing some slight movement on the ball, I have sorted this with some clear nail varnish, it has solved the issue 100% and I am actually really happy with the results on that...
IMG_6317.jpg

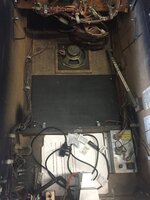
So I cleaned the inside of the cabinet as well today, this was really interesting, although I am not sure what visual difference it actually makes.
IMG_6318.jpg
IMG_6322.jpg
IMG_6319.jpg

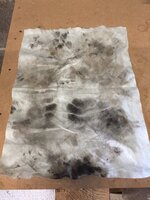
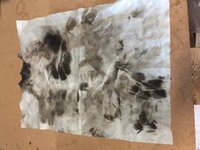
So took everything out of the cabinet and gave it a good old hoover and clean out with floor wipes as they are for wood apparently???

It has come up better I think.
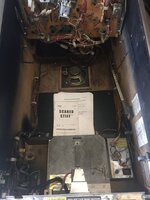
IMG_6324.jpg

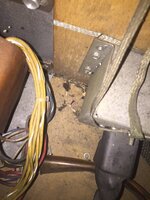
But the real proof is in the muck and extras that came out of it... each side is just as filthy...just crazy.
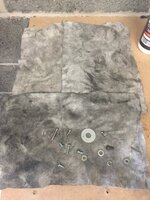
IMG_6323.jpg
 
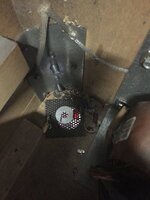
Does the machine show any sign of having been owned by a company called 'Wizard'?. I used to add a large washer like the one found in the cabinet to the wing-bolts used for securing the back-box (though I don't suppose I was the only one to do so)
 
Last edited:
I cannot see any sign of a wizard - either side of the flippers, but there was a huge wing nut attached to the speaker on the inside as well lol...

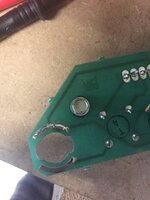
Another little error that I had was a light which I couldn't get to work at all, where the switch was making contact was pretty pitted, I checked over the diodes with the meter, all checked out ok, all other lights were working so I just tried reflowing the solder contacts and cleaned up the socket with some IPA.

IMG_6325.jpg

BINGO - all working perfectly now... Love little fixes like this.
 
Quick little fix today - just popped on the flipper buttons I bought ages ago...

Can you tell the new from the old?

5B15553F-3DB3-4E2D-8DDD-6A903354BFEA.jpeg
 
On what sorry?

The filthy old flipper button and bright new one?
 
Sorry I’m travelling and had a few beers for dinner, missed that :p - to be fair my first post was a tongue with just a side of cheek
 
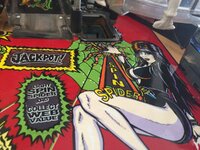
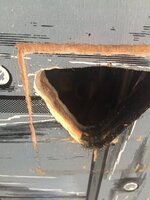
So a couple of updates from SS - I have decided to put in the "Cliffy" style protector on the spider hole as it did not look right to me

IMG_6674.jpg

The show stopper for me though... wow.

IMG_6684.jpg

IMG_6688.jpg

Absolutely shattered and was playing without headphones, but I think the game was happy for me to have been doing the work and repaid me with HS 4.

Worth. Every. Penny.
 
So today a little further work - there was a no return gate that had no gate wire in at all - the extra ball shot, this has been sent away to have someone kindly sort me one out.

The new long wire gate for the shooter lane I got off of @Poibug is now install as well as having the mint manual now sitting in the base in a nice protective cover.

The GI issue on the top string that came about since LED’ing is now resolved - dodgy GI LED - check em before installing.

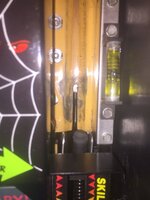
The shooter rod was very misaligned as you can see below, this kept causing shots into the first post, would happen at least once in a three ball game.


E164538D-D7AE-411C-A833-1EFCC4516992.jpeg

Pretty clear it’s way off centre here - so needed adjustment.

8DFB5485-2CF2-47BA-AE0E-1729A58C5AE5.jpeg

Took shooter out and gave the area a little drilling out - there was no way I could move it over far enough after a few attempts so this had to happen.
A05C7038-263B-40B0-ABCF-80E0D8363879.jpeg

This is hard left on the hole and still not 100% centre but after play testing of four games not one re-occurance.
 
Thanks @stoptap for this non return gate, perfect and had a quick game - makes such a difference that ball not hurtling back down and not getting the deadhead.

CC8E7110-5596-4EFD-9B82-6BBD4F8CDFE2.jpeg
9B19AB92-FCA6-43F9-AA1C-237734CA224F.jpeg

Once I get the replacement coffin decal I might pull that Mylar in front of the coffin and slap another bit down just to stop that wear getting any worse - or would people suggest overlaying another bit instead of pulling?
 
9BDCF915-8FF9-4534-B3B3-59694C8BEC1A.jpeg
6259E55F-CC67-43F0-9575-E0A1C6D36B5B.jpeg

Backbox finally LED’d! I also changed the left coil to a weaker one to stop the aorballs. Still getting a couple so will raise the back legs but also add some Perspex soon...
 
Very nice, you've been practicing! Can't be too far off being done now? I love that game!
 
Further progress has been made

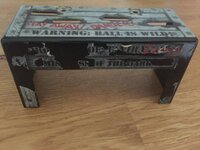
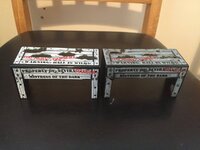
New crate which I started to pull the stickers off has arrived

97FF881D-E3CD-4CC2-9B39-654CC62A9D10.jpeg

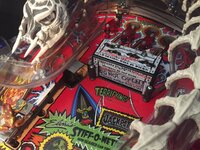
The old crate which had some cracks and platic issues against the new one with the new decals on

8EF53064-8ECA-4FD7-855D-2069C65DF565.jpeg

I added a couple of metal washers to stop any breaking of the plastic on this one.

A20D5ACB-0C1C-44B5-ACEA-16935A987B13.jpeg

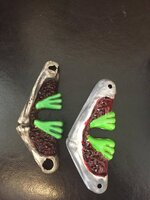
New sling plastics as the old ones had had it 85E6A7D3-5EDA-4369-A38C-F7E92EF5E000.jpeg
27D6F0F8-8DAD-49F9-931C-685601549803.jpeg

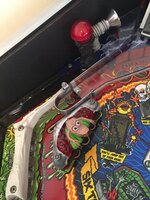
Just a new coffin spring needed for this now I think as the old one was a bodge that did work but the new spring is a few £
 
Back
Top Bottom