What's new
Pinball info

Register a free account today to become a member! Once signed in, you'll be able to participate on this site by adding your own topics and posts, as well as connect with other members through your own private inbox!

Complete Fireball 2

You need balls of steel in this hobby sometimes ;).

Good luck mate. Cabinet and shiny parts look fantastic so far. Can't wait to see it all together again.
 
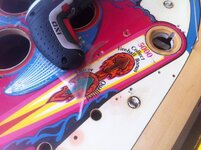
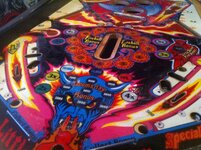
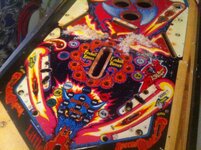
Phase 1 is complete :D I've got the mylar off with pretty much zero damage. There's a couple of keylines to touch in around some inserts but really minor. One insert was already damaged under the mylar (from heat by the looks of it) so that needs fixing but shouldn't be too bad. All in all I think it's been a massive success :) The playfield under the mylar is still covered in adhesive so I'll be using the flour trick tomorrow to get that off but it looks in good shape. The colours should pop a lot more now the mylar's gone as it was very dull :thumbs:

It was properly tense at some points and it took ages as I took it so slow but I think it was definitely worth the effort. Here's what I started with....

IMG_6951.JPG

And here's with the mylar on after cleaning....

IMG_6954.JPG

IMG_6955.JPG

IMG_6956.JPG

I started in an area that was already lifting a bit. I don't have many more pics of actually taking the mylar off after this point as I wasn't really thinking about taking photos :D

IMG_6953.JPG

IMG_6957.JPG
 
Phase 2 of the mylar removal is complete. I used the flour method to get off all of the adhesive left behind after the hairdryer treatment. It worked a treat and IMO is the best way to get mylar glue off a playfield, especially an older one :)

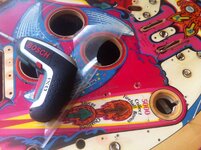
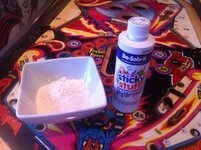
Here's the required tools :D I'd normally use Goo Gone for this but I didn't have any so went with this sticky stuff remover from Lakeland.

IMG_6991.JPG

First step is to cover the adhesive with a thin layer of the flour....

IMG_6992.JPG

Then cover the flour with the sticky stuff remover liquid and leave for about 10 mins....

IMG_6994.JPG

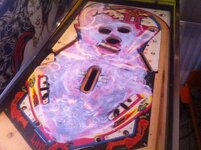
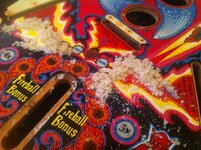
Then pour a pile of flour at one edge of the adhesive and start using the pile of flour to rub on the playfield. It'll fetch up the adhesive kind of like this....

IMG_6996.JPG

IMG_6999.JPG

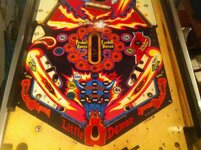
Needless to say this makes a proper mess so then hoover the playfield to get up all of the flour. You'll probably also need to hoover in the bottom of the cab as quite a lot falls through the various holes. Finally give the whole playfield a good clean with Novus 2 and you end up with something like this (the crappy camera on my phone really doesn't do it justice).....

IMG_7006.JPG

IMG_7007.JPG
 
Great step by step info. I've never done this but when I do I will be sure to follow your instructions.
Nice work buddy it's looking the nuts. Can't wait for a game at NLP.
 
Just a quick update to say that I've started putting the game back together :D The plan is to try and get the bottom of the playfield fully re-populated by the end of this week and work on the top side at the weekend. So far the sling mechs, little demon post mech and magnet doodlebug unit have gone back on and I'm part way through rebuilding the flipper base plates. Drop target banks have been rebuilt and just need bolting back on so hopefully things will start moving quite quickly from here on in.

Still on course to have this back together and play tested in time for NLP :thumbs:
 
Great work on the mylar, I removed the mylar very successfully from my BK2K upper playfield but left the lower playfield. Would like to remove from centaur and medusa but fear I will regret it, balls of steel required.
 
Would like to remove from centaur and medusa but fear I will regret it, balls of steel required.

It was quite nerve wracking but as long as you go really, really slowly then it should be ok. Getting the adhesive off is easy using the flour method so it's just the mylar pull where you have to be careful :)
 
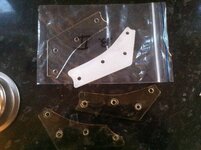
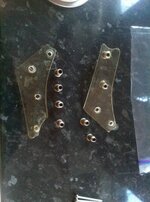
Does anyone have a spare one of the opposite of this they could part with please? It's from a Bally flipper base plate and I need the one that faces the other way to what's shown in the photo. I'll stick a seperate wanted thread up as well :thumbs:

IMG_7009.JPG
 
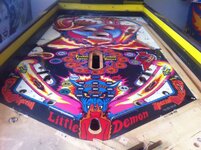
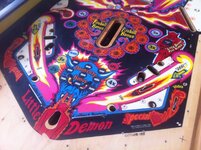
The bottom of the playfield is all back together now, just the flippers to sort out :thumbs: I've started to re-populate the top of the playfield and done a test fit of the playfield protector as well :)

IMG_7017.JPG

IMG_7018.JPG

IMG_7019.JPG

IMG_7021.JPG

IMG_7013.JPG
 
Ooh! Liking how that protector fits on. I think I'm going to try this style of protector when I do one for my VECTOR. The "total overlay" method I used on GOLD BALL is probably better but was a lot harder to do. Needed lots of fettling. Star posts could be mounted on top but small metal posts would "bite" in too deep and pucker the Lexan. This loose-fit method means only the playable area is covered and nothing bolts down onto Lexan itself.

So looking forward to seeing the fruits of your labour at NLP.
 
A lot of time spent and progress made over the last couple of evenings. The top of the playfield is pretty much back together and it is looking awesome :D I'm going to hold off on the pics until tomorrow so I can take some decent ones during daylight :thumbs:

I expect to be powering up tomorrow to check lamps and work through any issues I've introduced and the flippers still need finishing off but we're close to the first play test. I also decided to treat the game to some brand new red displays courtesy of @lukewells and these will be getting fitted during Friday setup at NLP :)
 
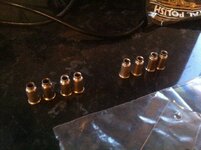
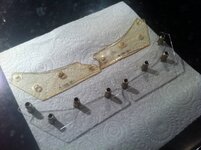
Big thanks to Dave @PinballDaze for getting the flipper base plate part out to me so quickly :thumbs:Arrived this morning so the chance of play testing this weekend has increased quite a bit :) One of the jobs from last night was to swap over the metal bell posts from the old inlane plastics to some new ones I'd got from Germany. I followed the technique shown in the video below both for removal and re-fitting using a soldering iron to melt the plastic slightly, worked a treat!

IMG_7025.jpg

IMG_7027.JPG

IMG_7028.JPG

IMG_7030.JPG
 
Some great inspirational restoration threads on this site, wish I had the balls to do a full strip and clean...
The EM I'm smartening up at the moment is just surface cleaning compared to some on here, I'm paranoid about breaking contacts on the playfield.
 
The game is pretty much back together now :D I've got the following jobs to sort out and then it should be complete :thumbs:
  • Properly fit and adjust the flippers (in the pics below I just dropped them in to see how the colours looked)
  • Figure out why the game has no sound
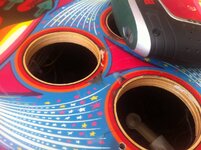
I had a few different choices of flipper rubber colour to go with the red flipper bats but I think the yellow looks best (they're superbands so the glossy look matches nicely with the playfield protector). I've also gone with a mix of red and standard incandescent lamps for the GI :) Once the flippers are in I'll do some proper play testing to make sure all the switches are working etc.

The sound issue was present before I started taking the game apart. I'm thinking it's a connector issue as I've tried my good known working FG sound board in the game and get no sound from that either. The sound was working at the UKPP and the main thing that's happened since then is connectors have been taken on and off. I'll replace them to start with and see if that fixes it....if anyone else has got any suggestions of things to check then please let me know (the other things I can think of are dodgy volume pot or blown speaker) :thumbs:

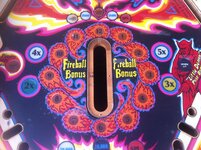
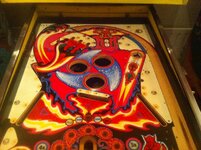
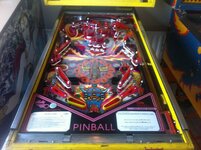
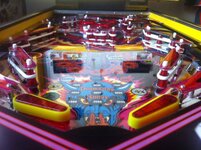
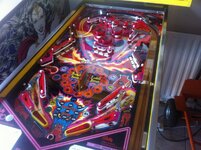
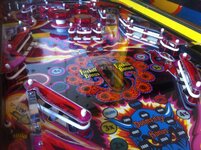
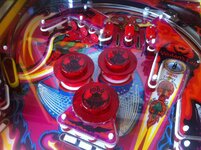
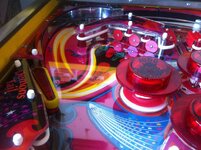
I'm really pleased with how this one has come out :D The artwork on this game is incredible....

IMG_7041.JPG

IMG_7043.JPG

IMG_7044.JPG

IMG_7045.JPG

IMG_7046.JPG

IMG_7048.JPG
 
Been a bit quiet on this the last few days :) The game's had a little trip out to The Legends place for the last couple of days to see what was going on with the sound and also for some new playfield glass (plus any other tweaks he spotted). All is now sorted and I'm going to collect it this evening :D The only thing left to do is put in Jim @myPinballs new S&T board with the reverb and then shoot some gameplay video over the weekend :thumbs:
 
Been a bit quiet on this the last few days :) The game's had a little trip out to The Legends place for the last couple of days to see what was going on with the sound and also for some new playfield glass (plus any other tweaks he spotted). All is now sorted and I'm going to collect it this evening :D The only thing left to do is put in Jim @myPinballs new S&T board with the reverb and then shoot some gameplay video over the weekend :thumbs:

Nice one. Looks Amazing. There should be a real strong and quality Bally presence at this years NLP :)
 
Back
Top Bottom