What's new
Pinball info

Register a free account today to become a member! Once signed in, you'll be able to participate on this site by adding your own topics and posts, as well as connect with other members through your own private inbox!

The Pinball journey begins.....

Wiredworm

Registered
10 Years
Joined
Apr 7, 2013
Messages
2,374
Location
Grimsby
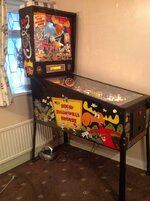
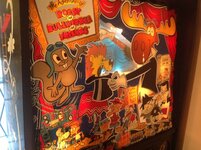
I took delivery of my first real Pinball machine yesterday.

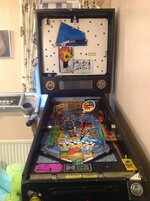
Matt was totally up-front with me about the condition when I bought it, but even so i'm really happy with the purchase and I feel i've picked up a bargain. The table (a Data East Adventures of Rocky & Bullwinkle) is great fun to play and is in pretty good condition.

The cabinet is pretty beat up and as Matt put it "appears to have been attacked by a shark". But it's nothing I can't repair with the right materials and a little patience. The first challenge when it arrived was getting it in the house. It turns out the head was marginally too wide to get through the front door and it was just millimeters too wide for the back door as well. I could have probably got it in had I removed the door from it's hinges but then i'd probably have struggled moving the thing through the kitchen in one piece.

So ultimately I took the brave (or possibly stupid) move of stripping the head off. I took plenty of photos and then removed all of the connections from the PCB's. Stripped the head and transported both parts into the back room. And then this morning i've reconnected everything using my photos as reference. And amazingly it's all working.

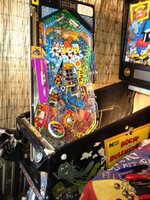
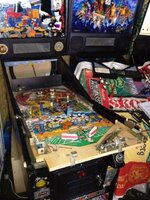
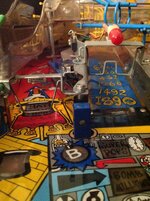
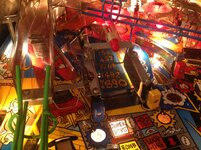
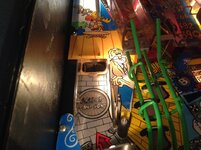
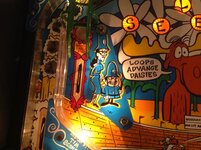
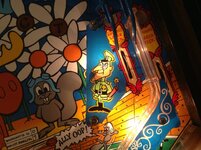
Playfield is in great condition except from some slight wear around Aesops Hole (fnarr). Think first order will be to get a cliffy protector in place for the locations that need them (think there's 2 on this table). The ramp plastics are in great shape with no cracks or damage so i'm pleased about that too.

So far the list of things I need to look at are:

1. Trigger test shows a fault on the top center lane. So that needs investigating.
2. Lion plastic in the top hat is held together with tape. This is causing it to stick in the up position. The Rocky plastic behind it looks fine but that's also sticking so it's probably worth me removing the Lion first and see if the tape on that is also jamming the Rocky. Locating a Lion plastic could be fun - it appears Marco's list them but they're out of stock (and I suspect they'll remain that way).
3. Cliffy protectors

I'm sure i'll find plenty more to look at as time progresses.

Family are round for lunch later so i'm going to let the grandkids loose on it. The missus has already commented about how noisy it sounds from upstairs so i've dropped the volume a little for the moment. If it becomes a real issue then she'll have to invest in a Shack in the garden for me. ;-)
 
A tip for next time you have to move it. You don't need to remove the head all you have to do is remove the hinge bolts from inside the head and rotate the head and have someone support the head as u move the machine.
 
A tip for next time you have to move it. You don't need to remove the head all you have to do is remove the hinge bolts from inside the head and rotate the head and have someone support the head as u move the machine.


Nah, just get a builder in and sort out the door hole size issue..;)
 
We're planning on having patio doors put in at a later date which would solve the issue and provide a nice clear route to the back room. Probably a moot point as I doubt I'll get authorisation for another in the house. I think a Grizz-style shack is more realistic but probably not until we move somewhere with a bigger garden. Still, at least this one will keep me both busy and entertained in the meantime.
 
Great to see you have your first of many machines, and you got stuck in stright away by removing the head to get in in the house.
Oh and good luck in putting up with the "Wrong Hat" being shouted at you.
Good fun machine, apart from the wrong hat quote , enjoy.
 
Get the patio doors quick!. My 1st pin last year has now turned into 6, and I installed double doors to the games room to get them in....... but wish I had built a ramp instead of two steps :(
 
Thanks for the feedback guys, and also the good advice.

The 'Wrong Hat' quote isn't bugging me too much just yet. On the whole i'm impressed with the game, and the DMD animations are really cool. Probably a good Pin to start with as the kids all love it and the missus has already threatened to beat my current high score (which is a paltry 80M) whilst i'm away in Denmark. I'm keeping fingers crossed that she gets bit by the bug - it will make getting more machines in the future a lot easier. ;)

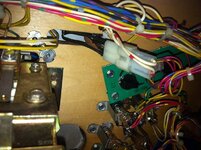
I've already managed to fix the center lane sensor issue - it was a simple fix. I lifted the playfield and found a fairly sizable lump of fluff was wedged under the sensor. Removed that and reseated everything then launched the diagnostics to find everything is clear now. Superb :-)

Also removed the Nell Log Assembly so I could have a look what was there and what wasn't. This machine was owned by Dan prior to it going to Matt and he'd already mentioned he'd ordered a new motor and belt for the log. Sure enough they're both present but as yet not connected. That's on the list to do when I get back.

I'll try to get some pictures of the game uploaded a little bit later. Just waiting for the iPad to charge so I can get plenty of photos to take to show my Danish colleague. It's his fault i've become addicted to Pinball as he made the introduction when he showed me the collection of 6 that he has.
 
cooooool! i love it when machines do the circuit between all us pinheads, and get a new helping of love each time.

i adored this machine. when i got it, there was no back end at all, so a shark bite was fully applicable (actually i think it was less exciting than that, i think it was sat on its end on a wet floor, and it just rotted off). i stripped it down and cleaned it up - i claim responsibility also for the tape on the lion plastic, i think the tiny amount of glue that was holding it together beforehand disentegrated when i was cleaning it up. sorry bout that.it predated the tiki hut, in fact i used R&B to prop up the ceiling when i was putting it up, as i had no helpers :)

garage w 1 pin.JPG 18.jpg1.jpg31.JPG

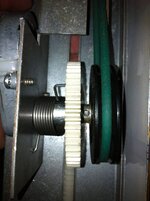
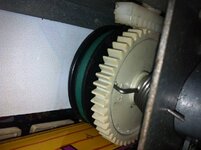
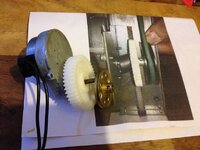
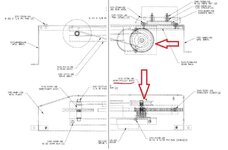
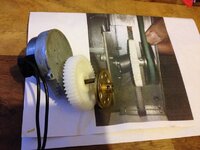
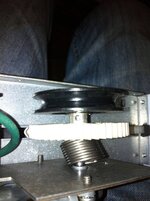
as said, you have a motor, a belt, and everything you need *except* the gear assembly, which is impossible to get, believe me. i asked about 20-30 places, and what you can see there now is cobbled together from cogs i got from various sources, from ebay to old scalextrix kits and round and round. i had fun playing with it all and have attached a few pics that may help you. where i got up to, before i got distracted, was that i had Frankensteined a gear assembly that seemed to all mesh correctly but now needed a spring that will correctly make the mechanism work as it should. the belt was a proper one sold as a Nell log belt, but always seemed a little loose to me. maybe if it's in a proper figure of eight, and the parts are separated a bit more, it'll get the traction that's needed, but if not, my plan was always to just use a big wide rubber band instead, as i'm sure you could get every length possible under the sun on ebay, so i planned to get 3 or 4 different sizes, and just pick the one that worked best. i posted threads about all this a couple of years ago, but i think they got lost in the forum move.


gear behind nell from ipdb.jpgian pic 9.jpgian pic 4.jpgian pic 5.jpg all the parts ready, almost.JPGNell log assembly with parts needed arrowed.jpg

those sources of help you may want to approach: Ian on this forum (he has a working one, and took loads of pics for me, but his has been hacked/glued, so he can't disassesmble it); Dave Wilcox (http://davidwillcox.vpweb.co.uk/default.html - and he goes to loads of shows so will meet him: nice bloke, he was trying to help me with getting hold of that spring); Dave Dutton (posts on yahoo group, don't think i've seen him here - he has a spare populated playfield with a functioning Nell log assembly, and said he's be willing to sell it); also if you do a google search for Rocky Bullwinkle pinball Nell log assembly gears, or something like that, you will come across a long detailed discussion on RGP, where Cliffy (yes, that Cliffy) discussed how he managed to fix one years ago, and folks discuss how the tension has to be just so, and where to have the log lined up and how the spring attaches and all that ..... i can't say it was a full walkthrough but it was useful, so i think if you email Cliffy at his website he'll probably also help you.

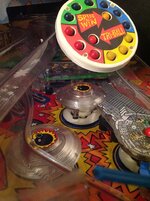
enjoy your new game, it is a fine piece of machinery. my top score was about 350M i think, though you'll find there is a very useful feature where it occasionally offers to double your score, so (obviously) always take this, and hopefully it'll offer it when you're already in 3 figures. read the rulesheet thoroughly, there's also a very nice 100M shot available, i think it was by completing the colours on the wheel thingy during triball. and go for the hat trick often, as it gives out loads of free balls much easier than getting them any other way.

looking forward to reading about this, i'll step away so as not to mess up or derail your thread now
 

Attachments

Thanks Dan. The background information you've given will be a massive help.

A few questions for you though:

1. It's clear the plastic gear is one you've sourced because the plastic colour totally differs from that on the Nell gear track. I'm guessing the gear is meant to be fixed on the shaft and this can most likely be done by passing a grub screw into the whole that appears to be on the collar of the gear?

2. The spring you talk about is the one that sits between the plastic gear and the metal panel that the motor fits to? I guess this is just to offer some resistance as the Nell log moves towards the spinning saw blade?

3. Is the diameter of the meccano gear wheel the exact same as an original wheel? If the belt is a little loose then maybe there's some value in me finding a replacement part with a larger diameter to take up the slack.

I'm thinking it would be worth me laying my hands on a 24v supply so I can work on the assembly away from the table. It might give me some food for thought or clues about the best way to proceed.

I've also got a friend who runs an engineering company so i'm thinking of maybe passing it under his nose - he might have some ideas on a good way to get it working again.
 
1. It's clear the plastic gear is one you've sourced because the plastic colour totally differs from that on the Nell gear track. I'm guessing the gear is meant to be fixed on the shaft and this can most likely be done by passing a grub screw into the whole that appears to be on the collar of the gear?

2. The spring you talk about is the one that sits between the plastic gear and the metal panel that the motor fits to? I guess this is just to offer some resistance as the Nell log moves towards the spinning saw blade?

3. Is the diameter of the meccano gear wheel the exact same as an original wheel? If the belt is a little loose then maybe there's some value in me finding a replacement part with a larger diameter to take up the slack.

it's all too long ago for me to remember the exact details i'm afraid. the plastic gear and the metal rail thing are both supposed to be fixed on the shaft like in this pic and in Ian's pic below, which also shows the spring, and how it's connected at both ends (if you look closely you'll spot the top end of the spring poking out). the white cog has loads of holes in it because i drilled them all, with the intention of - when i finally got hold of an appropriate spring - trying the different holes to get the one that worked best. sortas like i was gonna do with the belt, i tend to do a lot of experimenting).

the spring's function is to bring the whole mechanism back home after the motor has been working to turn the belt (and thus make it look as if Nell is gonna get bisected). i think that's why these mechs always went wrong, it seems to be a fundamental design fault to me, that the motor has to constantly work against a spring. no wonder the motors all burned out or the gears stripped the teeth off, or whatever happened.

all the parts ready, almost.JPG

ian pic 7.jpg

there should be a grub screw included with the brass piece, at least there was back when i had it last. if it's not there, maybe Matt took it out and had a play with it and put it somewhere. the white plastic cog i attached using superglue and a homemade shim made of metal from a coke can or similar i think, though i also tried using tightly wrapped cotton thread and all sorts. it was held pretty fast, but i then had to break the join when i realised i needed it to all be apart when i wanted to try fitting the first of many springs in there.

if it all goes to pot and you can't get it working, remember that the Nell log is purely a toy, and has no function whatever in the actual gameplay.
 
Thanks Dan. As you say it's pretty clear why so many of these things have failed. Having the motor working against such a tight spring is obviously going to load all components involved but I guess for DE it was far easier than trying to reverse the motor or use some kind of gearbox.

As you say it's only a toy, but that's part of the reason I've immediately stripped it. At least we can still play with it removed. I'm pretty sure I have a 24v supply at work so I can ever test and trial things away from the table.

It seems getting the spring positioned correctly is definately trial and error (based on what I've read) so I'm sure all the holes will come in handy. :)

I'll be sure to keep you up to date as things progress.
 
I'm already on the case.

The spring I need is a torsion spring and i've asked a colleague at work who is in our purchasing department if we have dealings with a company that would sell such things. I'd say it's pretty likely we do so maybe by passing the pictures in front of them it might give us some clues.

The issue with the loose belt is, I think, most likely due to the meccano wheel size used. Looking at the pictures you posted above the wheel should be pretty much the same size as the gear and i'm almost sure the one you've sourced is a bit smaller. No biggie at all - I can either try to source a larger one, or take the easier option and just find an o-ring of a suitable size and use that as the belt instead.

I'm in Denmark the rest of the week so i'm going to try to do what I can remotely so that when I get back on Friday I hopefully have some bits to start looking at.
 
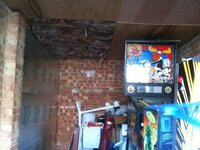
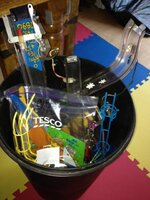
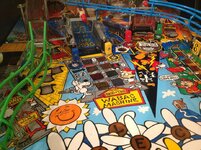
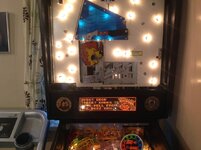
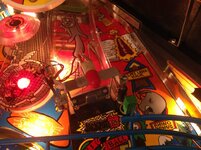
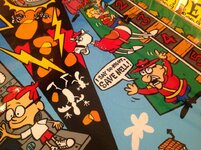
Oh, and also. Here are some pictures of my first Pinball in it's new home. You can't see from the pictures but the cabinet is pretty chewed up at the back so I need to take some time to get that repaired. It's not affecting the gameplay so no huge issue.

e9314b507b026dd594e550acb3336e79.jpg db130a2eecdd166927637a6e1a61f969.jpg5456a6ccd23777e01fc674423bc3a50c.jpg40cfa59162badcd811f2f1e99b657b6b.jpg87525921ff0fceca96743895e11dbffd.jpgebc9bccb8f7e699911cb4bc07168cebe.jpg8fa01f2d49fd300ba2c41f5faacd1dde.jpg77af41d91dcf6a89d647f44d996bc57b.jpg0c08e8462ce45ea9f732a0099e799062.jpg9bd47a39c4a5ac43cf29eb2195dba16b.jpg4483a42a9c95f496460921da43691451.jpga0f9ad699d91b22c340e3260e4faba21.jpg

Confirmed list of jobs I'd like to look at are as follows:

1. Sort out the badly chewed cabinet. Needs filling in sections and then repainting.

2. Fix up the broken and sticking plastics in the Hat Trick. The Lion will be tricky as it's pretty much unobtainium from what i've heard, although Russ Meyer over at Pinside says he might be able to help out so i'm just waiting to hear back. Another option i'm considering is speaking to the people who make up all our signage at work. It's produced in a similar way so they might be able to replicate it.

3. Perform the Coil Mod on the Hat Trick. The Lion coil has a 50v supply for some reason whereas the Rocky and the Rhino coils run at 32v. It's considered that this increased voltage for the Lion is what causes it to slam up with such force and why so many of the Lion plastics are smashed to pieces.

4. Investigate the possiblity of replacing the lamps for LED lighting. I'd be interested to hear if people have thoughts on this.

5. Look at a Cliffy protector on Aesops hole. I think he also does them for the ramps too - is it worth getting those fitted now too? The ramps look in good shape to me so possibly worth doing.

6. A few broken plastics on the playfield. Is it worth replacing those and i've seen they sell guards - are they worth the investment?

7. Some slight damage to the artwork on the backglass. Not sure if it's worth doing anything with or if I should leave well alone.

8. That damned Nell Log Assembly. I've stripped it out already and have sent out some e-mails to suppliers who might be able to source the needed parts.

9. Boris button and housing are a damaged or worn. Both parts are available as spares so I might look at picking those up and getting them replaced.

I think that'll do for starters. Looking forward to addressing at least some of the above issues.
 

Attachments

  • ecc01f4c86032683e7e28c2fe839e816.jpg
    ecc01f4c86032683e7e28c2fe839e816.jpg
    117.9 KB · Views: 16
Good list and you are getting stuck in which is fantastic. It will be a slippery slope to a second machine and then a third as you chase the desire to trouble shoot as much as play. ;)

I can give my tupence on the LED idea. That is entirely up to your preference and people can only give you their opinion. There are some games and some areas on a playfield/back box where they won't be noticed. There are some games where they might make it look better to you, some people really like the look. I don't mind them in bright areas but start to find them annoying in darker rooms. There are of course many different types of bulb that give different effects from very cool and clinical to the warm old fashion style bulb. Some bulbs don't fit in some places, some may strobe a little or ghost.
LED do run cooler and use less power but a home use game might never get the saving in cost or get the sort of heat build up that needs cooler bulbs. So buy some if you fancy playing around and add to your own taste.
 
10 give it a bloody good clean, polish and wax. Polish or tumble the metal parts it will make it look loads better.

Have fun I'm just finishing up the shop of my first pin the shadow
 
By god it's addictive - i've only hsd it two minutes and already i'm listing what I want to do to it (fnarr).

With regards cleaning the playfield - I think at least one of my pictures shows what appears to be a mylar circle. What's the score with those? Do I just carefully peel them off, clean the playfield and then replace them (or not)?

From what i've read the Treasure Cove Cleaning Kit seems to be the way to go?

Thanks for all the feedback so far - much appreciated and great to know i'm amongst such friendly company. :-)
 
Oh, and one more question. My chances to make the pinball oh so shiny are limited as the habitrails are painted primary colours which seems in keeping with the game.

So perhaps the best I can do is to strip the gates at the entry to the ramps and have those polished or tumbled. Is there any kind soul who'd be happy to tumble them for me please? I'm happy to pay real cash or beer tokens. :-)

Thoughts and comments welcomed as always.

Pete
 
Obviously I ment the un powder coated metal bits lol. I cleaned and polished everything by hand. If the Mylar isn't lifting or worn leave it be. You can clean and wax over it
 
Thanks for that - i'll probably whip the habitrails off anyway just to give them a damned good clean.

What's the recommended cleaning agent for the metal parts?
 
Thanks Carl. I'll give that a try. Now that you've said it I do recall hearing about Autosol.
 
Guess i'd best get my **** into town at the weekend then to pick some up. Looking forward to cleaning it up. Need to grab some wood filler to so I can start building up the 'shark attack' at the back end of the cab.
 
They aren't unfortunately.

The good news is that the same artwork is mirrored on the opposite side of the cab and that's in good order. So my plan was to actually take a trace from that and make a stencil I can use on the other side to fill in the bits i've had to patch up. Of course it helps that it's largely line artwork and i'm hopeful that I can get it looking as close to perfect as possible. But I never like rushing in so I suspect there will be a lot of trial and error before i'm happy to say it's 'done'.
 
I'll be sure to do just that. Hopefully make some start on the basics this weekend.

I'm away from home right now but I plan on sitting down tonight and putting together a parts list of the bits and pieces i'm going to need. It may be slow progress as funds for the repair are a little short right now due to other commitments.
 
Back
Top Bottom