What's new
Pinball info

Register a free account today to become a member! Once signed in, you'll be able to participate on this site by adding your own topics and posts, as well as connect with other members through your own private inbox!

Complete Tarting up a Paragon

Mfresh

Site Supporter
10 Years
Joined
Oct 7, 2012
Messages
2,250
Location
Marlow on Thames, Bucks
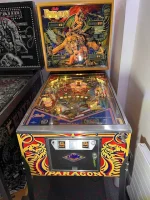
So I bought a Paragon of @PUP a little while ago. Brilliant machine, players condition, at a very fair price. There were a few bare wood patches on the playfield, and some touch ups had been done - rather well - and some of the inserts were cupped quite dramaticaly. But it played really well, and I had a lot of fun with it, and I never had time to take a close look at it.

But after a few months I smelled burning, and on closer inspection, I saw that one of the GI plugs on the rectifier board had burned itself up rather a lot. Hence the smell.
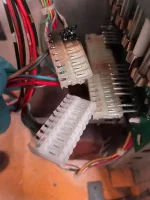
IMG_7181.webp

Nothing that unusual on a machine that old, but a closer inspection of the rectifier board showed that that had been patched multiple times and it was going to be more than just a matter of repinning and replacing the plug.
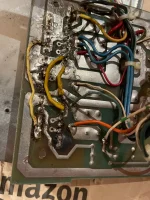
IMG_7194.webp

So I thought I better get a replacement rectifier board, and that became a kind of well why not spruce up the whole machine. Replace the playfield, paint the cab, rebuild all the flippers and bumpers, make shiney shiney.

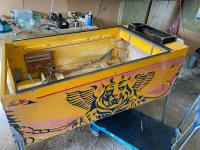
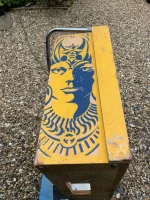
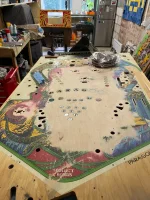
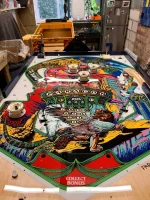
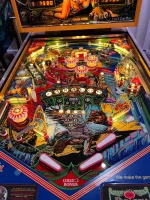
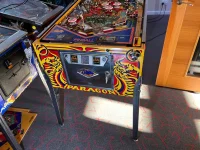
Here's a few pics of the playfield and the cabinet to get an idea of the condition it was in - overall not bad for a 40+ year old machine, but in need of a bit of tlc.
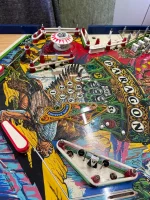
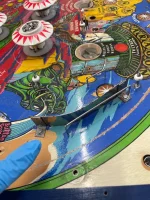
IMG_8589.webp

IMG_8917.webp
IMG_8076.webp
IMG_8341.webp

Let's go!
 
First up was getting the lamps working. Quite a few controlled lamps didn't work, but changing the lamp holders fixed about half of them. Most of the others were fixed by rebuilding on of the plugs onto the lamp driver board, which was tedious and fiddly. The weird thing is that most of the wires looked perfectly well seated into their pins on the plug, but only by attaching new pins and inserting them into the plug would the lamps work. I guess they were just tarnished inside. The last lamp working was due to a fault on the lamp board, but with some help from @AlanJ (who also kindly send me new parts for the board) we finally had all lamps working. Basically everything else was fully functional so time to strip the playfield topside and add a hardtop and patch and repaint the cabinet with Pinball Pimp stencils.

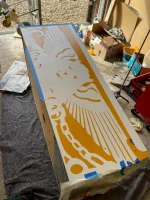
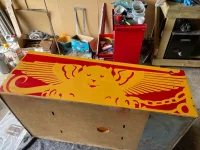
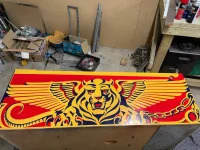
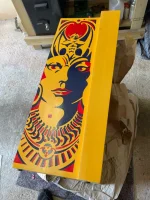
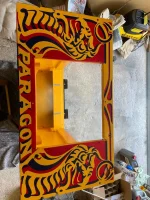
So after filling with resin and sanding, a layer of white primer, then yellow, then red then blue.


IMG_8488.webpIMG_8491.webpIMG_8629.webpIMG_8619.webpIMG_8633.webp

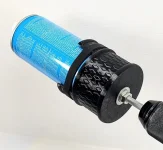
Using Painter's Touch spray cans makes it dead easy to do the stencilling. I even treated myself to a can shaker thing that attaches to an electric drill so that you can easily give the rattle cans a good shake without knackering your elbows and wrists. Well worth the £12 or so.

can.webp


I love adding a hardtop as you can't really go wrong with them if you take your time placing it in position and clamping it before removing the adhesive backing, and you instantly get a new perfect playing surface. I am not that good at delayed gratification..

IMG_9200.webp

Add some new bumpers and droptargets and you get this....

IMG_9398.webp
 
I've got to say, of the small number of machines I have fixed up, this was the biggest pain in the &^%* to get fully functional. Once I had put it all back together, switched it on and started a game the right flippers immediately locked on (turns out it was just the flipper switch being pushed closed by the lockbar) and the upper right flipper wouldn't hold in the up position (this one toook me ages to figure out - I thought it was a broken hold circuit in the coil, but in the end it was just a switch on the eos stack that looked closed but actually wasn't). Also the drop targets on the right wouldn't drop consistently - that was the rubber behind it being too fat. Switched to a smaller thinner rubber and they worked properly. And half the GI didn't work and kept blowing a fuse, which I eventually tracked down to one bulb holder shorting. And a metal lift bar on the back glass which was well and truly stuck on. Eventually I shoved a thin screwdriver between the glass and the lift trim, heated the trim with a heat gun to loosen the glue, and wumped it with a rubber mallet till it came off without somehow shattering the backglass, and replaced it with a shiney new one.

And a few other things I can't recall right now...

But

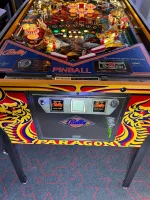
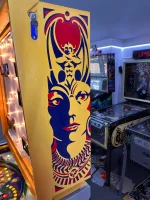
eventually it was all fixed up, with a new speaker and Bally sticker from @new forest pinball, and now it looks the dogs ********:

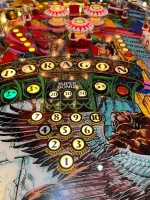
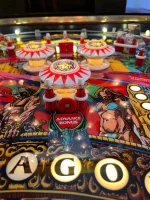
IMG_0276.webpIMG_0253.webpIMG_0262.webpIMG_0263.webpIMG_0268.webpIMG_0264.webp

IMG_0282.webp

Come round and play it...
 
Last edited:
Looks fantastic, great to see its gone to a great home. It was sold cheap to me by someone on the scene from Milton Keynes way back in 2009 along with a Vector but it was an absolute wreck. The Vector got moved on quick but I enjoyed this once I got it to run with a spare replacement board I had. I cleaned it up, touched in what I could on the pf and it was good enough for me, played it, enjoyed it then it had to be stored for ages through lack of space, until the cabin came in 2021. The original board was acid damaged way beyond repair. That was brave of you replacing that backglass lift, it took ages to find a decent original backglass, the one it came with, which I do still have was useable but rather bubbled. Was still enjoying it upto sale last year but I guess sometimes you got to move on your treasures to make money and space for future ones. 😊😊
 
I think these old pinballs sit around the British Legion smoking Woodbines and praying to be taken in by @Mfresh
 
Back
Top Bottom