hey thar pinfolk
usually i buy and sell games so fast that my garage has a revolving door fitted. i learned this trick from TV's Will Barber and would recommend it to anyone - i get to spend time with loads of different games, and usually sell them for the same as i paid so all they cost me was the £85 to Martin for delivering. 35 machines purchased in just under 5 years is not hanging around, and the intention is to one day stop the buy-and-sell and just settle down with my golden dozen or whatever.
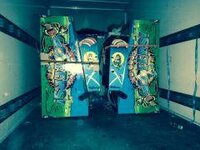
every so often i get a game that i intend not to sell, as i've been waiting and looking for a long time - this time it was No Good Gofers. so i did a few gentle upgrades to improve it: here it is on the van when Martin brought it. it has a twin!
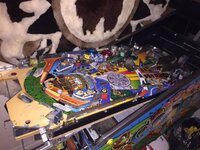
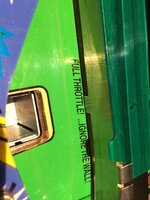
first i did the obvious - i took off the 'driving range' and the two main ramps, cleaned them, cleaned all the areas of the playfield i could now see better, and changed all the rubbers. there's a message for @Heighway Pinball in there!
i thought the game was a bit noisy, so i installed thin felt strips under all three of the moving ramps (slam ramp and the two metal flaps that sit over where the gofers pop up) to stop some of the clanking. replaced a few of the bulbs for more powerful spotlights (LEDs even. ugh!) where the gofers are lit up.
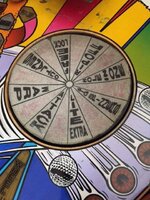
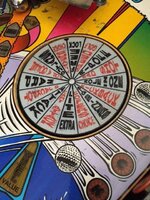
then i replaced the decal on the 'wheel' that determines what you get whenever you complete a hole. yes, i made the rookie error of not noting exactly where it went, so i had to put it in test and then play mode with the decal on blu-tac, so that i didn't put it down wrong (if you think you managed to manoeuvre - *great* word, btw - the 'light EB' award only to find i put it down all skew-whiff and instead you got the crappy 'big spinners' or 'bad shot', you'd be miffed). before and after pics below:
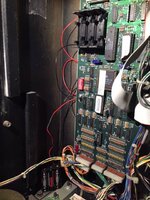
then i put one of those cool things in the hole where the balls are delivered to the shooter lane, so they don't drop out when you lift the playfield. Andy at pinball mania sells these for about £6 i think, and i put them in lots of games as i love them. put a remote battery holder in (about £3), soldered to the back of the board - though i've seen some nice looking models now that just slot in with some dowel. and i was getting the occasional ball hangup in the trough (divots i expect) so after using washers as shims to increase the incline, i found out about, and installed a trough sleeve (about £6) that just fixed it up immediately and took 15 seconds to put in.
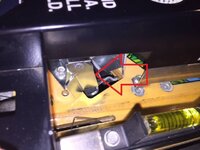
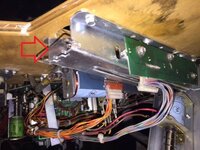
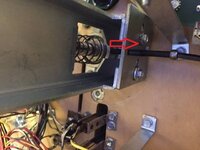
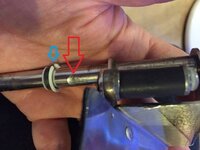
next i got frustrated trying to work out why the ****ing slam ramp kept jamming in the halfway up position. i found a couple of culprits - firstly the movable metal piece (that determines the angle of the slam ramp) had a huge washer on the top bolt (arrowed) that was catching on the long bolt (below the arrow) that's supposed to have free movement up and down that slot. a waffer thin washer fixed that. then i noticed a horrible notch (red arrow) that had developed in the vertical post supporting the slam ramp - presumably from ball hits - that was catching in the nylon ring (blue arrow) that sits where this post goes through the playfield. i sandpapered it down (as i have no dremel) and that fixed *that*.
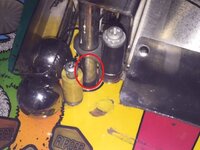
next i decided to repair that horrible looking mess in the playfield under the slam ramp, so i sent off to those nice people at Treasure Cove for the repair decals - http://www.treasurecovepinball.com/Library/decals/no-good-gofers/no-good-gofers.htm - and at the same time i got a backboard decal just because the postage was quite expensive and i could add this in without changing that. pretty rubbish logic, i know. unfortunately they accidentally sent me the backbox one and another wheel one by mistake, but were very nice and sent the proper one along when i told them. in the meantime i fitted the backbox one: i needed to take all the ramps off so it took a good couple of hours and you can hardly notice it, so i'd say to anyone thinking about it not to bother tbh:
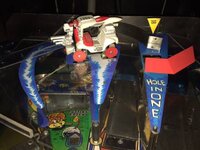
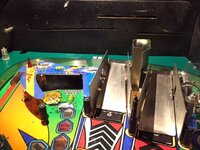
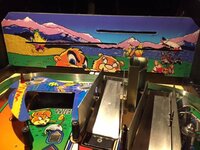
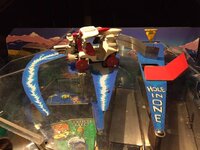
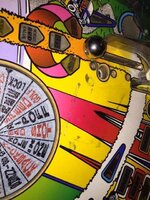
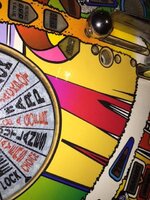
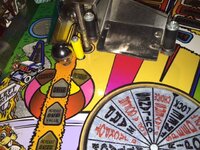
and finally this evening i fitted the slam ramp decal, first sanding away at that nasty notch then using some Mr Muscle window and glass as a lubricant for the 'wet method'. then i put it all back together again.
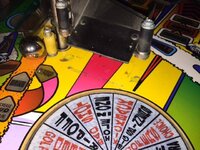
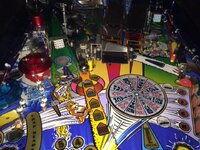
and that's where i've got to now. i've spotted a manky skirt on that red pop bumper so i may delve in there next and sort out all three of them while i'm at it. the slingshot switches need adjusting / replacing i think, to make them keener. but that's probably it. oh, and i will most likely change all the post sleeves to bright blue.
just thought i'd share some basic tasks that i can manage. not up there with those of you doing stuff with software and oscilloscopes and clever diagnostics, but all quite manageable, and even, dare i say it, enjoyable.
usually i buy and sell games so fast that my garage has a revolving door fitted. i learned this trick from TV's Will Barber and would recommend it to anyone - i get to spend time with loads of different games, and usually sell them for the same as i paid so all they cost me was the £85 to Martin for delivering. 35 machines purchased in just under 5 years is not hanging around, and the intention is to one day stop the buy-and-sell and just settle down with my golden dozen or whatever.
every so often i get a game that i intend not to sell, as i've been waiting and looking for a long time - this time it was No Good Gofers. so i did a few gentle upgrades to improve it: here it is on the van when Martin brought it. it has a twin!

first i did the obvious - i took off the 'driving range' and the two main ramps, cleaned them, cleaned all the areas of the playfield i could now see better, and changed all the rubbers. there's a message for @Heighway Pinball in there!


i thought the game was a bit noisy, so i installed thin felt strips under all three of the moving ramps (slam ramp and the two metal flaps that sit over where the gofers pop up) to stop some of the clanking. replaced a few of the bulbs for more powerful spotlights (LEDs even. ugh!) where the gofers are lit up.
then i replaced the decal on the 'wheel' that determines what you get whenever you complete a hole. yes, i made the rookie error of not noting exactly where it went, so i had to put it in test and then play mode with the decal on blu-tac, so that i didn't put it down wrong (if you think you managed to manoeuvre - *great* word, btw - the 'light EB' award only to find i put it down all skew-whiff and instead you got the crappy 'big spinners' or 'bad shot', you'd be miffed). before and after pics below:


then i put one of those cool things in the hole where the balls are delivered to the shooter lane, so they don't drop out when you lift the playfield. Andy at pinball mania sells these for about £6 i think, and i put them in lots of games as i love them. put a remote battery holder in (about £3), soldered to the back of the board - though i've seen some nice looking models now that just slot in with some dowel. and i was getting the occasional ball hangup in the trough (divots i expect) so after using washers as shims to increase the incline, i found out about, and installed a trough sleeve (about £6) that just fixed it up immediately and took 15 seconds to put in.


next i got frustrated trying to work out why the ****ing slam ramp kept jamming in the halfway up position. i found a couple of culprits - firstly the movable metal piece (that determines the angle of the slam ramp) had a huge washer on the top bolt (arrowed) that was catching on the long bolt (below the arrow) that's supposed to have free movement up and down that slot. a waffer thin washer fixed that. then i noticed a horrible notch (red arrow) that had developed in the vertical post supporting the slam ramp - presumably from ball hits - that was catching in the nylon ring (blue arrow) that sits where this post goes through the playfield. i sandpapered it down (as i have no dremel) and that fixed *that*.


next i decided to repair that horrible looking mess in the playfield under the slam ramp, so i sent off to those nice people at Treasure Cove for the repair decals - http://www.treasurecovepinball.com/Library/decals/no-good-gofers/no-good-gofers.htm - and at the same time i got a backboard decal just because the postage was quite expensive and i could add this in without changing that. pretty rubbish logic, i know. unfortunately they accidentally sent me the backbox one and another wheel one by mistake, but were very nice and sent the proper one along when i told them. in the meantime i fitted the backbox one: i needed to take all the ramps off so it took a good couple of hours and you can hardly notice it, so i'd say to anyone thinking about it not to bother tbh:


and finally this evening i fitted the slam ramp decal, first sanding away at that nasty notch then using some Mr Muscle window and glass as a lubricant for the 'wet method'. then i put it all back together again.


and that's where i've got to now. i've spotted a manky skirt on that red pop bumper so i may delve in there next and sort out all three of them while i'm at it. the slingshot switches need adjusting / replacing i think, to make them keener. but that's probably it. oh, and i will most likely change all the post sleeves to bright blue.
just thought i'd share some basic tasks that i can manage. not up there with those of you doing stuff with software and oscilloscopes and clever diagnostics, but all quite manageable, and even, dare i say it, enjoyable.
Last edited:
