What's new
Pinball info

Register a free account today to become a member! Once signed in, you'll be able to participate on this site by adding your own topics and posts, as well as connect with other members through your own private inbox!

Repair of Data East Checkpoint CPU board

benwillcox

Registered
5Years
Joined
May 24, 2016
Messages
58
Location
Oswestry
Hi all, I'm new to the forum, having been out of the Pinball scene for a few years.
Back in the day everyone was on the UK Pinball Yahoo Group and any proposal to move to a Forum was always strongly opposed, but time moves on and this seems to be where everyone is now - I see a few familiar names!
I run a website called Pinformer which is a user updatable database of pinball sightings throughout the UK (and actually worldwide), and have kept it ticking along over the past few years or so.

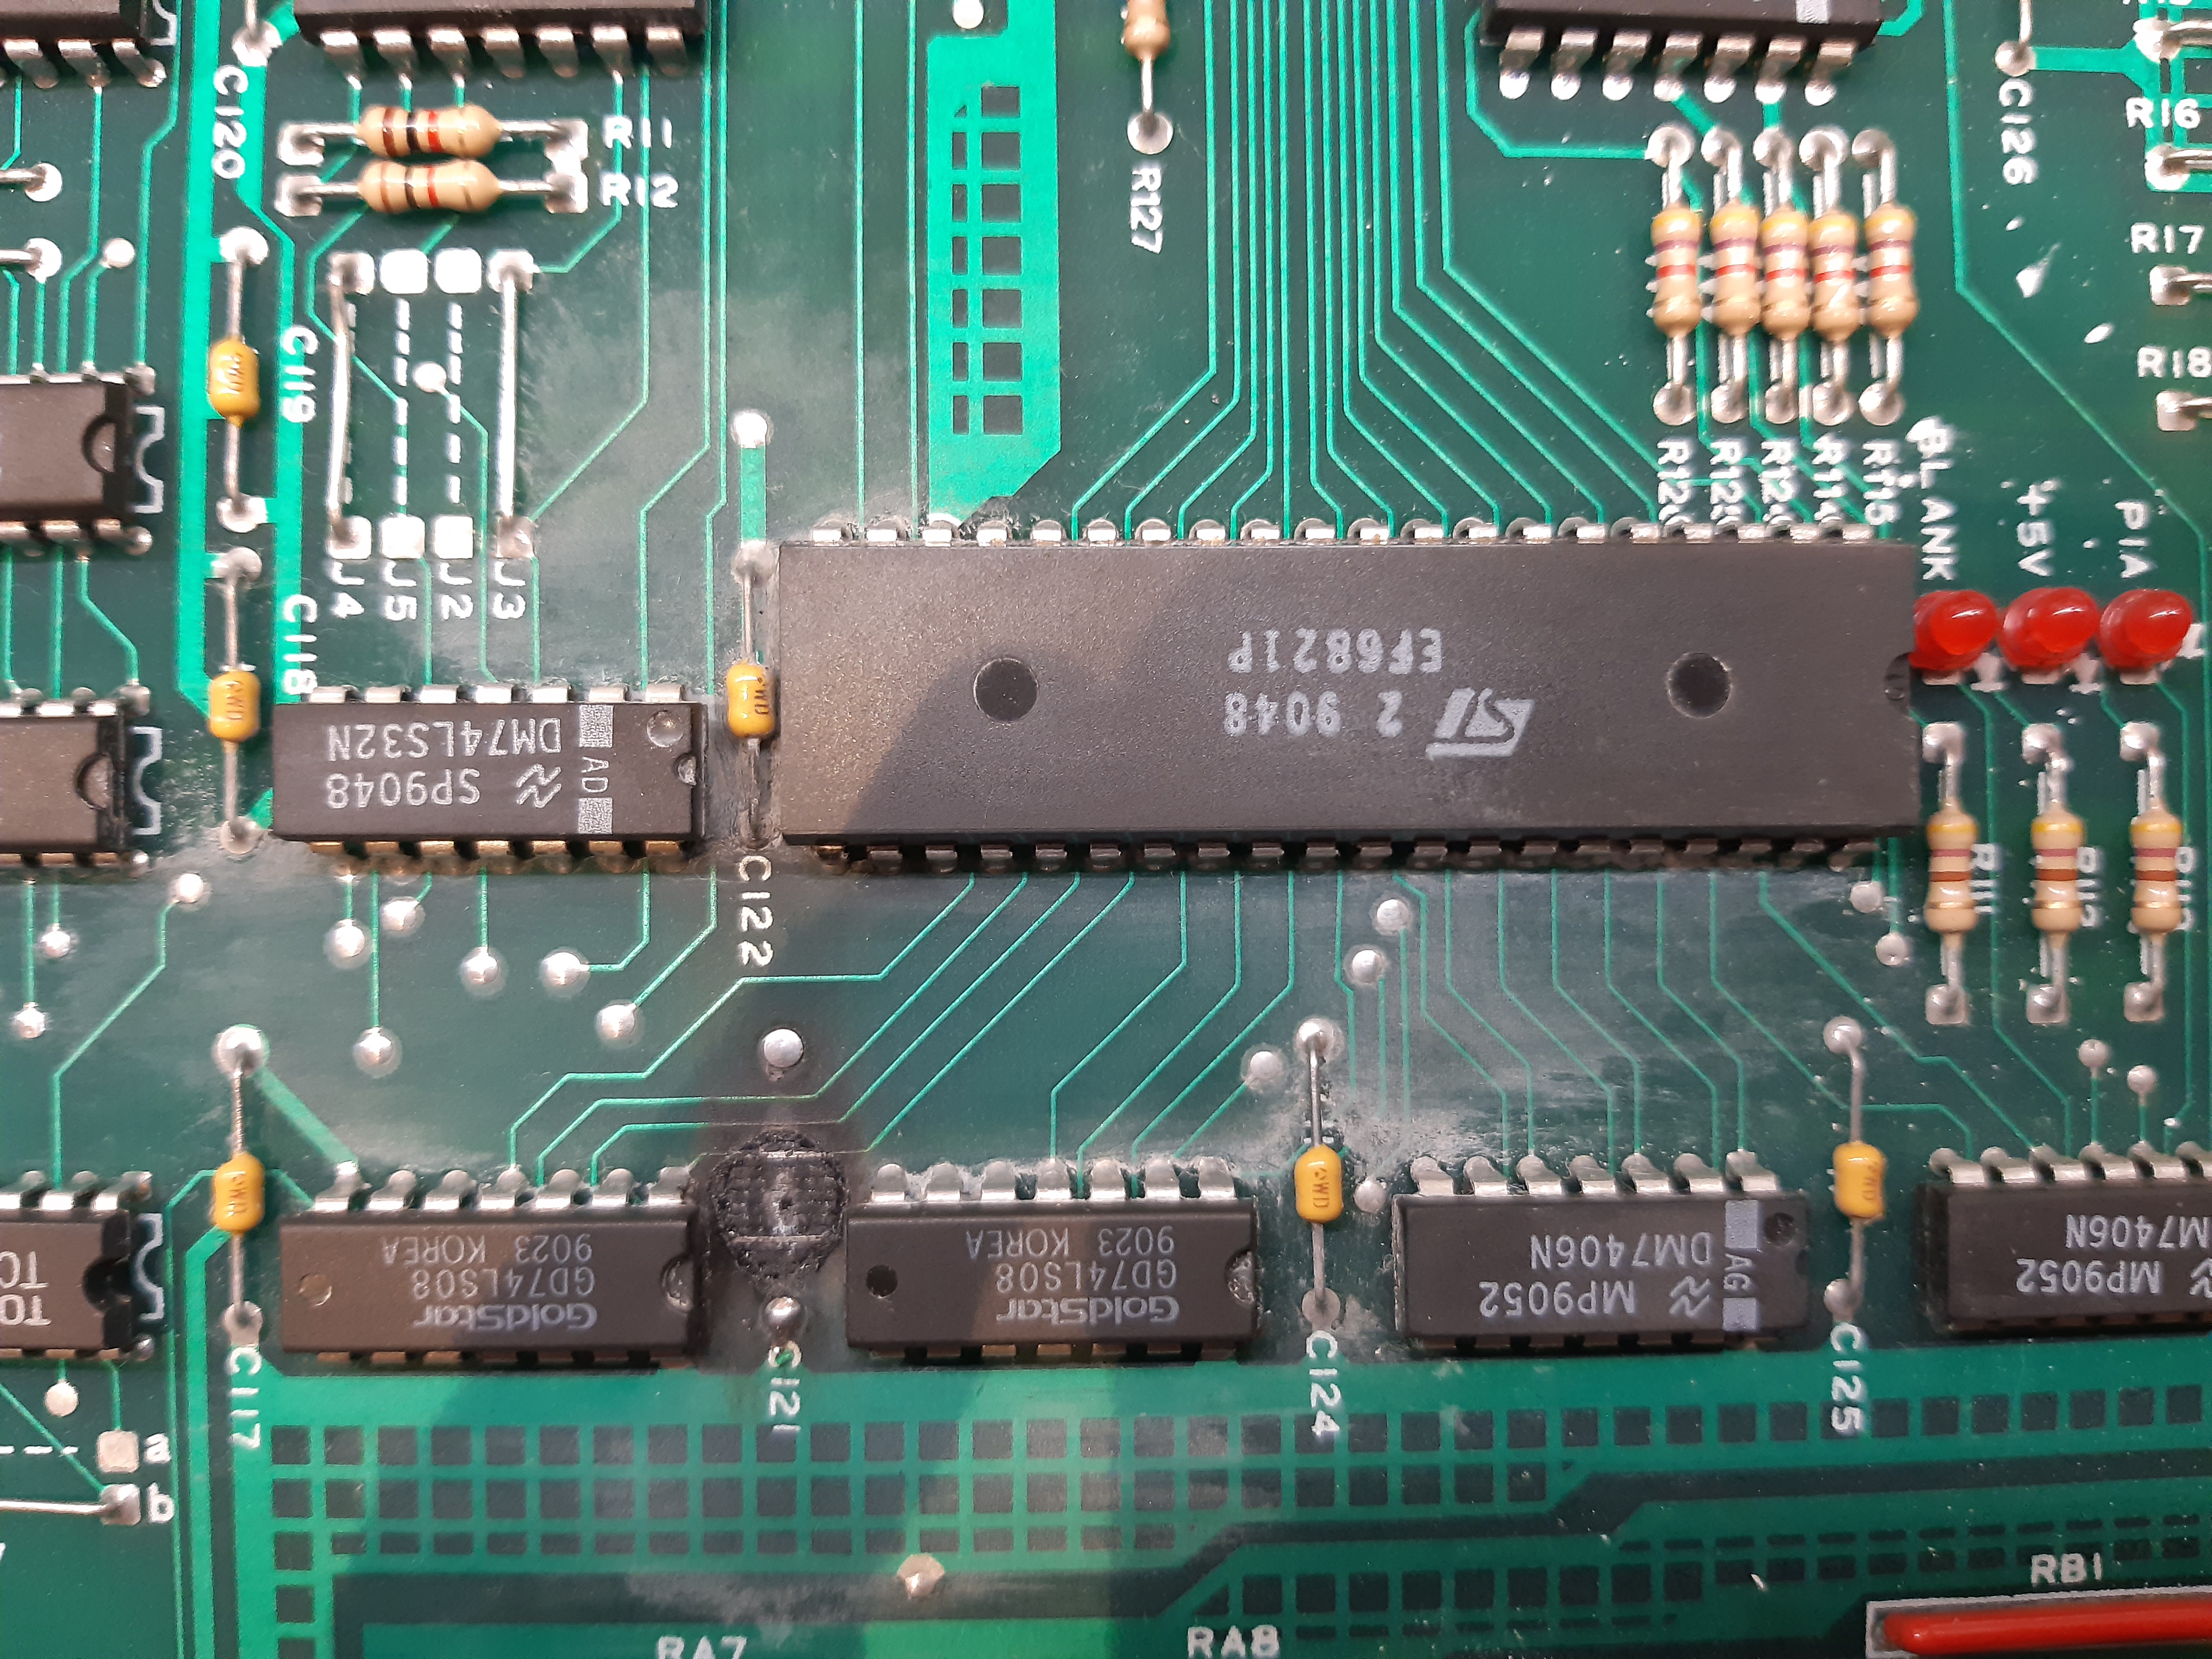
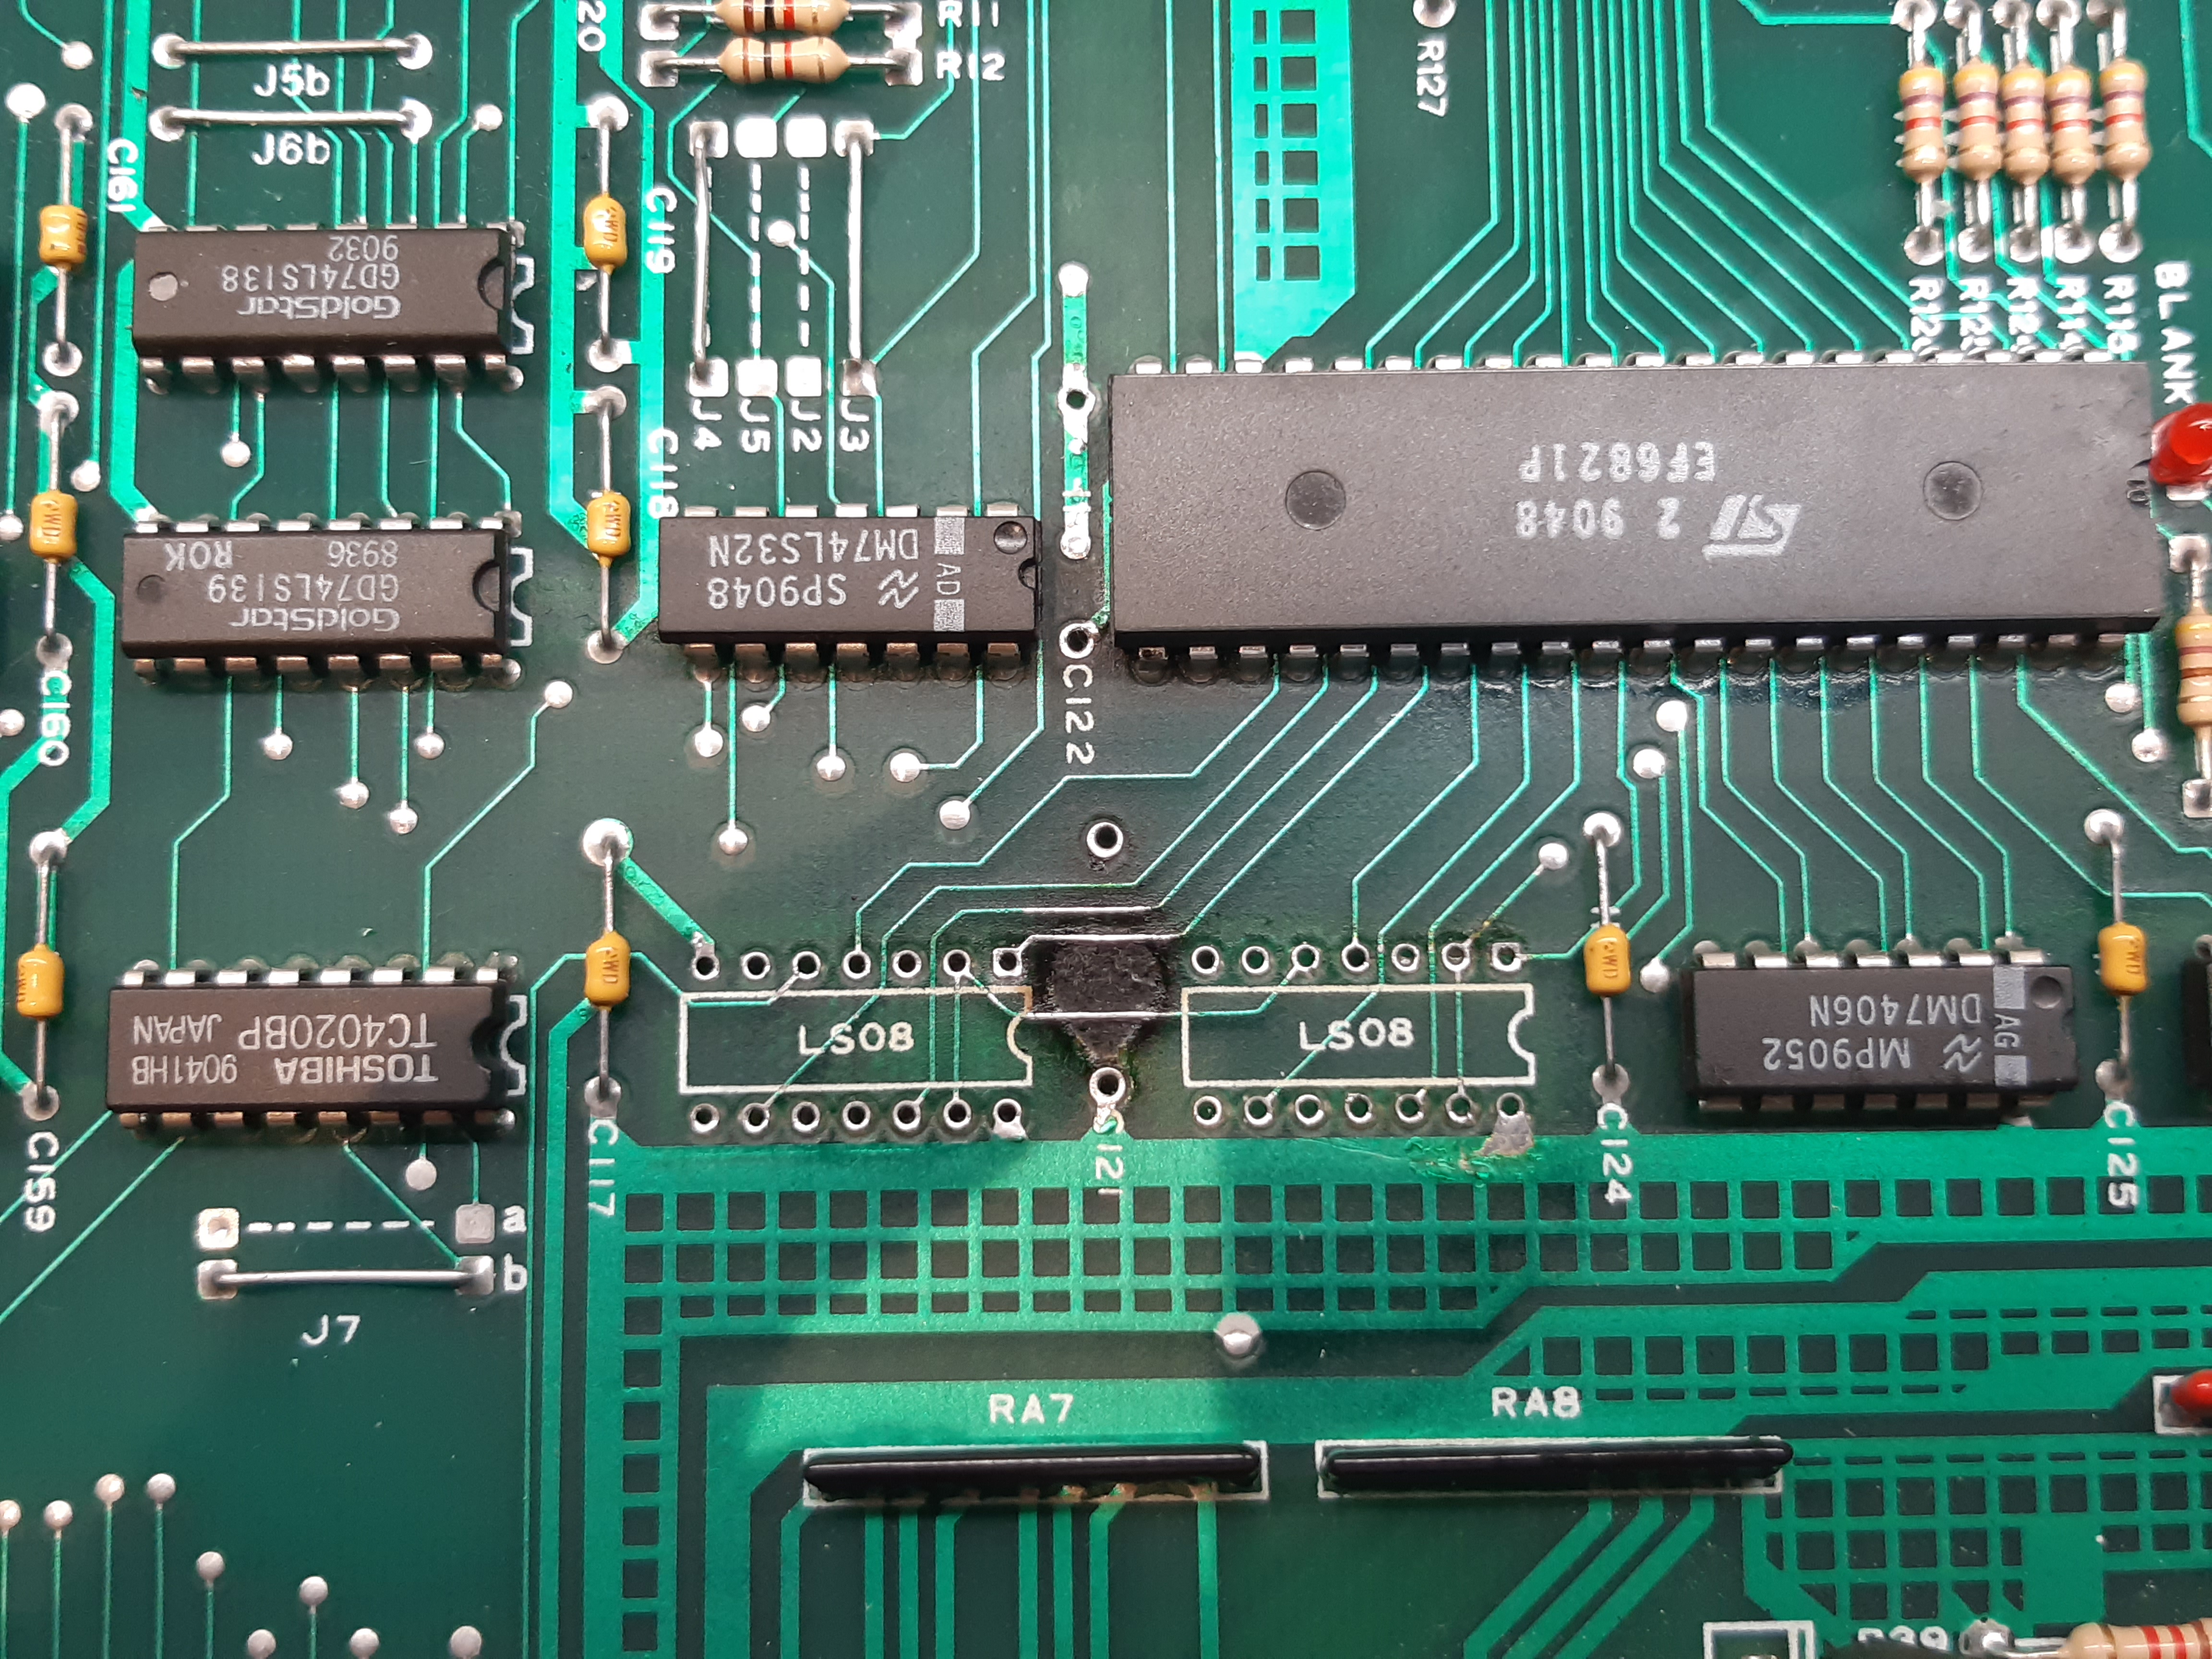
Anyway, I have a Data East Checkpoint that appears to have a fault on the CPU board, and it's about time I got this thing fixed. Does anyone have any recommendations on someone who can repair these boards, if I was to send it off? Basically it doesn't boot any more, it started being intermittent, and eventually became permanent. When I last investigated this a few years ago I found that one of the de-coupling caps on the 74 series TTL chips had burnt (which seems like a strange fault), and I removed the remains of it and cleaned up the board but it made no difference.

Any recommendations would be welcome,

Ben
 
Before sending the board off do the basic checks first.

Check you have a good 5v at the board. The most common reason for non booting cpus is that the 5v is low.

The most common reason for this is a single 100uF capacitor on the power supply board.
 
Pics of the cpu board would be good, especially of just under the battery holder (top left) of the cpu board. Data East decided to stick the main cpu processor directly under the batteries!! This along with what andy above said on the 5v check for the power supply board is where to start.

If you want me to take a look at it after these checks then no problem.
 
Thanks guys. It's quite a while since I looked at it and although I'm 99.99% sure I would have checked voltages as part of my basic checks, it's probably a good idea to check again to refresh my memory so I will do that when I can next get to the machine.
No worries on the battery leakage front, I was always very diligent about replacing these every year as paranoid about leakage, and removed them all when mothballing it so it's clean as a whistle around the battery holder area!

I'll take some pics shortly and post them here.
 
OK here we go:

Full board:

20200523_100040.jpg


Nasty bit:

20200523_100050.jpg


Close up nasty bit:

20200523_100059.jpg


Now that I look at it again I think it's obvious I need to clean up all that carbonated mess and check for continuity on those two track in the burnt area. I'm still not sure why a de-coupling cap should burn up in this way...

Thanks,
Ben

certainly a strange and odd fault. The cap must have internally shorted or failed with very low resistance. It can happen. maybe a consequence of being above the power resistors for the lamp matrix where lots of heat is generated
 
C121 vapourised, C122 lower leg looks like it might have a break (acting as an un-intended fuse). It possible that the 6821 needs replacing and possibly the 6821's that it feeds as well. I've found they are a pain to get hold of these days.
 
Right I've removed the 2 x 74LS08 to check for damage to those tracks underneath, and also the dodgy looking C122. Surprisingly the tracks are intact, C122 leg is fine but everything covered in carbon deposits as a result of the C121 burning out. The black burnt hole on the PCB was fairly conductive due to the carbon, so low resistance between the 3 visible tracks quite possibly could be the issue. I've cleaned the board up, scraped all the conductive black carbon from the burn mark, and tinned the 3 tracks. Can no longer measure any low resistance around the burn mark or between the tracks (although it doesn't look the prettiest), so I'm going to put the 74LS08 ICs back, check the supply voltages and see if this has fixed the issue next time I can get to the machine.

20200524_130636.jpg


I hope that's all it is and that I don't need to change the 6821s.
I'll report back when I get chance to test it.

Thanks for the assistance so far,
Ben


There really isnt any point just changing random parts and ics regardless of where there are unless there is a tested reason for why those parts are bad. You are just wasting your time. Like i've said a million times before, if you want to fix your own boards get a logic probe, bench test it and start at the beginning ie cpu clock and reset line, address and data lines, enable lines, address map control etc etc and clear your diary...

Those chips you removed are just lamp drive output buffers so they are on the output side of the pia which is unlikely to stop the game from booting. True the lamp matrix may be messed up but this is something for further down the line to test once the board actually boots up.
 
I don't intend to change any random parts, as I mentioned in my post I removed the 74LS08 ICs to check the tracks underneath, and as they are all cleaned up ok now I'm putting them back.
I don't particularly want to fix my own boards which is why I posted asking for recommendations as to a repair service I could send it off to, but it seemed wise to at least sort an obvious visible issue as a first step before proceeding.
Is a board repair service something you offer, as it sound like this burnt area is unlikely to be the cause of my non-booting fault so it would be great if this is something you can help with?

Cheers,
Ben

yes I fix boards. I mentioned earlier (post 4) that I’m happy to take a look at it if you want me to fix it. Pm me if so for the address to send and the costs etc. Also the above was just advice on what to do if you did decide to tackle it yourself that was all.
 
I was all set to send this off to Jim at @myPinballs, but decided to give it one last attempt before I gave up (sorry for messing you around Jim!)

I burnt Leon Borre's Data East test ROM and tried it out, it did as it was supposed to i.e. toggle all the PIA outputs, which proved that the CPU itself was running ok, and indeed all the PIA outputs that I tested were working fine. However beyond that it didn't give me any further details about my original problem but I found that there is an actual official Data East test ROM so burnt one of those and gave it a try. It indicated a RAM fault. As I was planning to remove the batteries and replace with a NVRAM anyway I ordered some 6264 NVRAM replacements which arrived today.
After fitting it, the test ROM now cycles through the full test process as it should, and on re-fitting the original game ROMs I get the correct startup sequence, i.e. +5v and PIA LED come on, then the PIA LED goes off and the Blanking LED comes on. So, although I won't get to test it in the actual machine until the weekend I think we have success!
 
Back
Top Bottom