Sounds like the pins. I've had various issues with connectors on the node boards. Re pin the wire for the one connecting the node board on the connector block. Instructions and tools are:
You will need the following toools if you don't have them:
1) these to pop the pins out of the housing or you can use a tiny screw driver
https://www.amazon.co.uk/dp/B01A15D3M0?starsLeft=1&ref_=cm_sw_r_cso_wa_apan_dp_TAJE75F7GDTPQZ35NGXN
2) Pins:
Crimp Terminal - for 0.1" Pitch Housings 538-08-52-0123
pinparts.co.uk
I would get more than you need by at least 15. You will need a couple to practice
3) a crimp tool
HT-225D Crimp Tool for Molex Crimp Pins AWG 18-22 /
24-30
pinparts.co.uk
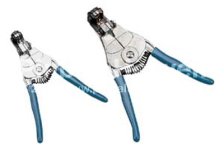
4) Wire Strippers

IDEAL STRIPMASTER LITE ; Length: 140mm; Product description: WIRE STRIPPER 16 TO 22; Stripping Capacity: 15mm; Stripping Capacity: 16AWG; Weight: 160g; Width, external: 100mm
 www.pinball.co.uk
5) Wire cutters
6) some spare wire to practice (if you need) I didnt
You need to do the following:
1) Take pictures of the housing and pins, plugged into the node board (so you know which pin goes where)
2) remove the pin causing the problem. To do this disconect the connector from the board. gently push the spiky tool or a small screwdriver in the hole slightly above the block furthest away from the wire. its metal and long for each pin. gently pull the wire at the same time. the pin will pop out.
3) Using the wire cutters cut the metal pin off. Just above the metal crimp bit, it will only cut around 1/2 centemeter of wire if that!
4) Take a pin and practive crimping it in the hole furthest away from the handle, the top one. Its a short very quick action. Once you got the hang of it..
5) measure the wire with the crimp so you cut the right amount. put the uncut wire in the crimp housing, should be just enough to cover the metal bit that u shapped.
6) using the wire stripper, placce the wire in the smallest hole, cut teh wire to the correct length the wire based upon the length measured
7) place the pin in the crimping tool, whilst the pin in the tool, put the wire in and then press the handle to crmip, fast hard and quick. Pin should be now on the wire.
8) push the pin back into the housing, will here it click. ready to go, plug the conector back in.

