What's new
Pinball info

Register a free account today to become a member! Once signed in, you'll be able to participate on this site by adding your own topics and posts, as well as connect with other members through your own private inbox!

Complete Funhouse

Spandangler

Site Supporter
10 Years
Joined
Jul 21, 2011
Messages
6,647
Location
Suffolk
Hey peeps

Not a proper one AT ALL. More like a wipe round with a rag but thought I'd document a couple of things as I go incase it helps anyone out with similar issues.

Picked this up on Tuesday night. Seller says its 100% working. As it's about an hour and half away I ask pertinent questions so as not to waste a journey. Sounds good so off I trot.

On arrival I'm quietly impressed with the general condition. I mean, this was a routed FH. I'm not expecting huge things. Cab looks good
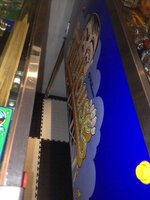
image.jpg

Other side is faded but there's not a knock or mark on it, even the head is nice.

New legs, coindoor, full plastics set and ramps. Nice
:thumbs:

So without further ado I turn it on!!!! :confused:

Then we have a cup of tea whilst we wait for the error reports to stop scrolling :mad:

No sh1t there were about 15!

Pretty much every switch. Rudis eyes won't open or close, his mouth won't open, flippers are so weak they don't hit the ball past the superdog targets!!!

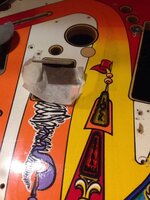
Every single clock and bonus insert is raised a good 1-2mm off the pf. It's more like an Orbitor 1!!

100% you say!!??. You sure?

"Well I don't know about mechanicals"!!

"Oh right, it's just that you didn't mention that on the phone" (putting it politely)

So I knock him down a bit and sling it in the car. I really did want to walk but I soooo want a FH, I just couldn't, plus it's easier to fix a switch than redecal a cab and swap a pf.

So I get straight to work when I get it home. I manage to clear 99% of the switch faults by adjusting them all. Reeeesult

Then I look at the optos by Rudis mouth. I see the receiver has some weird tiny little led in it.
Because I'm too impatient to wait to order a new one, I rob one off a spare opto board I've got knocking around. Fixed.:clap:.

Then it's on to Rudis head. His eyes won't open or shut.
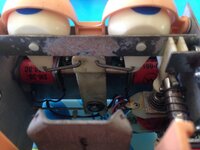
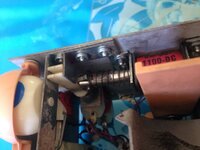
On stripping it down I find two wires off coils all taped up and a snapped plunger for the eyes shut.

Once again I'm to impatient to order one so I araldite it and its strong as an ox.
I re attach the wires to the coils and turn it on!! As expected, smoke bellows from Rudis ears, quite literally! Sh1t, better turn that off.

So after a quick consultation with pinball infos very own @chris b we agree that Q22 must be fooked.

So I whip the board out and replace the transistor. Put it all back together and hey presto :D. Rudis fully functioning.

image.jpg

image.jpg

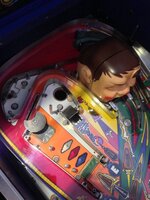
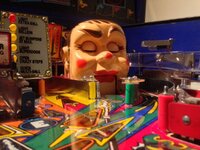
The plunger just below the right eye is the one I glued.

So moving on to Rudis jaw. Plug wasn't even connected to the board. Plugged it in and guess what..... He speaks, the gob ****e.

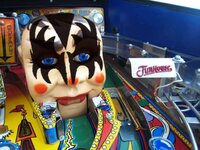
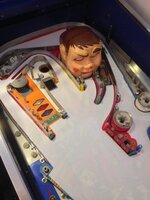
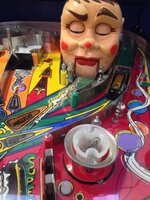
As he was looking a bit tired I stuck some more lippy on him. He looks smart now
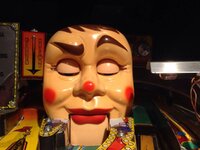
image.jpg

So far so good. We're now error free.:clap:

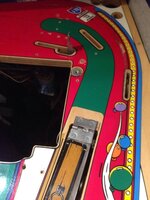
So now on to the inserts. Time to bust out the old trusty 12" deep throat G clamp!!! :oops:

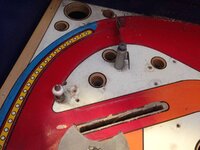
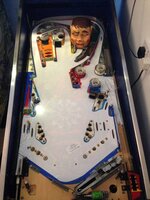
I strip the lower part of the pf to make access easier. As you can see the pf needs a good clean it's pretty minging.
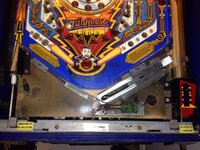
image.jpg

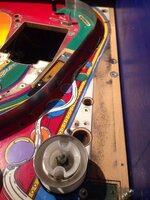
Heat the inserts from below and tighten her up.
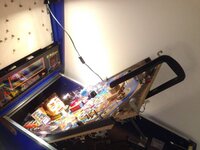
image.jpg

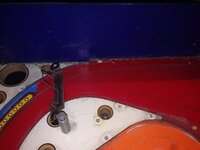
Here you can hopefully see the lip on the inserts
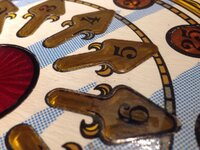
image.jpg

And that my friends, is where I'm at.

Jobs to do. Rebuild flippers.
Run a rag over it.
Play the hell out of it.

FH has been on my list since day one week one. It's gonna sit next to Taxi and will probably never leave (I never say never) maybe one day I'll treat it to new decals and pf but not for the foreseeable. 2 kids killed that one :(.

Cheers peeps and thanks for reading :wave:
 
Last edited:
Great read as always Gaz.

I love that funky clamp - so is that the usual method with moved inserts then, and do they usually go up rather than down? And do you then glue the inserts in place (presumably underneath)? I'm also confused as to the appearance of that clamp on the underside, presumably you had to strip it back to wood there as well and it's a mirror image, but I never saw one in use before.

What paint did you use for the lippy, and did it also need sealing? I often wonder and colour touchup on bash toys but haven't tried yet. I presume Hobbycraft have tiny pots of paint in many colours for mixing - acrylics? Lacquer seal?

Finally the smoking ears: shame there was no video camera on hand but I presume you predicted this because the snapped plunger indicated a locked on coil (and that this is what you got this time) - so does the smoke come from the coil itself or charred wood or what?

Nice result dude, I'm gonna put FH on my want list as well, it's one of the few alphanumeric (or is it numeric only) titles I'd welcome home to my stable.

That Rudi is one ugly flicker
 
Only trouble I found with the deep throated clamps is due to their deep throat it makes them weak. So careful not to over tighten them they snap like I found out
 
Cheers Dan

Well worthy of your stable mate. It's a true classic.

Tackling inserts can be done a couple of ways.
If you were doing it properly, you'd heat them up and fully pop them out. Remove the old glue. Give them a wet and dry and re glue nice and level or maybe even replace the inserts. FH ones are available.

You can heat them up and put a bit wood over the insert them whack it with a hammer.
This is more favourable with the pf removed and stripped as it causes some serious vibration and doing it in the machine always makes me cringe.

Or my method which is heat them up and clamp them down.
Because I'm impatient, I don't reglue them but you probably really should
I put a piece of wood underneath as well, although the clamp is well used and twisted well out of shape so the top and bottom don't line up anyway.
Finding a 12" deep throat G clamp in the UK is seemingly impossible so this came from the states. If anyone knows of any UK suppliers, let me know.

I used humbrol enamel model paints which I mixed with other colours to try and match the top lip but it's no where near bang on.

Once again if you were doing it properly (there's a them occurring here) you'd probably use a different paint, then seal it with some clear.

Like I say, this isn't a full on shop, this is a quick wipe round with a rag so I can play the thing, using whatever I have in stock.

Regarding the coils, I assumed that the coil was locked in due to a blown transistor but as I didnt know at the time how to check those, I just plugged it in to confirm my fear's!! Smoke came from the coil itself. Only went for about a second so it's not even turned slightly brown.

And Rudi, yeah those clamps are cheap **** so can quite imagine it snapping very soon!!!

Cheers guys
 
Quick update.

When I started stripping the lower part of the pf to put the G clamp on I realised how filthy the pf was. It was only clean where the rag could reach.
So I opted to strip the thing down and give it a decent clean. And as always the project snowballs and one thing turns into another.

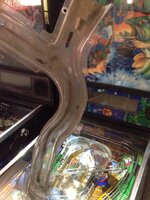
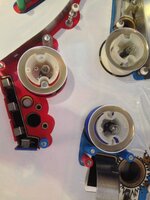
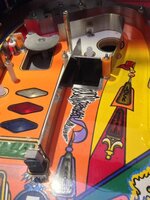
Firstly the subway was completely black.
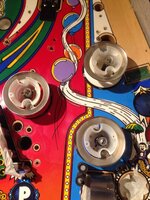
Cleaning a pf is pointless unless you clean EVERYTHING the ball comes into contact with. Obviously the subway needs to come off but so do the metal bits the ball lands in when they drop through the pf.

image.jpg

A quick flash round with the mop and I'm done

image.jpg

I then stripped the upper pf in prep for the treasure cove

Firstly i tentatively went over some of the dirtiest spots with a magic eraser and ipa. Then used novus 2 to get rid of the residue.
After that I used the 3 stage treasure cove polish.

It's looks good. Never gonna be a minter but hey, it'll do.

Some before pics

image.jpg

image.jpg

image.jpg

And after

image.jpg

image.jpg
image.jpg

image.jpg

image.jpg

image.jpg

image.jpg

image.jpg

image.jpg

image.jpg

image.jpg

image.jpg

Gonna ask my mum if I can have my crayons down and attempt some pf touch up.
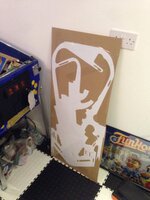
Then I'll install this.

image.jpg

After that I've got new flipper cabinet switches to install and full flipper rebuild kits for all 3 flippers. Then a remote battery holder and I think we're done.

Until next time.....
 
:clap::clap::clap:We're on the home straight now. Since the last update I've installed the flipper rebuild kits and cab switches. Fitted new back box hinges (what a bitch that was!! The bolts were totally seized) Installed a remote battery holder, put LEDs in the tricky to reach spots and installed the pf protector. All that remains is to finish assembly. Can't wait to play it

image.jpg

image.jpg


image.jpg

image.jpg


image.jpg


image.jpg


image.jpg


image.jpg


image.jpg


image.jpg


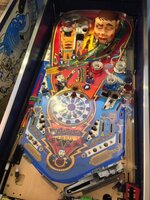
I'm really impressed with the pf protector and how easy it was to install. It fits like a glove with no jiggery pokery required. As the pf was already stripped it literally took 5 mins to do. It really adds a nice deep shine to the pf. I'm yet to play it yet but having red Martins write up in pinball news, I'm confident it will play fast and smooth.

Next pics should just be the finished product. Yesss
 
Looks very purty.
I have one game with a playfield protector on it, at first I didn't like it as a lot of playfield switches didn't register due to the extra mm, rollovers and poppers basically. But a bit of switch tweaking soon fixed that. Looks shiny, plays fast.

So when is the party at Chez Gaz to play this then?
 
I reckon in a couple of weeks Dan, the Death Star should be operational with 5 playable machines. Still need to fix the taxi pops. But thanks to your good self, I have the parts. You and Geoff will have to straddle your motorcycles and come over
 
Impressive Gaz, that protector has made a massive difference. I suppose it all comes down to how it plays, but it sure looks the nuts.
Great work buddy.
 
Good work Gaz! Looks swell.

My 'shopping' mojo has been MIA for too long. I see this and am inspired B-)

Cheers Ive. I know what you mean about missing the mojo. I really couldn't be bothered to do this, hence my initial post of wiping it round with a rag!! But all you gotta do is turn 1 screw and you're off. Next thing 2 hours have flown by and you don't wanna stop!!
 
Cheers Ive. I know what you mean about missing the mojo. I really couldn't be bothered to do this, hence my initial post of wiping it round with a rag!! But all you gotta do is turn 1 screw and you're off. Next thing 2 hours have flown by and you don't wanna stop!!
Yeah my Whirly has been with me about 6 weeks, done little to it.... there was a time that would have been in a hundred pieces within a day or 2 :-D Maybe after the summer I'll get back in the groove
 
Last edited by a moderator:
Finished :clap:

A few teething problems.
Firstly due to the pf protector, the apron wouldn't fit back on as I couldn't get those little lips under the catches. So I had to stick a couple of washers under them to raise it a couple of mil allow the apron to fit.

As per my other post, the left flipper only fired both flippers on the second switch contact. Turns out it was wired up wrong. Re wired and works a treat. I reckon the operator did this on purpose to short the switch as the contacts were literally like charcoal. It would have kept the machine running on site.

After a couple of games Rudi stopped working, with the exception of his mouth. So I had to extract him again. Turns out the wires were off a coil again and my aroldite bodge had snapped.:(

Luckily I ordered a new plunger for the eye lids from best of pinball when I got the pf protector so I was able to fit that. I also changed the coil as I hadn't noticed before, that when it had locked on previously, it had melted the sleeve ever so slightly which was making the plunger stick a bit, causing resistance, it was this which had caused the plunger to snap, which in turn caused the coil to flap about and break the wires!!
With those new parts fitted it works so smoothly now.

Next fault??!! I loose a few solenoids. The fuse (F105) has blown. Turns out that when I cleaned the coil plunger and link for the ball trough (the one which fires the ball back to the trough when you drain) I put it back in the wrong way up, causing the lugs to short on the apron. A quick turn around, new fuse and it's all good.

So a few little dramas but we got there. Been a nice little learning curve on a few things for me. Pleased it's finished. But I will miss the project a bit.
I think it looks fantastic compared to how it was. Couldn't be more pleased

Oh and that pf protector is awesome. It plays sooooo smooth and quiet. It's strange. There's no ball rolling sound. Just silent and smooth. Kind of like the electric TT!!!

Because it's so quiet you'd imagine the ball to be slow as if rolling on a soft surface would be like rolling through treacle, but it isn't. It's super quick.
Anyone thinking of buying one, do it. You won't be disappointed. Especially for these older games pre diamond plate. It'll be preserved for ever.

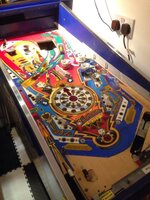
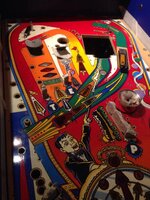
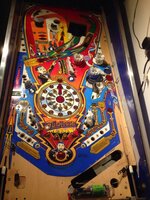
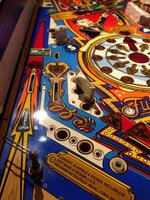
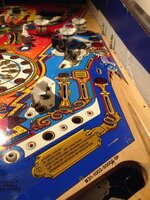
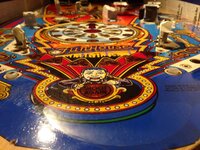
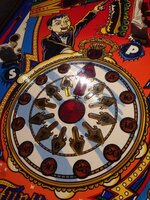
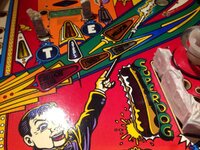
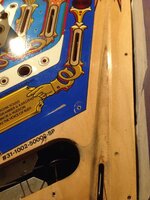
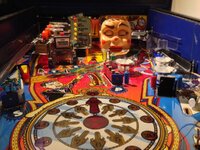
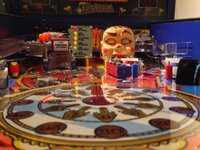
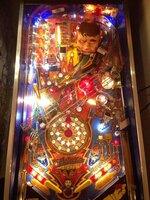
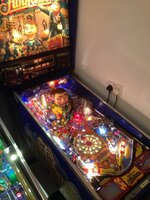
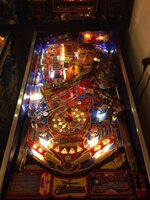
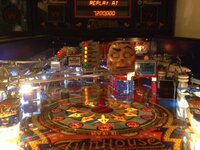
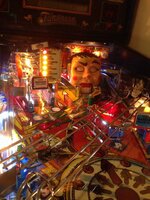
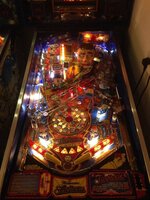
Here are a couple of pics of the finished article. Once again, sorry for pic quality, I'm using my phone still:oops:


image.jpg


image.jpg


image.jpg


image.jpg


image.jpg


image.jpg


That's all folks.....
 
Back
Top Bottom