Yeah, I know this is not a MAME forum - but thought I'd post progress on this here anyway...
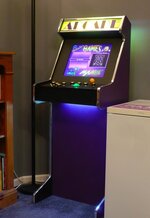
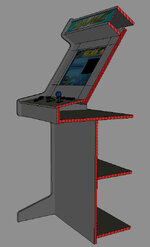
Plan is to build the cab from MDF, cover it in textured black formica and then either create myself, or have someone else create, custom graphics for the sides, control panel and marquee. The overall idea for the shape of the cab is not mine - it is heavily inspired by a cab on the BYOAC forums.
The PC running it is an old Athlon 3000+ (built around 2003ish for my brother in law, who has just replaced it with a nice shiny MAC and given me this old thing back). I had an old copy of vista, so that is being installed as the Op Sys.
The monitor is an old 24" Samsung LCD. I had to take it out of it's case to install it - which is proving to be a bit of a pain, as some of the buttons it needs to work are glued to the monitor's bezel, but I don't really want to destroy the case....
I will be using it for arcade games only - no pin simulation on this.
Not decided which MAME frontend to use yet - going to try MaLa for a bit and see how I get on with that.
A few pics of progress to date:
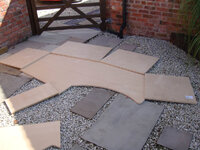
There were no plans or dimensions for the cab shape I wanted to copy, so I created a scale drawing on graph paper (haven't used that since school!) , guessing at dimensions, then scaled that up to draw the shape on a sheet of MDF. Then cut the sides of the cab to approximate shape with a jigsaw. For the back, front, top and bottom panels (i.e. the ones with straight edges) I used a circular saw. Below the rough cut pieces - this photo from around August last year.
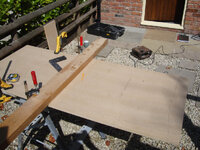
Using a big straight piece of wood as a guide, the straight edged panels were cut with a circular saw...
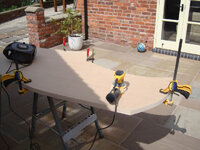
Putting the two sides on top of one another, I then used a random orbital sander to get them symmetrical - this took forever - and now I know using a straight bit in the router would have been much quicker and more accurate too...oh well..
Once all the bits were cut and sanded to size, I joined them all together using 4cm*4cm battons as a sort of frame. I've screwed all these panels together from the outside for now, but I will need to dismantle it to put the formica on. Once it's covered the screw holes will be covered too, so I will have to screw and glue from the inside.
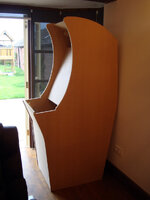
Same thing, different angle:
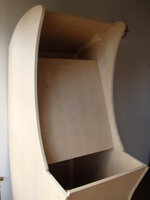
Next I had a few more panels to fit, and then had to cut the hole for the monitor. I used a plunge router to make the necessary hole, rebated it on the inside so the monitor could be correctly aligned, then built a small frame to hold it in place (you can just see this in the pic after the one below)
The monitor panel needed removing from it's case (the case was countoured, and would have been impossible to fit neatly in the cab).
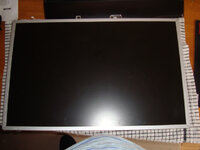
With the monitor in place, I built a shelf for the PC. Pic below shows it sat on the shelf, but I will do something more permanent next - maybe mount the motherboard, power supply, disks, etc, directly to the shelf - not decided if that is worth the effort or not, as the case it is in has a nice collection of fans and dampened trays for disk drives etc - so I may just lay the case horizontally and fix it securely to the shelf - we'll see...
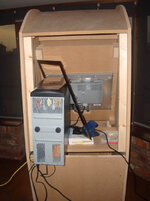
The PC I'm using is one I built around 2003 and gave away - well now it's been given back to me. It had an unlicenced XP version on it (oops!) and was whining at me that it wasnt genuine, so I installed an old licenced copy of Vista which I was no longer using. The vista performance score it gets is 3.8 - mainly due to the fact that it only has 1GB of RAM. Hopefully being a 2003 machine, I can get some second hand RAM off ebay cheaply though, and sort that problem out.
The below pic is the latest one (taken today) - a bare Visita install only so far, no MAME installed, just patching itself and sorting out antivirus etc.
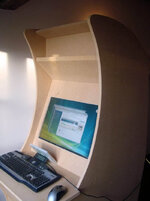
Next up, I need to sort out a few finishing touches to the cab woodwork - cutting a few angles to tidy it up. Then I need to dismantle it, and cut the groove around all the edges for the t-moulding. Then the visible panel faces will get covered in formica (for appearance, and to protect the MDF a bit). At current rate of progress, those couple of jobs will probably take a couple of months....
Plan is to build the cab from MDF, cover it in textured black formica and then either create myself, or have someone else create, custom graphics for the sides, control panel and marquee. The overall idea for the shape of the cab is not mine - it is heavily inspired by a cab on the BYOAC forums.
The PC running it is an old Athlon 3000+ (built around 2003ish for my brother in law, who has just replaced it with a nice shiny MAC and given me this old thing back). I had an old copy of vista, so that is being installed as the Op Sys.
The monitor is an old 24" Samsung LCD. I had to take it out of it's case to install it - which is proving to be a bit of a pain, as some of the buttons it needs to work are glued to the monitor's bezel, but I don't really want to destroy the case....
I will be using it for arcade games only - no pin simulation on this.
Not decided which MAME frontend to use yet - going to try MaLa for a bit and see how I get on with that.
A few pics of progress to date:
There were no plans or dimensions for the cab shape I wanted to copy, so I created a scale drawing on graph paper (haven't used that since school!) , guessing at dimensions, then scaled that up to draw the shape on a sheet of MDF. Then cut the sides of the cab to approximate shape with a jigsaw. For the back, front, top and bottom panels (i.e. the ones with straight edges) I used a circular saw. Below the rough cut pieces - this photo from around August last year.

Using a big straight piece of wood as a guide, the straight edged panels were cut with a circular saw...

Putting the two sides on top of one another, I then used a random orbital sander to get them symmetrical - this took forever - and now I know using a straight bit in the router would have been much quicker and more accurate too...oh well..

Once all the bits were cut and sanded to size, I joined them all together using 4cm*4cm battons as a sort of frame. I've screwed all these panels together from the outside for now, but I will need to dismantle it to put the formica on. Once it's covered the screw holes will be covered too, so I will have to screw and glue from the inside.

Same thing, different angle:

Next I had a few more panels to fit, and then had to cut the hole for the monitor. I used a plunge router to make the necessary hole, rebated it on the inside so the monitor could be correctly aligned, then built a small frame to hold it in place (you can just see this in the pic after the one below)
The monitor panel needed removing from it's case (the case was countoured, and would have been impossible to fit neatly in the cab).

With the monitor in place, I built a shelf for the PC. Pic below shows it sat on the shelf, but I will do something more permanent next - maybe mount the motherboard, power supply, disks, etc, directly to the shelf - not decided if that is worth the effort or not, as the case it is in has a nice collection of fans and dampened trays for disk drives etc - so I may just lay the case horizontally and fix it securely to the shelf - we'll see...

The PC I'm using is one I built around 2003 and gave away - well now it's been given back to me. It had an unlicenced XP version on it (oops!) and was whining at me that it wasnt genuine, so I installed an old licenced copy of Vista which I was no longer using. The vista performance score it gets is 3.8 - mainly due to the fact that it only has 1GB of RAM. Hopefully being a 2003 machine, I can get some second hand RAM off ebay cheaply though, and sort that problem out.
The below pic is the latest one (taken today) - a bare Visita install only so far, no MAME installed, just patching itself and sorting out antivirus etc.

Next up, I need to sort out a few finishing touches to the cab woodwork - cutting a few angles to tidy it up. Then I need to dismantle it, and cut the groove around all the edges for the t-moulding. Then the visible panel faces will get covered in formica (for appearance, and to protect the MDF a bit). At current rate of progress, those couple of jobs will probably take a couple of months....


