What's new
Pinball info

Register a free account today to become a member! Once signed in, you'll be able to participate on this site by adding your own topics and posts, as well as connect with other members through your own private inbox!

Complete Hook - The Restoration You've Been Waiting For!

PeteB

Registered
2 10 Years
Joined
Jun 28, 2014
Messages
1,455
Location
Global
I wasn't originally going to do a shop log for this, but there's been a few members on here asking to see me tear it down.

So... You asked for it, and now you're going to get it!

I've never seen a minty fresh Hook. Most of them seem to be really beaten up, I guess they did well on location? Either way what I've got here isn't the worst I've seen but it's certainly going to take a lot of work and probably cost me a fortune to put right. It's a good game in my opinion, I really like it.

As I wasn't going to document this, I did actually give the machine a quick wipe over when it arrived so the starting photos don't reflect the true level of dirt it arrived with. The game was more or less working. However, the display was flickering really bad, looking like it might be outgassed and within half an hour the power supply blew up (actual pop-bang explosion with smoke). So for the last couple of weeks I've been tinkering around with the electronics trying to figure out what needs doing.

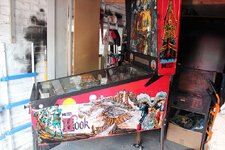
Here's what I'm starting with:
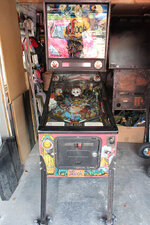
farm8.staticflickr.com_7670_17126384217_7fb0b16b3a_c.jpg

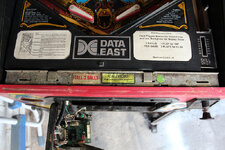
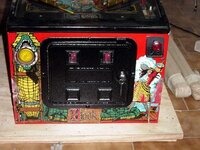
Artwork on the front is faded, will need touching up. The coin door isn't too bad however. At least, on the outside:
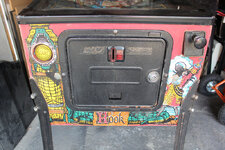
farm9.staticflickr.com_8773_16713559043_b3a4d9ea83_c.jpg

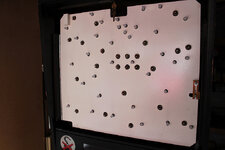
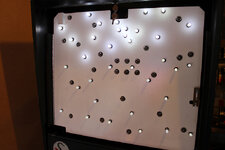
I already gave this a wipe over but as you can see this translight has a major air bubble issue. I will reveal a trick later for how to get rid of it.
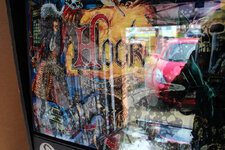
farm9.staticflickr.com_8883_17307834896_c23d3e4dde_c.jpg

The right side. Not as faded as the rest:
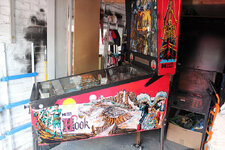
farm9.staticflickr.com_8814_17147571549_4ec9644e11_c.jpg

It's quite faded on the left. Got a lot of repainting to do here:
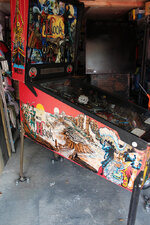
farm9.staticflickr.com_8702_17307824516_1889c6025d_c.jpg

Very typical worn artwork around the flipper buttons:
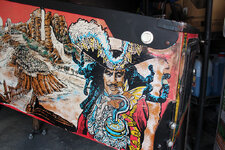
farm8.staticflickr.com_7705_16713537283_6f0800161c_c.jpg

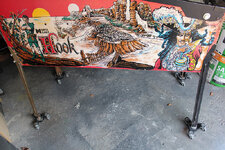
Odd legs on the back and front:

farm9.staticflickr.com_8859_17146005408_8ef585c849_c.jpg

The head isn't too bad, but the back of the main cab is a complete mess. I don't even want to look at it
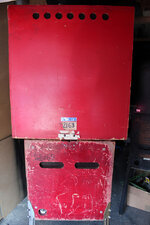
farm8.staticflickr.com_7692_17146215550_d9037d85d3_c.jpg

There is / has been some water damage on the back:
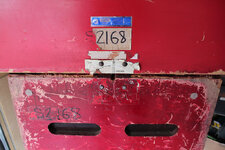
farm9.staticflickr.com_8889_17146211160_3321fd82c5_c.jpg

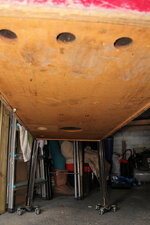
Nothing too scary on the under side:

farm8.staticflickr.com_7760_16711306314_33c994452d_c.jpg

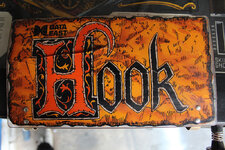
Get to da topper!! It's a wreck. Luckily these are still available for about £30:
farm9.staticflickr.com_8811_17145980238_74408e7347_c.jpg
 
Last edited:
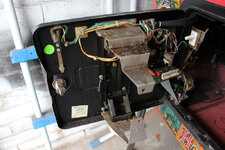
Coin door is all ugly on the inside. Dirty, no lock, and dents:

farm8.staticflickr.com_7688_17333371451_c51903c762_c.jpg

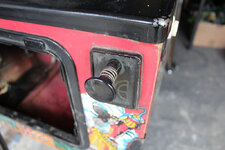
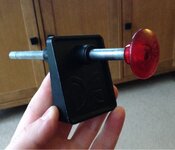
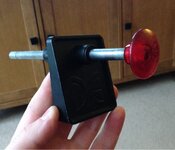
Incorrect shooter rod. Not only is it too short to plunge properly, it should also be translucent red, not black:

farm9.staticflickr.com_8770_17333764585_93f33edbe0_c.jpg

Typical tired lock bar receiver:

farm8.staticflickr.com_7767_17333760745_010b2cfb49_c.jpg

Playfield dirt:

farm9.staticflickr.com_8697_17147507629_7db7df87a4_c.jpg

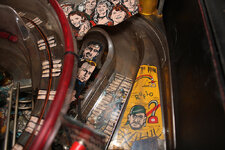
Broken plastics:

farm9.staticflickr.com_8899_17333745755_caee2d821c_c.jpg

Cracked plastics:

farm8.staticflickr.com_7688_17331849232_a0a9b38df7_c.jpg

More cracks:

farm9.staticflickr.com_8897_17333731955_b062ebe533_c.jpg
farm9.staticflickr.com_8788_17126290887_cbd6dacc8d_c.jpg

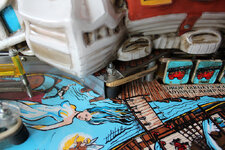
Destroyed pirate ship:

farm9.staticflickr.com_8799_16713461103_b3c25a3bc5_c.jpg

The main ramp is nice and the rope light works:

farm8.staticflickr.com_7691_16713456853_7f3c1423e0_c.jpg

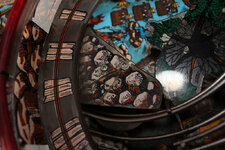
Hole wear:

farm8.staticflickr.com_7737_16713445183_a60421dc9d_c.jpg

More hole wear:

farm8.staticflickr.com_7657_16713439883_4623470dfe_c.jpg
 
Last edited:
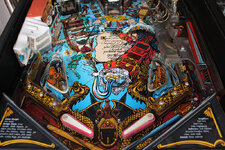
Lower playfield overview:

farm8.staticflickr.com_7788_17145907198_df1cc4d0ed_c.jpg

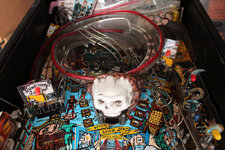
Upper playfield overview:

farm8.staticflickr.com_7724_17145901618_12420d5d4b_c.jpg

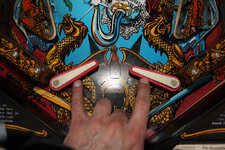
You can tell it needs full flipper rebuild when they don't travel equally, also notice the bats are completely wrong. Shown here with SEGA Sonic bats. They should be yellow with the DE emblem:

farm8.staticflickr.com_7780_16713367313_23a732307b_c.jpg

Urgh, hax:

farm8.staticflickr.com_7782_16713425533_ea6c70860b_c.jpg

Uh huh...

farm8.staticflickr.com_7698_17333686175_84197776c4_c.jpg

I don't want to look. Make it go away:

farm9.staticflickr.com_8750_17146106910_9c5042bc68_c.jpg

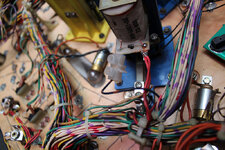
These hax are everywhere on the underside:

farm9.staticflickr.com_8888_16713401633_1a0f30f47b_c.jpg

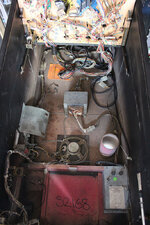
What a grotty mess:

farm9.staticflickr.com_8877_16711192094_457f64c67b_c.jpg

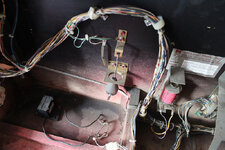
At least it has the plumb bob assembly AND the knocker:

farm8.staticflickr.com_7665_16713392633_6f85416fe3_c.jpg

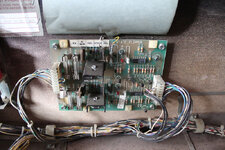
I spy hacks on the flipper board. Would you really expect anything less?

farm8.staticflickr.com_7709_17333253971_9e2708a1f1_c.jpg

Is there supposed to be a prop rod in this game?

farm9.staticflickr.com_8870_17146073880_31b08ba970_c.jpg
 
Last edited:
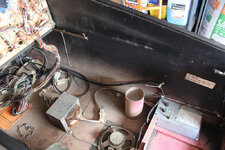
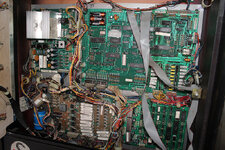
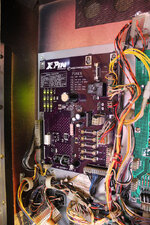
Backbox electronics:

farm9.staticflickr.com_8872_17147385469_74c47e6f4c_c.jpg

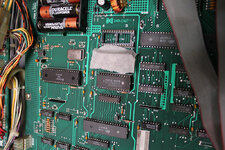
The window on the game rom was exposed. It's very important to keep them covered up as UV light from the sun and even household lights can erase or corrupt the data. Stuck some tape over it for now. Oh and HATE alkaline batteries:

farm9.staticflickr.com_8705_17307638626_2269972d2f_c.jpg

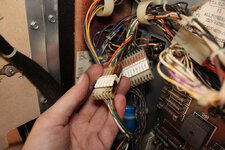
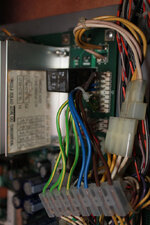
Burnt up connectors galore:

farm8.staticflickr.com_7656_17145818298_a610d2f0b5_c.jpg

Beautiful job on the GI connector. Tastefully soldered to the board too:

farm9.staticflickr.com_8785_17307851426_8ca04b35fd_c.jpg

I tried repairing the power supply by rebuilding the HV section but it was too far gone and very unstable. The board was full of hacks and liften traces. So it's been binned and new one has been bought. I hope that I don't have to a new dot matrix display too.

While waiting for the new XPin power supply to arrive. I took the light board out, repainted it, installed LED's and put new flash lamps in it. Hook seems to have a gazillion flash lamps throughout the game, it would probably cost more than the game's worth to change them all to LEDs, so on this occasion I'm sticking with incandescent for the flashers.

farm9.staticflickr.com_8832_17145821958_0e3f3db245_c.jpg
 
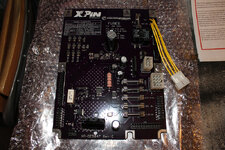
The new XPin power supply. Damn these boards look smart:

farm8.staticflickr.com_7766_17338749065_ec4df7ebfc_c.jpg

Please read blah blah blah BORRRRIINGGGG!!!

farm8.staticflickr.com_7660_16718491363_f13a2b1666_c.jpg

I like to live dangerously, so it's straight in and the game is on. I cleaned up the crappy GI circuit mess and put a new connector on:

farm8.staticflickr.com_7790_17336840992_2a31531515_c.jpg

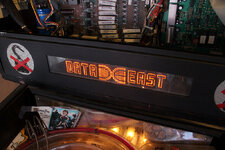
The display is working perfectly! Flicker free and bright. Pleased I don't have to buy a new one:

farm8.staticflickr.com_7671_17338738955_54e1723263_c.jpg

Half of the backbox GI is dim. No doubt caused by a burnt up connector somewhere:

farm8.staticflickr.com_7735_17338344501_e20798df0b_c.jpg

Thanks all for now!
 
No mate its the Terminator 3 I'm working on. Would love to work on a Maverick.
 
No mate its the Terminator 3 I'm working on. Would love to work on a Maverick.

Got ya. The cab looked a bit brown in the first pics so thought it could be a Maverick.
Good luck with the Hook. Looks like those hacks are going to keep you busy for a while!
 
@PeteB I really appreciate you logging this - mine has similar imperfections (to be polite) worse in places particularly the water damage around the back.
Is that a credit counter lurking - what's the reading?

Incorrect shooter rod. Not only is it too short to plunge properly, it should also be translucent red, not black:
Mine has the same. I thought it was supposed to be Red too but can't find any pictures or evidence online or the original literature of such.

While waiting for the new XPin power supply to arrive. I took the light board out, repainted it, installed LED's and put new flash lamps in it.
I learnt on here that the 4 or 5 lamps under the key lock should be #455 blinkers to make Tinkerbell twinkle - just did this to mine yesterday and it looks good.

I've just finished fixing the pop's, funny yours has blue and yellow brackets. I don't like the way everything is covered in tape but I read that's standard for DE. I can't make out in your pictures but can you confirm on the pops is the metal or fibre yoke closest to the playfield?
 
@PeteB I really appreciate you logging this - mine has similar imperfections (to be polite) worse in places particularly the water damage around the back.
Is that a credit counter lurking - what's the reading?

Too dirty to read, it also has a wire broken off. Will get back to this once I start cleaning.

@PeteB
Mine has the same. I thought it was supposed to be Red too but can't find any pictures or evidence online or the original literature of such.

Here's an image from Pinside:
img_s.pinside.com_archive_ad_original_ad827715687cd6e591813a83635ed9671ce23c53.jpg

My RoboCop also had the same red shooter.


@PeteB
I learnt on here that the 4 or 5 lamps under the key lock should be #455 blinkers to make Tinkerbell twinkle - just did this to mine yesterday and it looks good.

Yes you're right. I don't have any blinkers to hand right now so just stuck ordinary bulbs in for the time being. I wanted to get the load off the old power supply while I was trying to fix it.

@PeteB
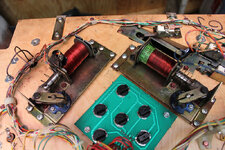
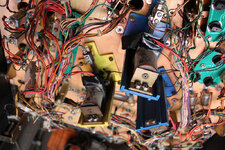
I've just finished fixing the pop's, funny yours has blue and yellow brackets. I don't like the way everything is covered in tape but I read that's standard for DE. I can't make out in your pictures but can you confirm on the pops is the metal or fibre yoke closest to the playfield?

Gonna replace all the brackets as each one is cracked. Pinball Center have the blue ones in stock but they're nearly £12 each!

The metal yoke is nearest the playfield on mine, which theoretically is correct even though the manual shows different. You want the plunger to pull down on the metal part.
 
Yes. I've tried contacting him about other parts but he doesn't reply to messages.
 
Just done my Sherlock Holmes bit and decrypted the shoddiest manual scan I've ever seen (and after downloading many Bally manuals from IPDB that's saying something!) which states on Page 30 that the Ball Shooter Assembly is part number 500-5409-02-05. Later on Page 34 is the spec for the shooter assembly including colour codes. A NOTE below the colour code tables states:

1st XX- DENOTES ROD ASSY.
2nd XX- DENOTES SPRING

The shooter should therefore have a RED button with BLUE spring.

Unfortunately the original flyer doesn't show the shooter and other images on IPDB show black, and even a silver pointy Bally plunger! A Google Image search seems to turn up more black, silver and incorrect red knobs than the correct DE red. Was it just a really bad part that ended up being replaced with whatever was to hand?

1233f2[1].jpg
 
Just done my Sherlock Holmes bit and decrypted the shoddiest manual scan I've ever seen (and after downloading many Bally manuals from IPDB that's saying something!) which states on Page 30 that the Ball Shooter Assembly is part number 500-5409-02-05. Later on Page 34 is the spec for the shooter assembly including colour codes. A NOTE below the colour code tables states:

1st XX- DENOTES ROD ASSY.
2nd XX- DENOTES SPRING

The shooter should therefore have a RED button with BLUE spring.

Unfortunately the original flyer doesn't show the shooter and other images on IPDB show black, and even a silver pointy Bally plunger! A Google Image search seems to turn up more black, silver and incorrect red knobs than the correct DE red. Was it just a really bad part that ended up being replaced with whatever was to hand?

Spot on. Also TNT Amusements have posted videos of Hooks with red shooters. I'm sure Todd even said it was original. But as for the part numbers, the manual says the red shooter is 02 and if you look here: http://www.bestofpinball.de/catalog...rds=data+east+shooter&search_in_description=1 - both of the red shooters there end in 02.

I'm sure most Data East games from that era had red shooters but they were no doubt weak. Plus, Hook would appeal to kids and families and likely prone to more abuse. I seem to remember Bally came out with the silver pointed shooters as a way to deter kids from slamming on the shooter (because it would hurt lol), so that's probably why there's a few images kicking about with those in Hook games.

As for the spring, if memory serves correct the blue spring is the softest/weakest. Would make sense with the skill shot being so close.
 
The plunger was more orange then red with the DE logo on it.

Some had the DE logo on, some didn't. I think it was the later games that had the logo. Difficult to tell because Hook is kinda in the middle. But I've never seen an orange. Always a deep red:

mirror2.ipdb.org_images_1415_1415f1.jpg

www.ipdb.org_images_2090_image_18.jpg

mirror2.ipdb.org_images_1777_1777f1.jpg

mirror2.ipdb.org_images_126_126f1.jpg
 
The connectors screwed on to lugs of coils I've seen a lot of,think it was operator standard if a coil went down change it n use connect ore instead of soldering!,made it a quick fix next time around!
 
I can see the logic behind that.

I took the tape off all the other coils. It wasn't hiding anything really. Couple of them had the wires just twisted on to the lug but the rest were soldered on, although not very neatly.
 
Is there supposed to be a prop rod in this game?
I don't think they have them on DE tables, and I don't believe that the chain at the top left of that picture is right either.

There's actually a large orange picture just near that chain and i'm pretty sure it's the same as the one in my R&B. What should be there (instead of the chain) is a couple of hooks with a large rubber piece between them. The idea being that once the playfield is lifted you can hook it onto an eyelet which is located on the back of the playfield, thus stopping it from falling forward.

I've never used it on mine and to be honest the lift mechanism on DE tables seems really precarious to me.
 
The metal yoke is nearest the playfield on mine, which theoretically is correct even though the manual shows different. You want the plunger to pull down on the metal part.
Gotcha, that's how I rebuilt mine and I'm glad it's right cos fitting the yolks and spring is a fiddly job. It also means that when the coil releases you get a nice metal to metal thwack as the bumper rises and hits the retaining bracket!

The shooter should therefore have a RED button with BLUE spring.
Red it is then. Frustrating it was just out of shot in the brochure.

I don't think they have them on DE tables, and I don't believe that the chain at the top left of that picture is right either.
No rod on mine but that same weak looking chain and the orange label but I can't find anything to attach it to. Perhaps this arrangement changed between Hook and R&B, 1 year but 3 games later.
 
The right side. Not as faded as the rest:

farm9.staticflickr.com_8814_17147571549_4ec9644e11_c.jpg

Is this a bad photo - or does the side really fade from red to pink? Also where do you get those leg rollerskate things?

www.austinchronicle.com_binary_d294_SS.Hook._leftsideonly_.jpg
So many questions.....
 
No rod on mine but that same weak looking chain and the orange label but I can't find anything to attach it to. Perhaps this arrangement changed between Hook and R&B, 1 year but 3 games later.

I've had a few DE games which do have prop rods but perhaps they were experimenting during the Hook era. If you look at the very bottom of the playfield, slightly left you should see and hoop screwed in. That's where the chain attaches. Unfortunately I don't understand how any of it works. Seems pointless.

Is this a bad photo - or does the side really fade from red to pink? Also where do you get those leg rollerskate

Combination of both. It is faded but not quite the same way it looks in that photo.

Got the rollers off Amazon, here's the exact ones I bought: http://goo.gl/DPzOy2 but if they don't have enough just search for 3 wheel dolly. I bought 12 of them! :D
 
Progress has been slow on this due to me having to take a break from restoration, but there are a few things to report:

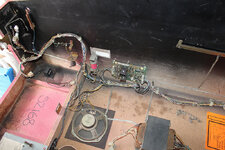
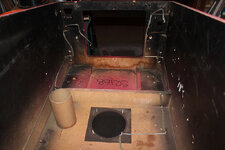
Despite a good hoovering sesh, the inside of the cabinet is still all yucky:
farm1.staticflickr.com_701_20695387658_537cb8ebd3_c.jpg

The more I strip the inside of this cabinet, the less I want to look at it:
farm1.staticflickr.com_766_20890511841_9fa2ae5f99_c.jpg

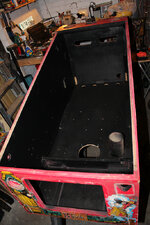
After attempting to sand and clean all of the wood inside, I wasn't getting the result I was hoping for. So I've decide to do a full paint job on the inside. This is not what I usually I like to do because it doesn't look original, but it's the only way to clean up that wood. Gonna require a few coats I think, but it's starting to look better:
farm6.staticflickr.com_5699_20883280755_100b1b5e99_c.jpg

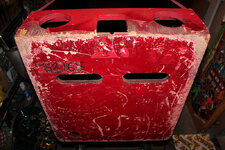
The back of the cab has a fair bit of damage. Looks like I have some serious wood filling to do:
farm6.staticflickr.com_5622_20890501821_b87a9bd9ee_c.jpg

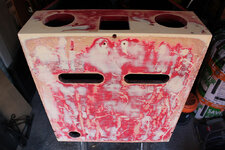
Filled and sanded. Just needs a coat of paint so we can see if there's any further touch ups to do with the filler. There always is:
farm6.staticflickr.com_5692_20369786743_84efd6ac5f_c.jpg

More to report soon!
 
Back
Top Bottom