What's new
Pinball info

Register a free account today to become a member! Once signed in, you'll be able to participate on this site by adding your own topics and posts, as well as connect with other members through your own private inbox!

Complete Aerobatics

ronsplooter

Site Supporter
10 Years
Joined
Jul 21, 2011
Messages
6,552
Location
Nottingham
Plan is to have my newly acquired Aerobatics at the NLP for you lot to have a go on so this shop log will cover getting it working and cleaned up hopefully in time for the show :) First thing to say is that I'm being given a huge amount of support with this by EM experts John Bateson (Biff) and Dave Dutton (not sure he's on here) so anything I get going with this game is most likely down to them.....nice one gents :D

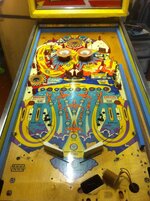
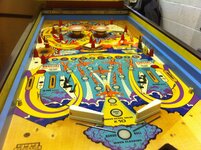
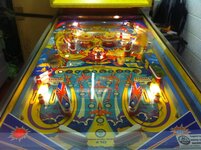
There's quite a few pics of it's original state in another thread so I won't repeat them all here but here's one of the pf before I started doing anything:
IMG_1831.jpg

When I got the pin, you couldn't play a game on it. On powering up, the score motor would spin continuously, the outhole kickers would constantly fire and the 3 drop targets would try and reset over and over. Using the schematic that I downloaded for the net I worked back through each of the various relays and switches that can cause the score motor to be energised checking for problems and adjusting things as required. This had the desired effect and I got it working so that I can now play a game :) There are still a load of smaller issues that need to be ironed out to get the game playing 100% but at least it's a working pinball machine now.

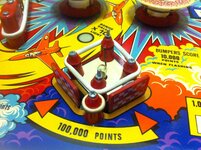
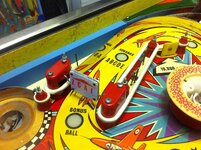
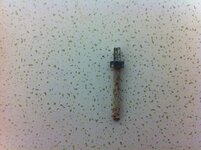
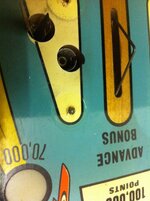
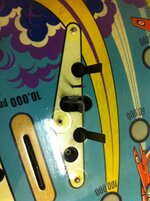
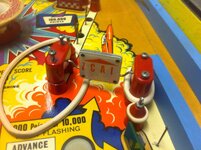
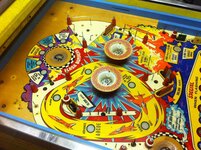
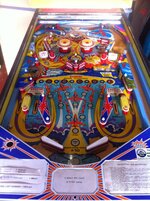
I've taken the main pf plastics off for cleaning and also started trying to remove the various posts. Here's where I've encountered my first major problem. While removing the slingshot posts, a number of them have sheared off just above the level of the pf and now I need to get the remaining bits of each screw out :mad: Anyone had this happen before and got any good ideas on the best way to deal with it? I'm also going to need some new metal posts so if anyone knows the best place to get these (they're Williams I think) then please let me know. Here are some pics with the pf plastics removed.....
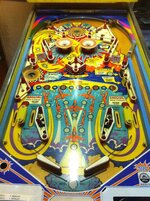
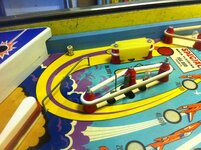
IMG_1860.jpg

IMG_1863.JPG

IMG_1870.JPG

IMG_1878.JPG
 
I posted in your other post that I have the schematics in pdf if required
David D has indeed worked on one of these as he looked at Jim Bibbys(now Tels)
 
Cheers Poi, just seen your post in the other thread about posts snapping and it's already happened to me :( Got any tips on how to fix them?
 
IIRC heating up snapped post with a soldering iron,and twisting out with a good set of vise grips/pliers
You need baby steps on a zac on a complete not snapped post.Twist a little bit,wait 15 secs or so,then rise repeat a fair few times.
If totally fooked and it wont come out you would have the drill out all the way thru then t nut other side for replacement post.You will need cobalt drills and patience when doing that
Email me if ya need pdf
 
Thanks Poi, I'll give the soldering iron trick a go. I've already got a copy of the schematic, thanks for the offer though :)
 
"the worst bit is the bottom of the head... the wood's dropping off in bits.... however you cant see it".... however it does perform the duty of holding the top bit onto the bottom bit :)

:rofl: ;)
 
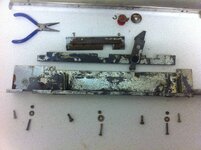
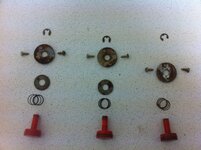
Managed to spend a bit more time on the game this evening mainly just stripping more bits off the pf and also getting some of the other metal parts ready for the tumbler. Here's a few pics......

IMG_1929.JPG

IMG_1941.jpg

IMG_1944.JPG

IMG_1968.JPG

IMG_1973.JPG
 
I also made Part 2 of the restoration video which is up on my Youtube channel. I welcome any comments on there and please subscribe if you find it interesting....I'm quite enjoying doing the vids :)

 
Good video, these are very helpful to let people know how they can do things and the way to clean them up. You also seem to have worked out what you are going to talk about so they seem quite natural and flow well with information.
One suggestion, to liven up your voice, take some helium before you speak. Always gets an audience laughing. ;)
 
Just a quick update for today. Most of the bits off the top of the pf have been cleaned and I'm just waiting for the metal to come out of the tumbler. Spent most of my time using the dremel to clean up the larger metal parts like the lock down bar assembly. I'll put up another video soon that shows some before and after on these parts :) I've also managed to get some replacement posts for the ones I sheared off into the pf by attacking my spare with a drill, I'll show what I did in the next vid.

I do have one question that I'm hoping someone might know the answer too. I need to order new rubbers and have been making a list so I can email the Legend but some of the older ones don't have normal sizes on. Instead they seem to have a code number that I'm guessing equates to a size. Does anyone know what the equivalent inches size is for the following rubber codes:
  • 240
  • 244
  • 246
  • 249
  • 257
 
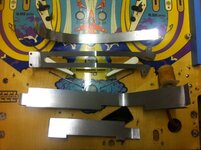
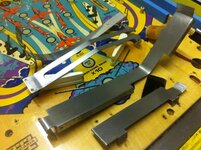
Mainly been cleaning things recently but everything is done now so the pf is up next. I know the Jackdaw's amongst us like the shiny, shiny so here's a couple of pics and the latest in the restore video series......

IMG_1979.JPG

IMG_1980.JPG

 
another great video, you certainly know your stuff mate. i wanna see how you did the dremelling on those shiny metal bits, as i've not got one and have no idea how that works. also, why on earth do you keep referring to using anusol on the playfield? the mind boggles, as does the anus.
 
i wanna see how you did the dremelling on those shiny metal bits, as i've not got one and have no idea how that works. also, why on earth do you keep referring to using anusol on the playfield? the mind boggles, as does the anus.

I've put a little bit in the next video to cover off polishing up the metal bits just for you :) And it's Autosol dude!!!!!! :D
 
Chris, Did you manage to remove the snapped off posts ?

Yes mate, ground the tops flat with the dremel and then drilled down into the middle of each one. I tried to use some screw extractors to get them out but even my smallest one was too big so just stepped up the drill bit size and went in from the top again. This got most of the metal out but for the last bit I had to drill in from under the pf (there were already small holes) and push the last bit out through the top. Tbh it was a ball ache and pretty nerve wracking when I was drilling the pf but went well in the end and once the posts are back on you'll never know :) Even better was I managed to get spare posts out of my other pf by drilling them out from underneath so I've got replacements for all of the sheared ones.
 
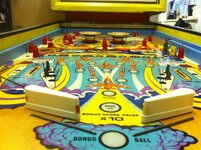
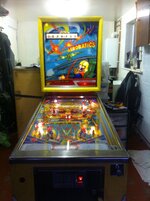
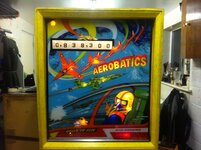
And she's done :) Everything is back together and all the issues have now been fixed. There's a couple of minor tweaks here and there but the game is ready to go to NLP. Here's the final instalment of the video series including some gameplay as well some pics.


IMG_2011.jpg

IMG_2012.JPG

IMG_2013.JPG
 
Back
Top Bottom